A step-by-step, contractor-level walkthrough of shower wall waterproofing: backer board, membrane, seams and corners, niche, valve and pipe seals, curb detai...
I grew up holding the flashlight for my dad under sinks and behind toilets, so I learned early that “sounds” in a house usually mean something. When a brand-new bathroom tile installation sounds hollow, it can be totally harmless, or it can be your early warning sign that a tile is not properly bonded and will crack, loosen, or leak later.
The tricky part is this: tile can sound hollow for more than one reason, and not all voids are a big deal. Below are the six most common causes I see on bathroom floors and shower walls, the quick checks you can do without special tools, and how to decide whether to pull and reset tile before grouting.

First, what “hollow” usually means
A hollow sound is most often a clue that there is an air pocket under the tile, meaning the thinset mortar did not fully support the tile. Sometimes that air pocket is small and near an edge and the tile is still well bonded overall. Other times it is the sound of a tile that is only stuck in a few spots and will eventually move, crack the grout, or let water migrate where it should not.
Tap tests have limits
A tap test is a good screening tool, not a final diagnosis. Some substrates can change the sound even when the bond is fine, including uncoupling membranes, certain foam backer boards, and assemblies with a bit of “give.” That is why I always pair the sound with stability checks and, if needed, pulling one sacrificial tile to confirm coverage.
The quick decision rule
- If the tile moves, clicks, rocks, or the grout joints are widening or cracking, treat it as a functional failure. Plan to remove and reset that tile.
- If the tile is solid underfoot or to the touch and the hollow sound is limited to a small area near an edge, it may be an acceptable “edge void,” especially on floors. Keep monitoring, and pay close attention in showers.
How to do a simple tap test
- Use the wood or plastic handle of a screwdriver, or a rubber mallet very gently.
- Tap the center and each corner. Mark questionable tiles with painter’s tape.
- Compare the sound to nearby tiles. You are listening for a dull thud versus a higher, drum-like ring.
Now let’s get into the common causes and fixes.
Two benchmarks worth knowing
Mortar coverage targets
Tile standards are more specific than most homeowners realize. A commonly cited industry target is:
- Dry interior floors and walls: about 80% coverage minimum
- Wet areas (showers) and exterior: about 95% coverage minimum
- Edges and corners: should be well supported, not left with large voids
In plain English, you want continuous support, especially anywhere water is frequent or structure movement is more likely.
Floor stiffness (deflection)
If your floor system is too bouncy, even perfect tile work can fail. Common guidance is L/360 stiffness for ceramic and porcelain tile, and L/720 for natural stone. If you can feel the floor flex, it is worth taking seriously before you blame “bad thinset.”
Cause 1: Thinset skinned over
Thinset starts to dry the moment it is spread. If it sits too long, the surface skins over and stops transferring properly to the tile. The tile can still be pressed into place and look perfect, but the bond can be weak and coverage can be spotty. This is extra common in warm rooms, low humidity, a fan running, direct sun, or when someone spreads too large of an area at once.
Diagnostic checks
- Timeline clue: Hollow tiles are clustered in an area that was likely set later in the day or after a break.
- Pattern clue: The hollow sound follows a “field” shape, like a section that could have been combed out at one time.
- Performance clue: A few tiles in that zone may debond with surprisingly little force if you gently try to lift a corner at an exposed edge (if any are not grouted yet).
Fix
- Before grout: Pull and reset affected tiles. If thinset skinned over, the reliable fix is removing tile and mortar and re-installing with fresh mortar.
- During install (prevention): Spread less area, periodically touch the combed thinset with a fingertip (it should transfer), and re-trowel if it starts to skin.
Can it stay? In a shower, I am conservative. A weak bond in a wet zone is a long-term risk. On a bathroom floor, a small number of fully stable tiles may survive, but the bond problem is real, not cosmetic.
Cause 2: No back-buttering
Back-buttering means keying a thin layer of thinset onto the back of the tile right before setting it. For many porcelain tiles, large-format tiles, textured backs, and shower applications, this step is often the difference between great coverage and spot bonding. Without it, the ridges on the floor or wall might not collapse into full contact, leaving voids that sound hollow.
Diagnostic checks
- Tile type clue: Large-format porcelain, heavily cupped tiles, or tiles with deep grid patterns on the back are more prone.
- Location clue: Hollow sound is worse on the wall (gravity works against you) or on big floor tiles.
- Coverage clue (best check): If you can sacrifice one tile in a suspicious area, pull it and look. You want continuous transfer, not just ridges or isolated blobs.
Fix
- Before grout: Pull and reset tiles with poor coverage. Back-butter every reset tile and re-trowel the substrate.
- Prevention: Back-butter consistently. It is not about adding thickness, it is about creating contact.
Can it stay? In wet zones, poor coverage is usually a replace-it situation. In dry areas, small edge voids can be tolerable, but widespread lack of coverage is not.
Cause 3: Wrong trowel or technique
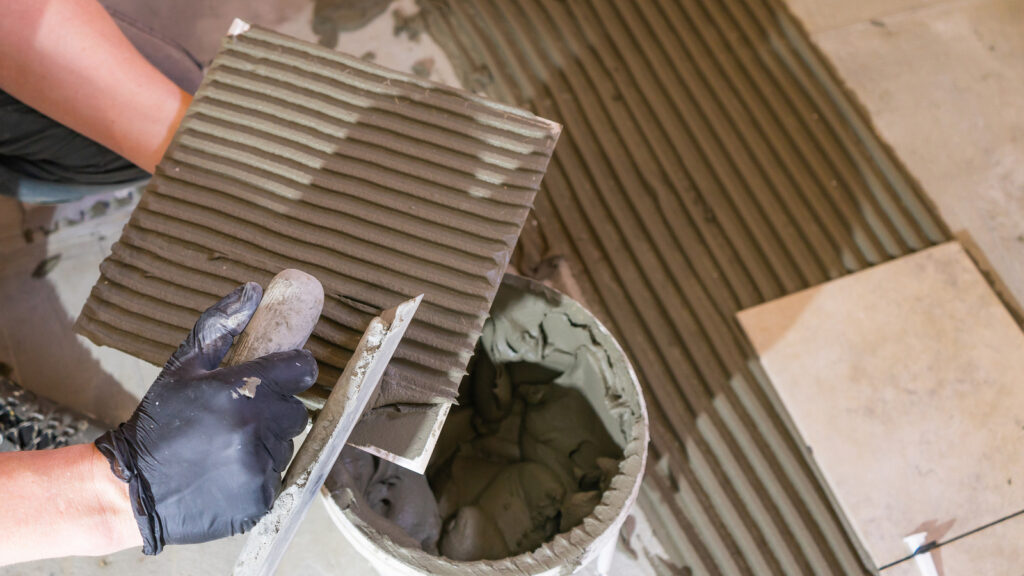
Trowels are not one-size-fits-all. If the notch is too small, you simply cannot deliver enough mortar to achieve proper coverage, especially with larger tiles or slightly uneven substrates. Technique matters too. Inconsistent angle, swirled patterns, or spot setting can trap air instead of allowing ridges to collapse.
Diagnostic checks
- Tile size clue: 12x24 and larger tiles need more mortar and better technique than small mosaics. (Many people call a tile “large-format” once one side is about 15 inches or longer.)
- Sound clue: Hollow sound is centered under the tile, not just at edges, which can indicate ridges never collapsed.
- Layout clue: Hollow tiles appear in rows where the installer could have changed trowel angle or rushed.
Fix
- Before grout: Pull a suspect tile to confirm coverage. If ridges are intact like corduroy, reset with the correct notch and proper ridge direction.
- Technique tip: Comb ridges in one direction and press the tile in with a slight perpendicular motion to collapse ridges and release air.
Can it stay? If you confirm good coverage and the tile is stable, a slightly different sound alone is not an automatic failure. If coverage is visibly poor, reset it.
Cause 4: Tile not bedded in
You can use the right mortar and the right trowel and still end up with voids if the tile was placed and lightly tapped without fully bedding it into the thinset. I see this most with wall tile where someone is trying to avoid squeeze-out, or with floors when the installer is moving too fast.
Diagnostic checks
- Lippage clue: Slight unevenness between tile edges can indicate inconsistent pressure and poor embedment.
- Corner clue: One corner sounds hollow and may feel slightly higher or more resonant.
- Movement clue: On floors, step on the tile and listen for a click. On walls, press firmly with your palm. There should be zero flex.
Fix
- Before grout: Pull and reset. Once thinset cures, you cannot push the tile down farther in a way that restores proper support.
- Prevention: Use a beating block or a rubber mallet gently, and check coverage as you go. Plan for a little squeeze-out so you are not afraid to embed the tile.
Can it stay? A tile that is stable but drummy at one edge might stay on a dry bathroom wall. On floors and in showers, lack of support raises the risk of cracked grout and tile, so I lean toward fixing it while access is easy.
Cause 5: Floor or wall movement
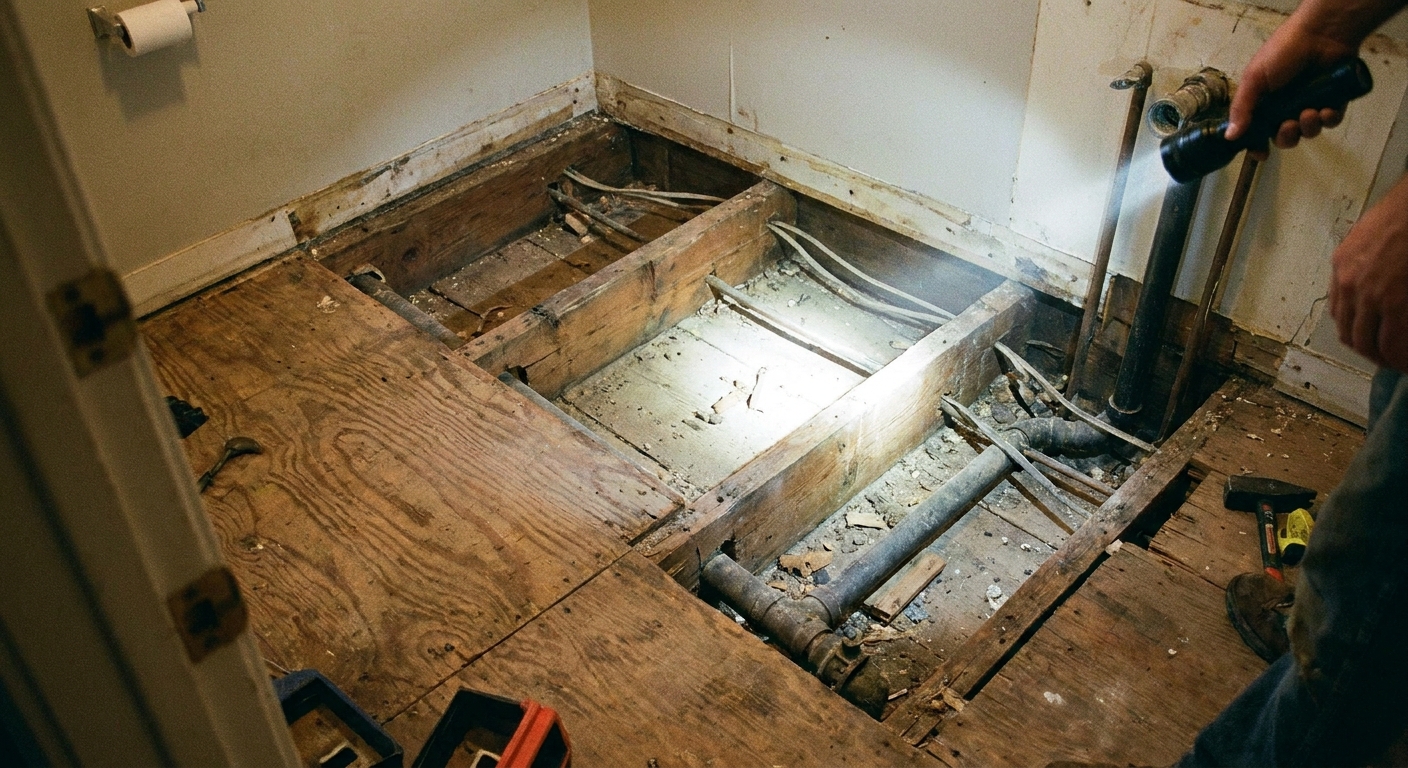
This one is less about the tile setter and more about what the tile is attached to. Tile and grout are rigid. If the subfloor bends too much, or a wall moves, the tile assembly takes the hit. Sometimes a tile sounds hollow because the bond is stressed. Other times the floor system itself is acting like a drum.
Diagnostic checks
- Floor bounce clue: Stand near the hollow area and shift your weight. If you feel springiness, that is a red flag.
- Crack clue: Hairline cracks that track through grout joints, or recurring grout cracking near a doorway, tub edge, or along a joist line.
- Layout clue: Hollow sound clusters over long spans, around heat registers, or near transitions where subfloor thickness changes.
- Wall tile clue: In showers, movement can come from insufficient blocking, flexing backer board, or an improperly fastened foam board.
Fix
- Before grout: Investigate structure. On floors, you may need additional subfloor thickness, underlayment, or joist stiffening. On walls, add fasteners or blocking if accessible.
- If the tile is already set: You still may have to remove tile to correct the substrate, because grout and caulk cannot compensate for movement.
Can it stay? If you have deflection, the issue is bigger than one hollow tile. Leaving it usually means future cracked grout, cracked tile, or waterproofing stress in a shower. This is fix-the-cause territory.
Cause 6: Flatness problems
Even with good thinset and decent technique, a substrate that is not flat can create voids. Humps and valleys prevent full contact, especially with large-format tile, because the tile bridges over low spots. That can leave a hollow sound even when the tile looks fine from above.
Diagnostic checks
- Straightedge clue: Lay a straightedge or level across several tiles. If you can see a dip or a hump pattern, you likely had a flatness issue under the tile.
- Lippage pattern clue: Lippage repeats at regular intervals, often where the substrate waves or where seams were not treated flat.
- Coverage clue: If you pull a tile, you may see heavy mortar contact on one side and very little on the other.
Fix
- Before grout: Pull and reset the worst tiles and correct the substrate where possible (patch, plane, or float). Then reset with proper troweling and embedment.
- Prevention: Flatten first, then tile. Large-format tile is unforgiving.
Can it stay? Minor sound differences can be harmless if coverage and stability are good. If the tile is spanning a low spot and lacks support, it is a crack risk.
Edge voids and corners
Not every hollow sound means the tile is about to fail. Tiles can ring a bit at an edge, especially if thinset coverage is strong in the center but light near a perimeter. You also see this at changes of plane where installers leave room for movement joints, or where trim pieces and bullnose details create tricky mortar conditions.
Diagnostic checks
- Location clue: The hollow sound is only at the very edge of the tile, near a wall, curb, niche edge, or outside corner.
- Stability clue: No movement, no clicking, no cracking, and the tile feels fully supported under load (floor) or pressure (wall).
- Joint clue: Look closely at grout lines. Are they uniform and intact? Or are there hairline separations starting at the hollow zone?
Fix
- If it is truly an edge void and stable: You can often leave it, especially in a dry floor area, and keep an eye on grout performance.
- If it is in a shower: Be stricter. Voids can hold moisture and contribute to issues like staining or efflorescence, and if a tile later cracks or debonds, that can create pathways for water to reach places you do not want it.
- Be cautious with “injection” fixes: Drilling and injecting adhesive or thinset is unreliable because it is hard to get full penetration and support, and it can create bonding and moisture-management problems in some shower assemblies.
Can it stay? This is the most common “yes, possibly” category, but only if the tile is stable and the hollow sound is minor and localized.
When to pull tile before grout
If you only remember one thing, make it this: grout is not structural. Grout cannot make up for missing mortar support.
Pull and reset if you have any of these
- Any movement: rocking, clicking, flexing, or a springy feel underfoot
- A large hollow zone, especially centered under the tile
- Cracked tile or new cracks forming while other tiles are fine
- Recurring grout cracking or grout separating from tile edges
- Hollow tiles in a shower floor, curb, bench, or niche, where water exposure is constant
It can often remain if all are true
- Hollow sound is small and near an edge
- Tile is completely stable
- You are in a dry bathroom floor area, not a shower floor or constantly wet wall
- No cracking appears after normal use and the grout cures properly
If you pull a tile, keep it clean
If the tile is not grouted yet, you are in the easiest possible moment to fix it. You are saving yourself a bigger repair later.
Basic reset steps
- Protect neighbors: Tape cardboard over adjacent tile edges to avoid chipping.
- Remove the tile: Use gentle prying and patience. On walls, support the tile so it does not take others with it.
- Remove cured thinset: Both surfaces should be scraped back to clean, sound material.
- Reinstall correctly: Fresh thinset, correct trowel notch, comb in one direction, back-butter as needed, and press to collapse ridges.
- Recheck: Tap test again after set and before grout.
If you are dealing with a shower system and you are not sure whether waterproofing is compromised, that is a good moment to bring in a tile pro for an on-site evaluation. A one-hour consult is cheaper than a tear-out.
FAQ
Is it normal for porcelain tile to sound hollow?
Porcelain can sound more ringy than stone or thicker ceramic, especially in large formats. A slightly different tone is not automatically a problem. What matters is bond and support. If the tile is stable and coverage is good, you can still get a higher-pitched sound.
Will grouting make hollow tile sound go away?
Sometimes grout dampens the sound a little, but it does not fix the underlying issue. If the tile is hollow because it is unsupported, grouting can hide the symptom until cracks show up.
Can I live with a hollow sound on my bathroom floor?
If it is a small edge void and the tile is stable, you may be fine. If it is a large hollow area, multiple tiles, or any movement, fix it now while it is still relatively simple.
What coverage should I expect in a shower?
In wet areas, you want excellent coverage and support. A commonly cited target is about 95% mortar coverage in wet areas, with no large voids, especially on shower floors, curbs, benches, and niches.