A step-by-step, contractor-level walkthrough of shower wall waterproofing: backer board, membrane, seams and corners, niche, valve and pipe seals, curb detai...
I grew up holding the flashlight for my dad while he chased leaks through houses, and I can tell you the same thing he told every panicked homeowner: water is sneaky, but it is not magical. If a tiled shower is leaking, it is coming from a predictable pathway. Your job is to figure out which pathway before you start re-caulking everything in sight or, worse, tearing out perfectly good tile.
This is a diagnosis guide, not a full waterproofing tutorial. I am going to map common “where the water shows up” symptoms to the most likely failures, then walk you through a few controlled checks you can do on a finished shower.
First, know the usual leak sources
A tiled shower can leak from:
- Plumbing: valve, shower arm drop-ear elbow, tub spout (if it is a tub-shower), body sprays, handheld outlet, supply lines, or the drain connection.
- The receptor (the shower base or pan assembly): the pan liner or bonded membrane, the drain’s seal, or the pan slope directing water to the drain.
- The surface: grout cracks, failed caulk at change-of-plane corners, poorly sealed penetrations, or a niche and bench that were not truly waterproofed.
- The drainage path: clogged weep holes in a traditional clamping drain that keep the mortar bed saturated. (Not every shower uses weep holes you can service. Many modern bonded drains work differently.)
Tile and grout are not the waterproof layer. They are the wear surface. Even “water in, water out” traditional showers still rely on a liner or membrane to manage the water that gets through. Some older showers were built with little more than mortar and hope, and they may limp along for a while, but tile and grout alone are not a dependable water stop.
So when you see water, the question becomes: is it plumbing under pressure (leaks even when you do not use the shower), or water management failure (leaks only during or after use)?
Symptom map: where the water shows up
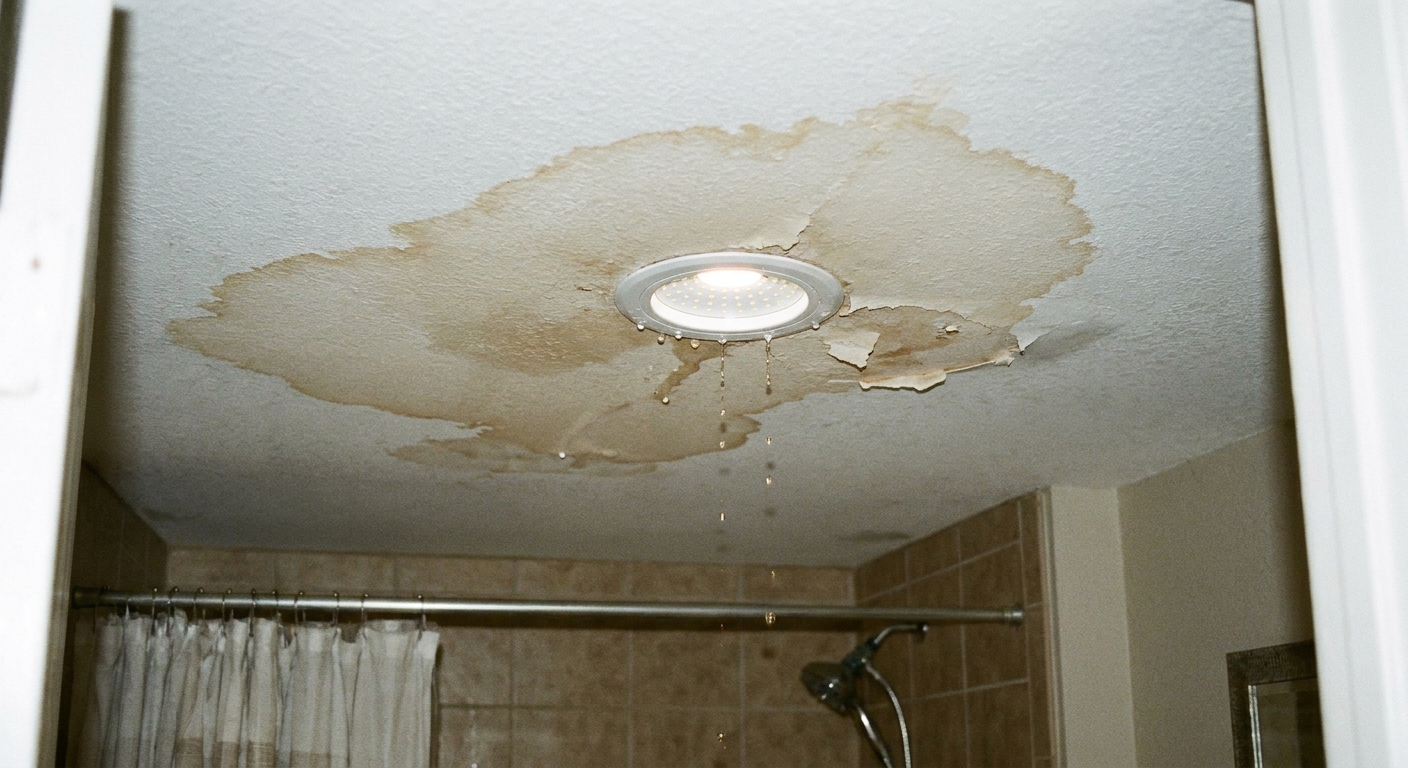
1) Ceiling stain or dripping below the shower
Most likely causes:
- Drain connection leak (at the trap, riser, or drain body): often shows up quickly when the shower runs.
- Supply line or valve leak: can drip even when the shower is off, especially if a fitting is weeping slowly.
- Pan or membrane failure: often appears after several minutes of showering or after the shower is off (water stored in the mortar bed releases).
Clues that point to plumbing: stain grows even when nobody showers, or you hear a faint hiss or drip inside the wall. Leaks under pressure also tend to show up sooner, sometimes within seconds of turning the water on.
Clues that point to the pan: the stain appears only after use, especially after longer showers, and may come and go depending on how much water hits the floor area.
Do not skip this: make sure it is not condensation. A cold supply line, AC duct, or bathroom exhaust issue can sweat and stain a ceiling in a way that looks like a “leak.” If the stain shows up after steamy showers even when you do not use this shower, condensation deserves a look.
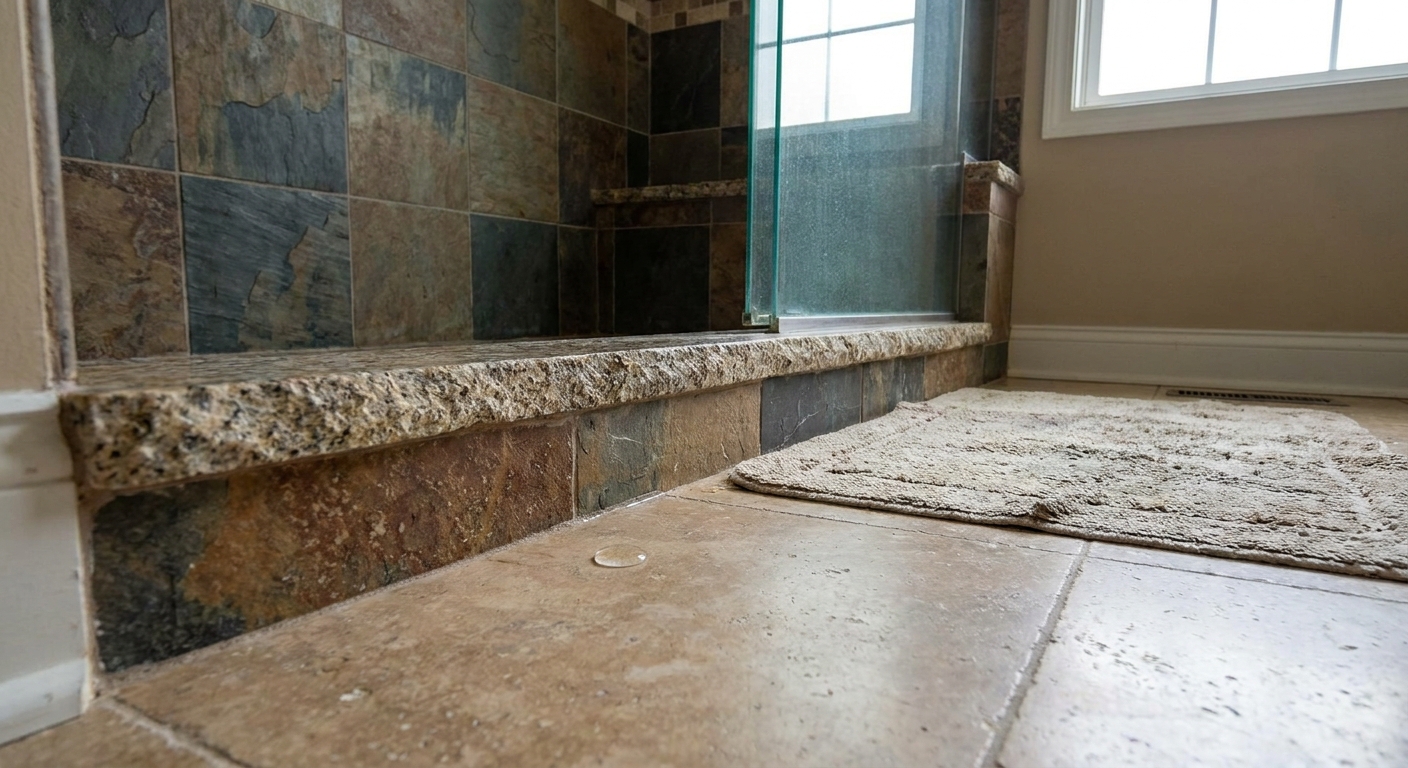
2) Water on the outside of the curb (or at the curb ends)
Most likely causes:
- Failed curb waterproofing: fasteners through the top or inside face of a traditional liner curb, or a membrane that was not properly wrapped and sealed.
- Cracked or missing caulk at the curb-to-wall joint: water wicks through a hairline gap and shows up at the curb end.
- Shower door sweep or door alignment issue: not technically a leak, but it mimics one by letting splash escape.
Red flag: water showing up specifically at a curb end or outside corner is a classic sign that the curb is compromised behind the tile.
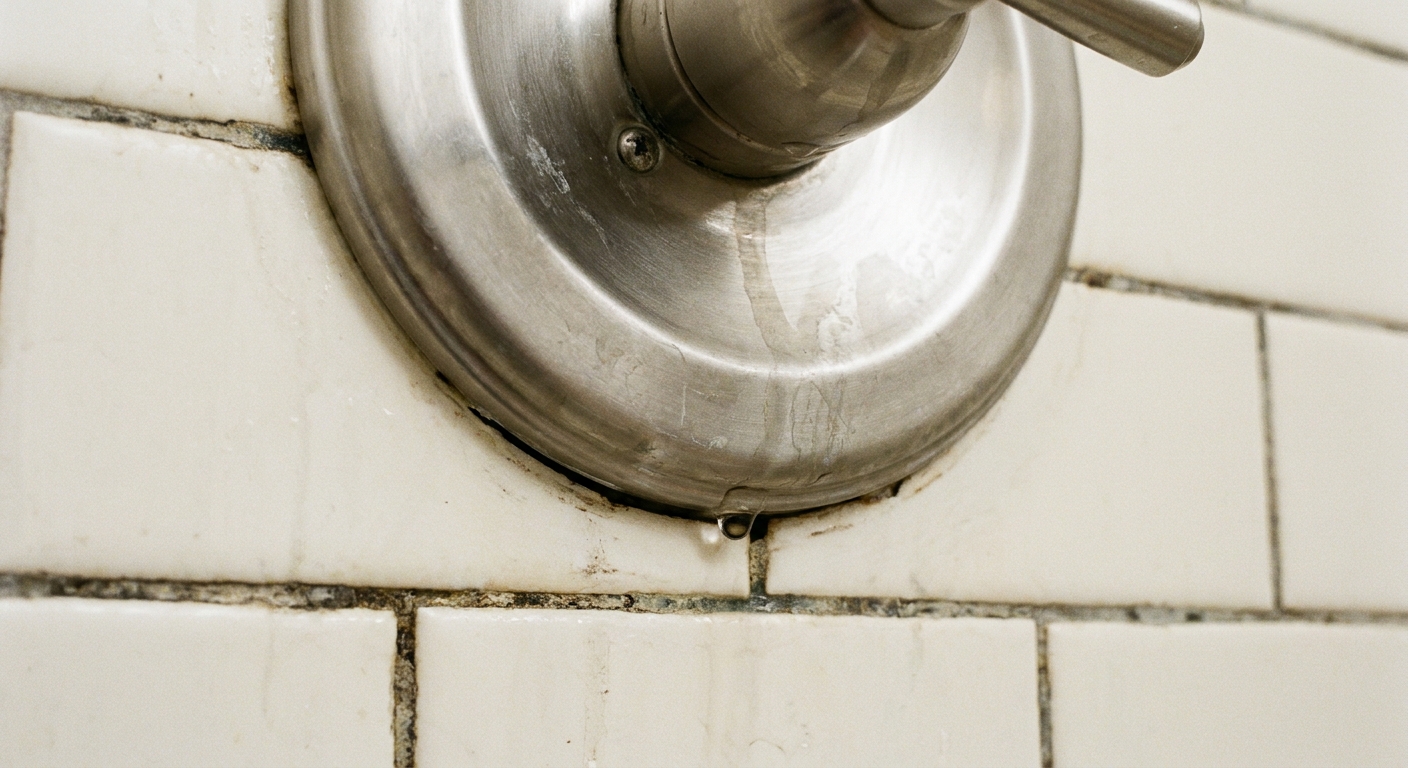
3) Drips from behind the valve trim plate (escutcheon)
Most likely causes:
- Missing or failed seal behind the escutcheon: water gets behind the trim when you shower and runs down inside the wall.
- Unsealed valve penetrations: openings around the valve body or screws that were never sealed.
- Plumbing leak at the valve: more serious, and it can leak even when the shower is off.
Quick pattern read: if it only drips during showering, suspect the trim seal first. If it drips randomly when no one is showering, call a plumber.
4) A wet niche, damp drywall on the other side, or swelling paint near the niche
Most likely causes:
- Niche waterproofing failure: corners not properly sealed, membrane not tied into the field membrane, or a missing waterproof layer entirely.
- Grout or caulk failure at niche corners: can be superficial, but niches concentrate water and shampoo bottles bump corners.
- No slope on the niche sill: water sits, then finds a pinhole or seam and migrates.
Pattern read: if the niche area stays damp long after the shower, or the wall behind the niche shows damage, it often points beyond simple re-caulking.
5) A puddle outside the shower door
Most likely causes:
- Door sweep, gasket, or alignment issue: the most common culprit.
- Improper curb height or slope: curb top sloping outward, letting water run to the bathroom floor.
- Clogged drain causing temporary pooling: water level rises and escapes at the weakest point.
Reality check: if the puddle happens only when someone aims the showerhead at the door or takes a high-pressure shower, it is often splash management, not a failed pan.
Also check the obvious: wet bath mats, towels, and kids who step out dripping can create a “mystery puddle” that has nothing to do with the shower assembly.
6) Water appears at the base of a wall or at a change-of-plane corner
Most likely causes:
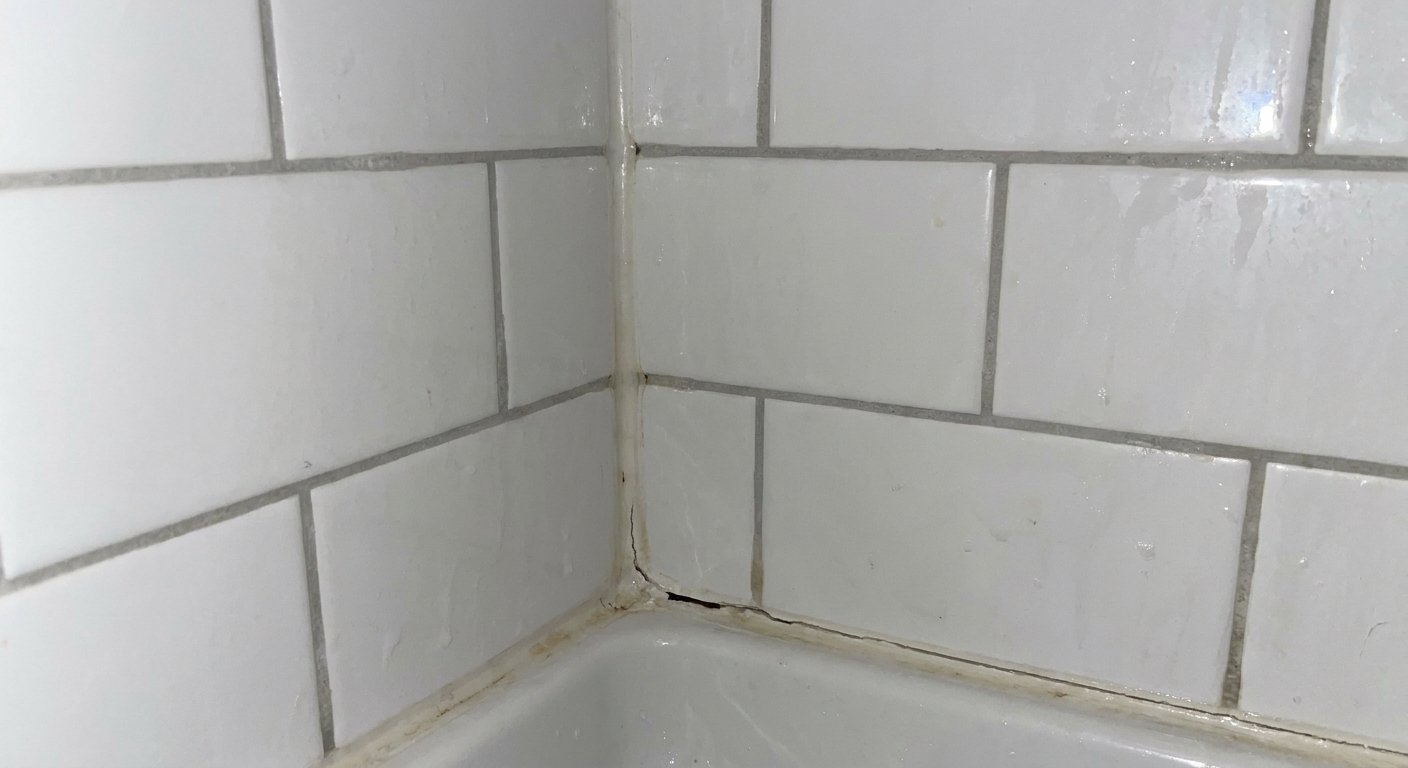
- Failed sealant at change-of-plane joints: corners and wall-to-floor transitions are ideally treated as movement joints with flexible sealant per industry guidance, because tile assemblies move.
- Water wicking through cracked grout: can feed a slow leak path if the waterproofing behind is compromised.
- Saturated mortar bed with blocked weep holes (traditional pans): water has nowhere to drain, so it finds edges.
Pattern read: recurring dampness at the same corner, especially near the curb, often means the corner joint is opening up or the curb is letting water into the assembly.
Checks you can do without ripping tile
These checks are meant to be controlled and reversible. If you feel uncomfortable, or if you see active dripping into a ceiling, stop and bring in a pro.
Safety note: any testing that holds water in an upstairs shower can worsen damage if the shower is actively leaking. If you are in a condo, over finished space, or dealing with a ceiling that is already soft or sagging, keep tests short and consider having a pro run them.
Before you test: rule out plumbing leaks
- Check for moisture when the shower is not in use: run a tissue around the valve trim, shower arm, tub spout diverter (if applicable), and any body spray trims. If it is wet when nobody showered, that is a plumbing issue.
- Look for drips that travel: water can run along pipes, studs, or the underside of a subfloor and show up far from the source. A ceiling stain “below the drain” is not always the drain.
- Look under the sink vanity (if nearby): sometimes a “shower leak” is actually a supply line or drain leak telegraphing through framing.
- Listen and smell: a musty smell that persists can indicate ongoing moisture, even without obvious drips.
1) Controlled pan flood test (for the shower floor and pan)
This helps you separate a pan or waterproofing problem from a splash or plumbing problem.
- Do not run the shower during this test.
- Use a test plug that seals inside the drain pipe below the drain strainer (a wing-nut test plug from a hardware store works for many drains).
- Fill the shower base with 1 to 2 inches of water, staying well below the top of the curb.
- Mark the water line with a small piece of painter’s tape on the tile.
- Check the level at 30 to 60 minutes.
- If things look stable and it is safe for your situation, check again at 4 hours, and up to 24 hours for a slower leak. If you are over finished space or in a multi-family building, do not let it sit unattended.
How to read it:
- If the water level drops and you see new moisture outside the shower or below, the leak is likely in the pan, drain seal, or drain connection.
- If the water level holds steady, your leak is more likely from walls, corners, niche, door splash, curb top slope, or plumbing under pressure.
Important: some natural stones can darken or discolor with standing water. A short test is usually fine, but keep it as short as practical for your goals and dry the area thoroughly afterward.
2) Targeted spray test (for walls, corners, niche, and door area)
This is the test people accidentally do every day, but you are going to do it on purpose and in sections.
- Dry the shower and any areas where you normally see water outside.
- Have a helper watch the suspect area outside the shower, and if possible, check the room or ceiling on the other side.
- Use a handheld shower or a cup of water. Start low and gentle. Do not blast the whole shower at once.
- Wet one section for 2 to 3 minutes, then stop and wait a few minutes. Move to the next section.
- Good sections to isolate: valve wall around the trim, each corner, curb-to-wall joints, the niche (especially corners and sill), and the door jamb area.
How to read it: if the leak appears only after you soak one specific area, you just narrowed the pathway. That is how you avoid the “caulk everything” spiral.
3) Dye test along the curb and suspicious joints
When water shows up outside the curb, a dye test can help confirm the path.
- Dry the shower thoroughly.
- Add a few drops of food coloring to a cup of water.
- Slowly dribble the tinted water along the inside curb-to-wall joint and the curb corners, one short section at a time.
- Watch the outside of the curb and the adjacent bathroom floor for any tinted seepage.
How to read it:
- Tinted water appearing outside quickly often points to a curb or corner waterproofing breach, not just a surface caulk issue.
- No tint outside does not guarantee the curb is perfect, but it makes splash or door sealing more likely.
4) Inspect the escutcheon (trim plate) seal
The trim plate should not be a direct funnel into the wall.
- Gently try to wiggle the plate. If it is loose, water can get behind it.
- Look for a missing foam gasket or a plate that was never sealed.
- Check for a gap at the bottom edge where water can run behind and down.
Tip: the goal is not to glue the plate to the tile forever. You want a water-managed seal that still allows servicing. If you see active water coming from behind the plate with the shower off, stop and call a plumber.
5) Check the weep holes (traditional clamping drain showers)
If your shower was built with a traditional liner and mortar bed, the drain has weep holes that let water in the mortar bed drain into the pipe. When they clog, the base stays saturated and leaks show up at edges.
- Remove the drain cover if possible.
- Look for signs of chronic wetness, gunk buildup, or mineral deposits around the drain perimeter.
- If water seems to sit around the drain long after showering, clogged weeps are a suspect.
Note: if you have a modern bonded waterproofing system, the drain may not use serviceable weep holes at all. In that case, focus on seams, penetrations, and transitions instead.
6) Examine change-of-plane joints (corners and wall-to-floor)
Anywhere tile changes direction is a movement point. In real life, people grout these corners, and then the house moves and hairline cracks open up.
- Look closely at inside corners, curb-to-wall joints, and where the walls meet the shower floor.
- Look for cracks, gaps, missing sealant, or mildew that keeps returning in the same spot.
Pattern read: a single cracked corner joint is often a sealant maintenance issue. Multiple corners failing, loose tiles, or spongy grout can hint at water getting behind the system.
Sealant fix or open it up
Usually a sealant or trim issue
- Leak happens only when water directly hits a specific joint (like the curb-to-wall corner), and stops when you avoid spraying that area.
- You can see an obvious gap or cracked caulk at a change-of-plane joint.
- Dripping at the valve plate occurs only during showering and improves when the spray is redirected, suggesting water intrusion behind trim.
- Puddles outside the door correlate with a missing sweep, misaligned door, or a curb top that is flat or sloped the wrong way.
More likely a membrane or pan failure
- The pan flood test fails (water level drops, moisture shows up outside, or staining appears below).
- Water shows up at the outside of the curb with no obvious surface gap, especially at the curb ends.
- The niche area causes repeated swelling, soft drywall, or staining on the other side of the wall.
- You see loose tiles, persistently dark grout that never dries, or efflorescence (white chalky deposits) that keeps returning.
- There is any sign of framing damage below or adjacent to the shower, like sagging ceiling drywall.
When to call a pro right away
- Active dripping into a ceiling or light fixture.
- Moldy odor plus visible staining spreading week to week.
- Leak when the shower is off.
- You are in a condo or multi-family building where water affects another unit.
Quick cheat sheet
| Where you see water | Most common source | Best first check |
|---|---|---|
| Ceiling stain below | Drain connection, pan, valve leak, or condensation | Flood test (no running water) plus check for moisture when shower is off |
| Outside of curb | Failed curb waterproofing or corner breach | Dye test at curb joints, inspect curb corners |
| Behind valve plate | Missing escutcheon seal or valve leak | Inspect gasket and gaps, check for drips when shower is off |
| Wet niche or wall behind niche | Niche waterproofing or unsealed corners | Targeted spray test, inspect niche corners and sill slope |
| Puddle outside door | Door sweep, splash, curb slope, or bath mat confusion | Check door seals, aim of showerhead, verify curb slopes inward |
| Wet corner at floor | Failed change-of-plane sealant or saturated base | Inspect corner joints, consider drainage behavior |
A few myth-busters
- “I will just seal the grout.” Grout sealer helps with staining, not waterproofing. If water is escaping, sealer rarely fixes the actual pathway.
- “Cracked grout means the pan failed.” Not always. Sometimes it is movement and a maintenance issue. The flood test helps separate these.
- “If it leaks, it must be the drain.” Drains are common culprits, but curb corners, penetrations, and niches are right up there.
FAQ
Can a shower leak only sometimes?
Yes. Intermittent leaks happen when the leak depends on spray direction, how long the shower runs, or whether water pools at the curb or in a corner. That is why controlled tests beat guessing.
Is it normal for water to get behind tile?
Some moisture migration through grout is normal. What is not normal is water reaching framing, ceilings, or adjacent rooms. The waterproof layer behind the tile should manage that moisture and direct it to the drain.
If my flood test passes, does that mean my shower is fine?
It suggests the floor pan and drain seal are likely okay, but it does not clear wall penetrations, niches, corners, door splash, or plumbing under pressure. If you still have symptoms, move on to the targeted spray and dye checks.
What is the single most common small fix?
Failed sealant at change-of-plane joints and poorly sealed trim plates. They are small details that can cause surprisingly big damage if ignored.
Bottom line
A leaking tiled shower usually tells on itself if you listen to the pattern. Start by separating plumbing leaks (can happen anytime) from water management failures (happen during or after use). Then use a controlled flood test, targeted spray and dye tests, and a careful look at the escutcheon, drainage behavior, and change-of-plane joints.
If the pattern points to the pan, curb build, or niche waterproofing, you are typically looking at an “open it up” repair. If it points to a single joint, trim plate, or door splash issue, you may be able to solve it without demolition. Either way, a calm, methodical diagnosis is the cheapest part of fixing a shower leak.