Pick the right sheen, primer, and mold-resistant paint for steamy bathrooms and hard-working kitchens. Brand recommendations, where to use each finish, and p...
Painting kitchen cabinets is one of those projects that looks simple on a reel and feels very different when you are three days in, covered in sanding dust, and wondering why your doors still feel tacky. The good news is that a factory-smooth finish is absolutely doable at home. The not-so-fun truth is that it comes from prep, patience, and the right products, not a magic paint.
I spent years designing kitchens where clients wanted “new cabinets” on a “paint budget.” When you follow the system below, painted cabinets can look crisp, modern, and hold up to real life. Skip steps, and you will get brush marks, chips, and that gummy feeling around pulls.
Set expectations: what “factory-smooth” means
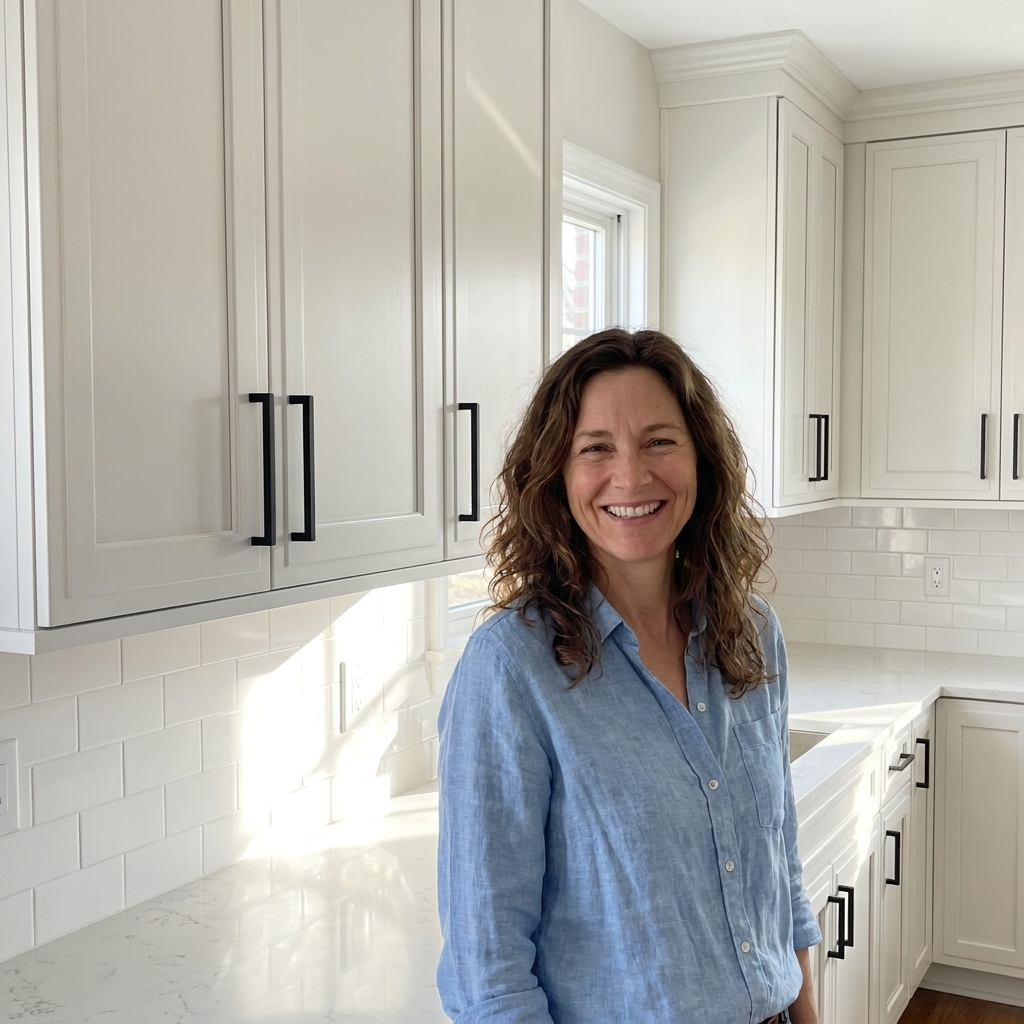
Most factory cabinet finishes are sprayed and cured in controlled conditions, often with heat or UV systems. At home, your goal is a smooth, level surface with minimal texture, crisp edges, and a hard cure that resists fingernail dents. You can get extremely close with careful rolling, or get truly spray-like results if you use a paint sprayer.
If you are rolling and brushing, expect a subtle micro-texture when viewed up close at an angle. From normal standing distance, it reads as a professional finish if you use the right roller and do not overwork the paint.
Tools and materials that matter
Must-haves
- Degreaser (more on which ones work below)
- Sanding system: sanding sponge plus a random orbital sander for door faces (optional but helpful)
- Vacuum with brush attachment and tack cloth or microfiber
- High-quality primer for cabinets
- Cabinet-grade paint (or a true enamel)
- 4-inch foam roller or fine-finish microfiber roller (3/16 in to 1/4 in nap)
- Angled sash brush (2 in is my sweet spot) for profiles and corners
- Paint conditioner (optional) for longer open time and better leveling
- Painter’s pyramids or screws in a board to elevate doors
- Numbered labels and bags for hinges and screws
Nice-to-haves for pro results
- HVLP or airless sprayer if you want true factory look
- Drying rack for doors and drawers
- Hinge jig if you are swapping to concealed hinges
Safety basics (do not skip)
- Dust mask or respirator rated for sanding dust. A simple paper mask is not enough for fine dust.
- Eye protection for sanding and spraying.
- Hearing protection if you are running an orbital sander for hours.
- Ventilation for primers and paints, especially shellac-based or oil-based products.
Step 1: Make sure they are paint-worthy
Paint is not structural. If your boxes are falling apart, your doors are delaminating, or the hinges are ripping out of particleboard, painting is lipstick on a leaky pipe.
- Great candidates: solid wood doors, MDF doors in good shape, sturdy frames, intact veneer
- Proceed carefully: thermofoil that is peeling, heavily damaged veneer, cabinets near a heat source with bubbling laminate
- Not worth it: water-swollen particleboard, loose boxes, doors that are warped beyond adjustment
Older homes: a quick lead paint note
If your home is older (in the U.S., pre-1978 is the big cutoff), assume painted surfaces could contain lead until proven otherwise. Do not dry sand unknown paint. Use an EPA-recognized lead test kit or talk with a pro, and follow safe work practices if there is any doubt.
Step 2: Remove doors and hardware
This is the part that saves your sanity at reinstall.
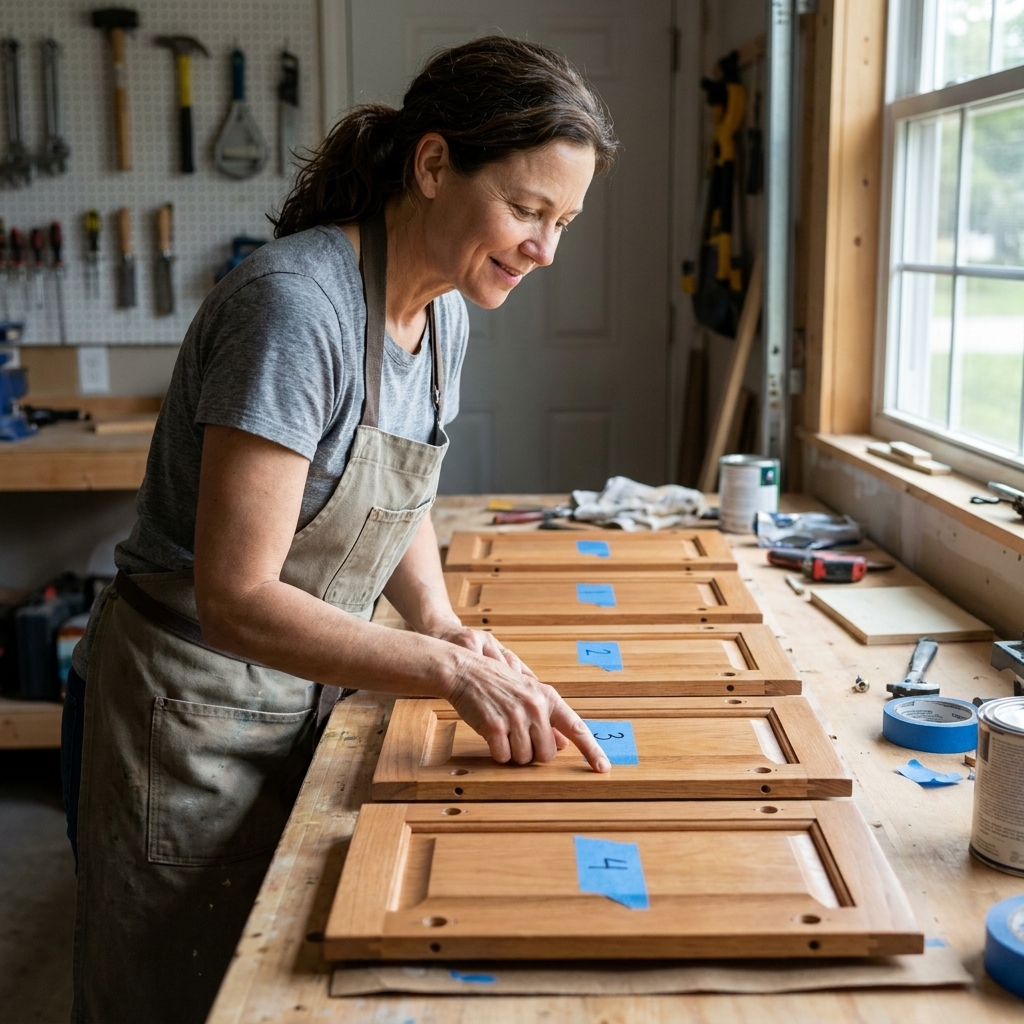
- Number each door and opening with painter’s tape (inside only).
- Bag hinges and screws per door.
- Take a quick phone photo of tricky hinge setups.
- If you are replacing hardware, fill old holes now (wood filler or Bondo style filler for durability), then sand flush after it cures.
Step 3: Degrease thoroughly
Kitchen cabinets are basically handrails. Oils, cooking residue, and cleaners build up invisibly and can cause primer failure. Do not rely on “deglosser only” and hope for the best. Clean first.
Best degreasers for cabinets
- Krud Kutter Original: a strong general degreaser for many painted or previously finished cabinets.
- TSP substitute: effective for heavy grime without the disposal issues of true TSP.
- Dawn and warm water: surprisingly useful for light grease, but rinse well and do not leave soap film.
Compatibility tip: Whatever you use, test in an inconspicuous spot first and rinse thoroughly. Avoid soaking seams and edges, especially on MDF or veneered doors, since water can swell or loosen them.
My degreasing method
- Work top to bottom.
- Use a scrubby sponge on high-touch zones: around knobs, near the stove, and the trash pull-out.
- Rinse with clean water and a separate cloth.
- Let everything dry fully before sanding or priming.
Designer tip from the field: If you can rub a cabinet face with a clean white cloth and it picks up yellowing, you are not done cleaning.
Also avoid this: Silicone-based “shine” sprays and some furniture polishes can cause fish-eyes. If you suspect they were used, plan on extra cleaning and a solid bonding primer.
Step 4: Sand for adhesion and smoothness
Sanding does two jobs: it knocks down texture and creates tooth for primer. You do not need to sand down to raw wood in most cases, but you do need a consistent dull finish.
Grit guide
- Previously painted cabinets (sound paint): 180 grit to scuff, then 220 grit to refine.
- Varnished or polyurethane wood: 150 to 180 grit to degloss, then 220.
- Between coats: 220 to 320 grit to knock down nibs and keep things silky.
Where people mess up
- Over-sanding edges and profiles: Rounded edges scream “DIY repaint.” Use a sanding sponge and light pressure on corners.
- Skipping dust removal: Dust left on the surface becomes texture locked into your finish.
After sanding, vacuum every surface and wipe with a slightly damp microfiber or tack cloth. If your cloth feels gritty, keep going.
Step 5: Use the right primer
If you want durability, primer is not optional. The right primer blocks stains, reduces bleed-through risks, and gives your topcoat a surface it can grip.
Primer options and when to use them
- Bonding primer (water-based): Great for slick surfaces and previously finished cabinets. Low odor and easy cleanup.
- Shellac-based primer: Best for knotty wood, heavy stains, smoke odors, or when you are worried about bleed-through (oak and knotty pine are classic troublemakers). Strong odor and very flammable, so ventilate well and keep it away from pilot lights and sparks.
- Oil-based primer: Still effective for stain blocking and leveling, but slower to dry and higher odor. Many DIYers prefer modern bonding or shellac primers now.
If your cabinets are oak with deep grain: Decide whether you want that grain to show. Paint will not magically erase texture. For a smoother look, you will need grain filling (more on that below).
MDF and thermofoil reality check: MDF is paintable, but raw edges need sealing and gentle handling around water. Thermofoil is tricky even with bonding primer. If it is already peeling or bubbling, paint is not a long-term fix.
Step 6: Choose paint that cures hard
Cabinets need a finish that dries, then cures into a hard film. Wall paint is too soft. Look for products labeled for trim, doors, or cabinets. Most are acrylic-alkyd, urethane-reinforced acrylic, or enamel-style coatings.
Paint types that work well
- Acrylic-alkyd (waterborne alkyd): Excellent leveling, harder cure, water cleanup. A favorite for cabinets.
- Urethane-reinforced acrylic: Durable, great adhesion, often very DIY-friendly.
- Traditional oil enamel: Beautiful leveling and hardness, but longer dry time and higher odor.
Sheen recommendations
- Satin: My default for most kitchens. It hides minor flaws but still wipes clean.
- Semigloss: Crisp and durable, but highlights texture and prep mistakes.
- Matte: Beautiful but can show wear and oils faster unless it is a very durable cabinet-rated formula.
Color note: Dark colors show brush and roller texture more than light colors. If you are going navy, charcoal, or black, your prep and application need to be extra dialed in.
Optional: fill oak grain
Oak is strong and paintable, but the grain is basically a roadmap. If you want that modern, flat-panel smooth look, you have two realistic options: embrace the grain as character, or fill it.
How to fill grain
- After degreasing and sanding, apply a grain filler or a skim coat of a high-build product designed for filling pores.
- Let it dry fully, then sand smooth with 220.
- Repeat if needed. Most oak takes at least two passes for a near-flat look.
This step adds time, but it is the difference between “painted oak” and “sleek painted cabinets.”
Rolling for a smooth finish
Your roller choice and your rhythm matter as much as the paint.
Best rollers for cabinets
- Foam roller: Can lay down very smooth, but can also create tiny bubbles if you press too hard or roll too fast.
- Fine-finish microfiber (3/16 in to 1/4 in nap): Holds more paint, reduces bubbles, levels nicely. This is my go-to for most DIY cabinet jobs.
My rolling method
- Load the roller properly: Fully saturate, then roll off excess so it is wet, not dripping.
- Work in sections: On door backs and fronts, roll the flat fields first.
- Tip off once: Lightly pass the roller in one direction at the end to even texture.
- Do not overwork: Once the paint starts to tack, leave it alone. This is where stipple and drag marks come from.
- Brush only where needed: Use your angled brush for profiles and corners, then lightly blend with the roller while still wet.
What causes orange peel
- Paint too thick or drying too fast
- Rolling too aggressively
- Using a thick nap roller
- Painting in hot, dry conditions with fans blowing directly on the work
If you are struggling with leveling, a paint conditioner that is compatible with your paint can help extend open time. Follow the product directions precisely.
Spraying: when it is worth it
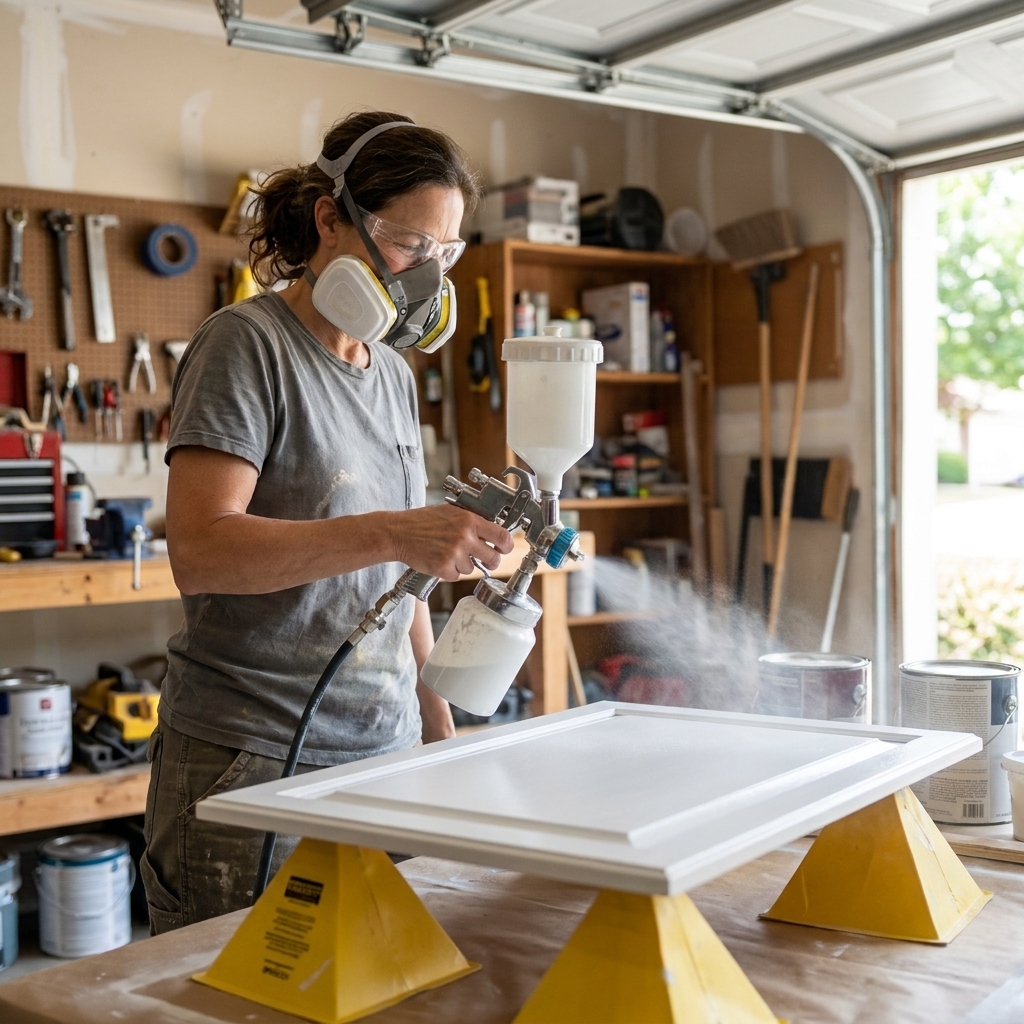
If you truly want the closest thing to a factory finish, spraying is the move. It is also a bigger setup: masking, practice, ventilation, and cleaning the sprayer.
Basic spray tips
- Practice on cardboard or a scrap door first.
- Keep the sprayer perpendicular to the surface and overlap passes by about 50 percent.
- Multiple thin coats beat one heavy coat. Heavy coats sag, especially on profiles.
- Control dust. A single stray hair in sprayed paint will haunt you forever.
Dry time vs cure time
This is the part many tutorials skip. Paint can feel dry to the touch in hours but still be soft underneath. Cabinets get handled, bumped, and cleaned, so you need cure.
- Dry time: When the surface is no longer wet.
- Recoat time: When you can apply another layer safely.
- Cure time: When the coating reaches full hardness. Many cabinet paints land in the 7 to 30 day range depending on product, humidity, and temperature. Check the label, and do not be surprised if your specific paint is closer to 14 to 21 days for a full cure.
During cure, treat cabinets gently. Avoid harsh cleaners, do not hang wet towels over doors, and consider waiting a bit before installing new pulls if you tend to torque hardware down tightly.
A realistic painting schedule
This schedule assumes decent ventilation and fairly normal conditions. If your space is cool, damp, or you are painting in a basement or garage, build in buffer time.
Day 1
- Remove doors and drawers, label everything
- Degrease and rinse
- Dry thoroughly (overnight if possible)
Day 2
- Sand and remove dust
- Prime doors, drawers, and frames
Day 3
- Light sand if needed (220), remove dust
- First topcoat
Day 4
- Light sand if needed (320), remove dust
- Second topcoat
Day 5 and beyond
- Let parts harden before reinstalling (follow your product’s rehang guidance)
- Reinstall hardware and adjust doors
- Go easy during cure time
If your kitchen is high-use and you cannot have doors off for long, paint in batches and keep one section functioning at a time.
Painting frames in place
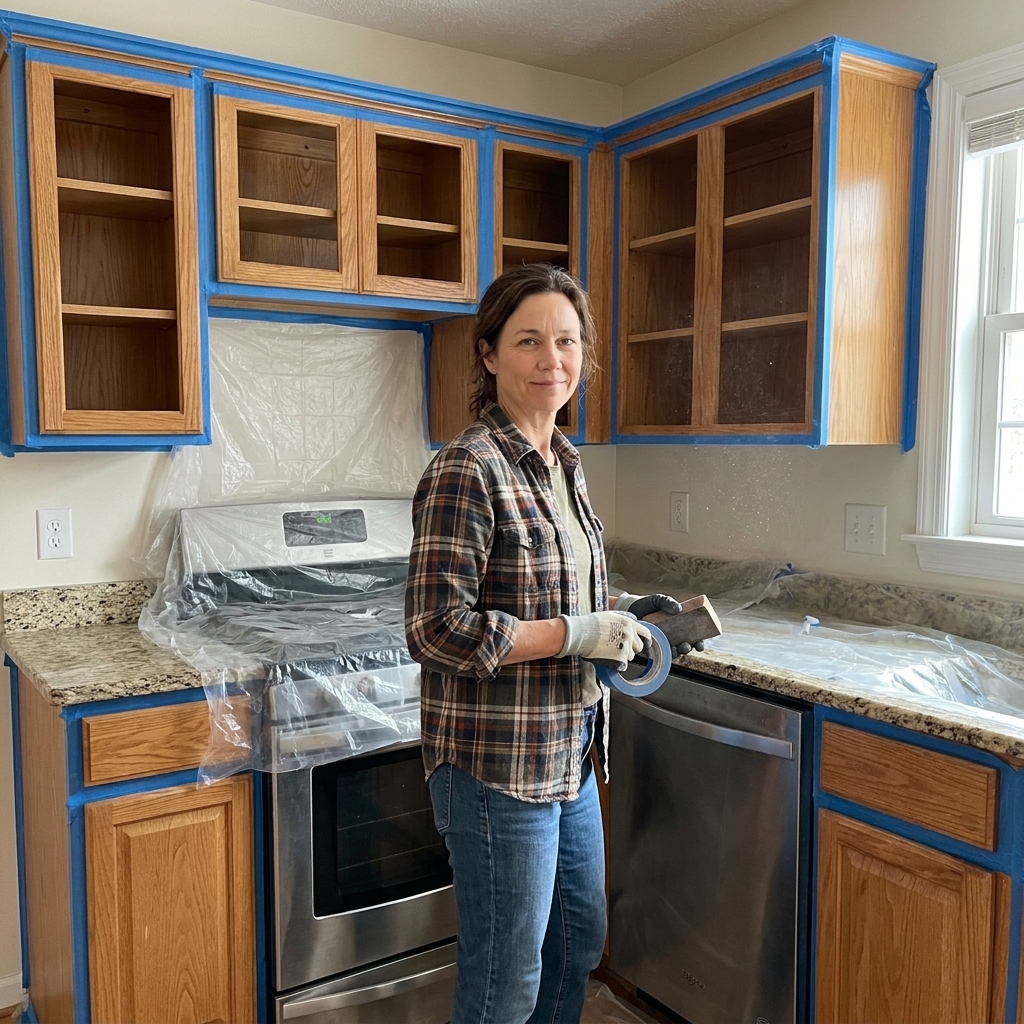
Painting the boxes and face frames in place is normal. It just requires careful masking and a calm pace.
- Remove doors and drawers first.
- Mask off countertops, appliances, and the inside of cabinet openings if you are not painting interiors.
- Use a brush for inside corners and profile details, then roll the flats.
- Watch for drips on the inner edge of the face frame. They love to hide there.
Ideal conditions
Paint behaves best in the conditions it was designed for. If you want better leveling and fewer surprises, aim for moderate temperatures and humidity, and avoid blasting the work with direct fan airflow.
- Follow the label for minimum and maximum temperature.
- Keep humidity in mind. High humidity can slow dry time and leave paint feeling soft longer.
- Good airflow helps, but fans pointed right at wet doors can dry the surface too fast and hurt leveling.
Common problems and fixes
Brush marks
- Switch to a better brush and stop overworking as paint tacks.
- Consider a compatible conditioner to improve leveling.
- Let it dry, sand smooth, then recoat.
Roller stipple
- Use a finer nap roller or foam.
- Roll lighter on the final pass and tip off once.
- Let it dry, then sand lightly and recoat.
Fish-eyes (little craters)
- This is usually contamination: grease, silicone, or cleaner residue.
- Stop, clean thoroughly, sand, and re-prime.
Bleed-through (yellow or brown staining)
- Common on oak, cherry, mahogany, and knotty pine.
- Spot-prime with shellac-based primer, then recoat.
- If you are working with maple, watch for discoloration or blotchy staining and spot test early.
Chipping around pulls and edges
- Usually insufficient prep, impacts, or not enough cure time.
- Touch up after the paint has cured, and consider adding soft-close bumpers if you do not already have them.
Durability upgrades I love
- Soft-close hinges or soft-close adapters to reduce slamming.
- New door bumpers: replace old flattened ones so doors do not smack the frame.
- Felt pads where trash pull-outs hit.
- Quality hardware: it reduces wear because people do not grip the door edges as much.
FAQ
Do I have to sand if I use a deglosser?
In my experience, yes, at least lightly. Chemical deglossers can help, but sanding is your most reliable way to ensure adhesion and a smoother finish.
Can I paint cabinets without removing the doors?
You can, but you will not get the same clean edges or even coverage around hinges, and it is much harder to avoid drips. If you want a factory-smooth look, take the doors off.
How many coats of paint do cabinets need?
Typically two topcoats over primer. If you are changing from very dark to very light, you might need an extra coat. Thin, even coats beat thick ones every time.
Should I clear coat painted cabinets?
Usually no. Many cabinet-grade paints are designed as a complete system and a clear coat can cause adhesion issues or change sheen. If you want extra protection, choose a cabinet paint known for a hard cure and let it fully cure before heavy use.
When can I reinstall doors?
Follow your paint’s guidance, but a practical rule is: reinstall when the finish feels dry and firm, and does not dent from a gentle fingernail press in a hidden spot. Even after reinstall, treat cabinets gently for a few weeks while they fully cure.
Final checklist
- You cleaned until rinse water stayed clean.
- You sanded to a uniform dull finish and removed all dust.
- You used a primer that matches your cabinet material and stain risk.
- You chose a cabinet-grade paint with a hard cure.
- You applied thin coats and resisted the urge to fix tiny imperfections mid-dry.
- You sanded lightly between coats as needed for a smooth feel.
- You planned for cure time before you go back to normal wear and tear.
If you are unsure which primer or paint path fits your cabinets, take one door to a reputable paint store and ask for product recommendations based on your cabinet material, current finish, and whether you are dealing with oak grain or stain risks. A few minutes of matching the system up front saves you days of frustration later.