Pick the right sheen, primer, and mold-resistant paint for steamy bathrooms and hard-working kitchens. Brand recommendations, where to use each finish, and p...
If your tub or shower has black specks, peeling edges, or that "why is the drywall soft?" feeling near the corner, odds are your caulk is past its prime. The good news is recaulking is one of the highest-impact bathroom fixes you can do in an afternoon. The not-so-fun news is: the result depends almost entirely on prep. Clean removal and a dry surface are what make a bead look professional and actually stay mold-free.
This guide walks you through removing old silicone and laying a smooth, watertight seal, even if you have never held a caulk gun before.

Choose the right caulk
In wet areas, you want a product that stays flexible and truly waterproof. For tubs and showers, the most common recommendation is 100% silicone.
Best choice for most tubs and showers
- 100% silicone, kitchen and bath rated: Waterproof, flexible, long-lasting. Harder to tool than acrylic, but worth it.
- Mold-resistant formula: Look for “mildew resistant” or “mold resistant” on the label. It will not prevent all mold forever, but it helps.
Also worth knowing
- High-quality hybrid sealants (often labeled silane-modified polymer or similar) can also work in wet areas and may tool easier than silicone. If you go that route, make sure it is specifically kitchen and bath rated and approved for continuous water exposure per the label.
When not to use silicone
- If you need paintable caulk: Silicone is not paintable. If the joint is on drywall outside the wet zone, a high-quality paintable bathroom caulk can make sense. Inside the shower and tub surround, stick with a waterproof sealant approved for that use.
- If you are caulking a huge moving gap: Gaps larger than about 1/4 inch should be addressed with backer rod (more on that below), not a mountain of caulk.
Pro tip from too many callbacks: If your old caulk is silicone, your new caulk should usually be silicone too. Silicone does not reliably bond to leftover silicone residue. That is why removal matters so much.
Tools and supplies
You do not need a garage full of gadgets. You do need the right basics.
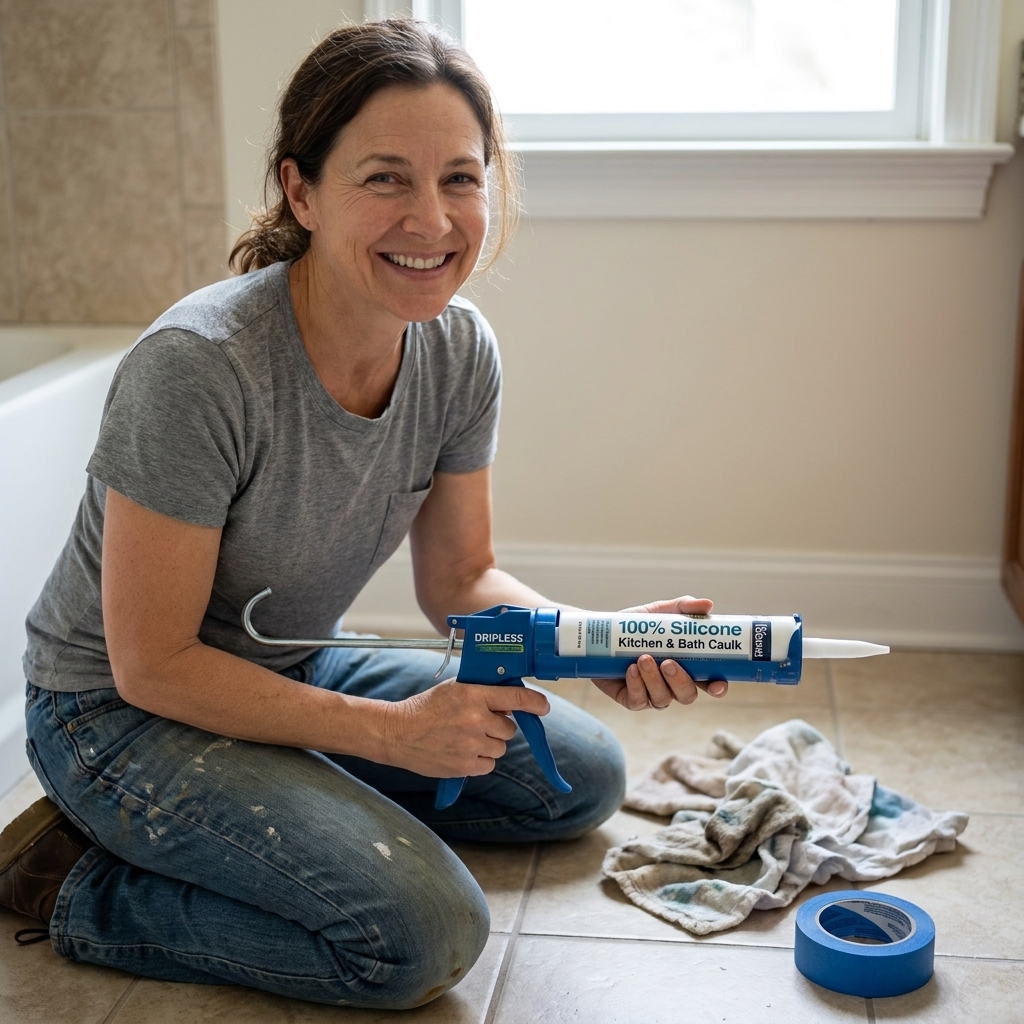
- Caulk: 100% silicone, kitchen and bath rated (clear or color-matched white, almond, gray, etc.)
- Caulk gun: A smooth-rod dripless gun is easier for beginners
- Caulk remover tool or a sharp utility knife with fresh blades
- Plastic razor scraper (safer on acrylic tubs and fiberglass)
- Needle-nose pliers (for pulling long strips)
- Rubbing alcohol (isopropyl alcohol) and clean rags or paper towels
- Non-scratch scrub pad
- Painter’s tape (optional, but helpful for super crisp lines)
- Disposable gloves
- Fan or dehumidifier (for drying)
- Backer rod (only if gaps are wide or deep)
Step 1: Remove old caulk
This is the part everyone wants to rush. Do not. Any leftover silicone film is a common reason new caulk peels within weeks.
How to remove silicone safely
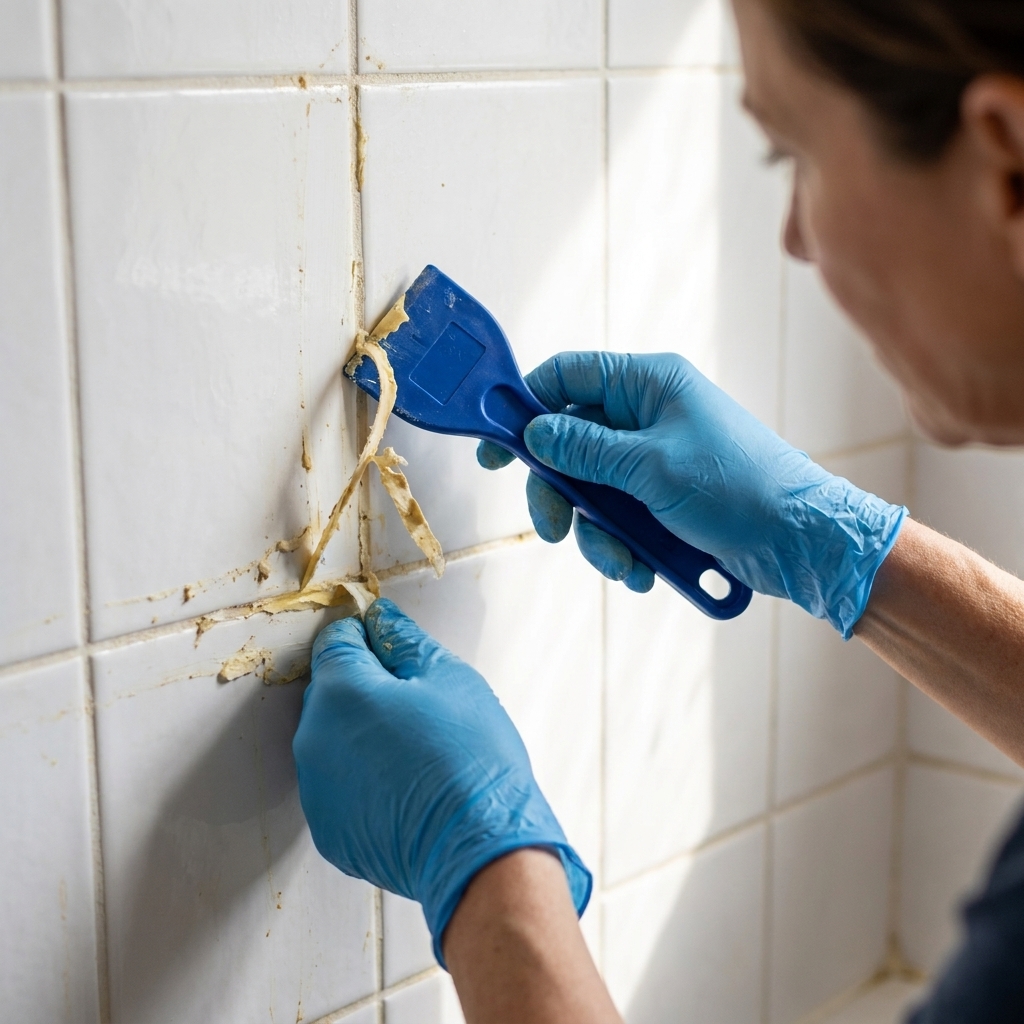
- Score both edges: Run a utility knife lightly along the top and bottom edges of the old bead. Keep the blade shallow so you do not gouge acrylic, fiberglass, or grout.
- Lift and pull: Use a caulk tool or plastic scraper to lift one end, then pull slowly. Needle-nose pliers help grab stubborn strips.
- Scrape residue: Use a plastic razor scraper or caulk tool to remove the thin leftover film.
- Use caulk remover gel if needed: For really stuck silicone, apply silicone caulk remover per label instructions, wait the full dwell time, then scrape again.
Watch-outs: Avoid metal razor blades on acrylic tubs and fiberglass shower pans unless you are very confident. Scratches happen fast and they love to hold grime.
Step 2: Clean and disinfect
Caulk hates soap scum, body oils, and leftover cleaner residue. Mold also loves any gunk you trap under fresh silicone. Your goal is a clean, dry, squeaky surface.
Cleaning order that works
- Wash: Clean the joint area with a bathroom cleaner that cuts soap scum. Rinse well.
- Disinfect (if you saw mold): Use a mildew cleaner appropriate for your surfaces and follow the dwell time. Rinse thoroughly.
- Final wipe: Wipe the joint with rubbing alcohol on a clean rag to remove oils and help the surface dry residue-free.
Safety note: Ventilate the room, wear gloves, and follow product label directions when using mildew cleaners or caulk remover gels.
Important: Do not mix cleaners. If you used any bleach-based product, rinse extremely well before using anything else.
Step 3: Dry it out
Silicone can cure in normal humid air, but it does not like liquid water on the surfaces during installation. Water hiding in a corner joint is a recipe for poor adhesion and early failure.
- Minimum dry time: Aim for at least 8 to 12 hours after the final rinse and alcohol wipe.
- Best practice: 24 hours of dry time if your bathroom tends to stay humid.
- Speed it up: Run the exhaust fan, crack a window, and consider a small dehumidifier.
If the tub or shower was used recently, wait. Caulking over a damp joint is like putting a bandage on a wet countertop. It might stick today, but it will not last.
Step 4: Prep the joint
Check the gap
Caulk works best when it is not excessively thick. If the gap is wide or deep, add backer rod first. It gives the caulk something to bridge across and helps it flex properly.
- Rule of thumb: If the gap is larger than about 1/4 inch, use backer rod.
- Aim for a controlled bead: A good target is a joint that is wider than it is deep (often roughly a 2:1 width-to-depth look), not a deep trench filled with silicone.
- Avoid three-sided bonding: Backer rod helps keep the caulk bonded to the two faces you want, not glued to the back of a deep joint where it cannot stretch correctly.
- How to install: Press it in gently with a blunt tool so it sits below the surface, leaving room for a reasonable bead of silicone.
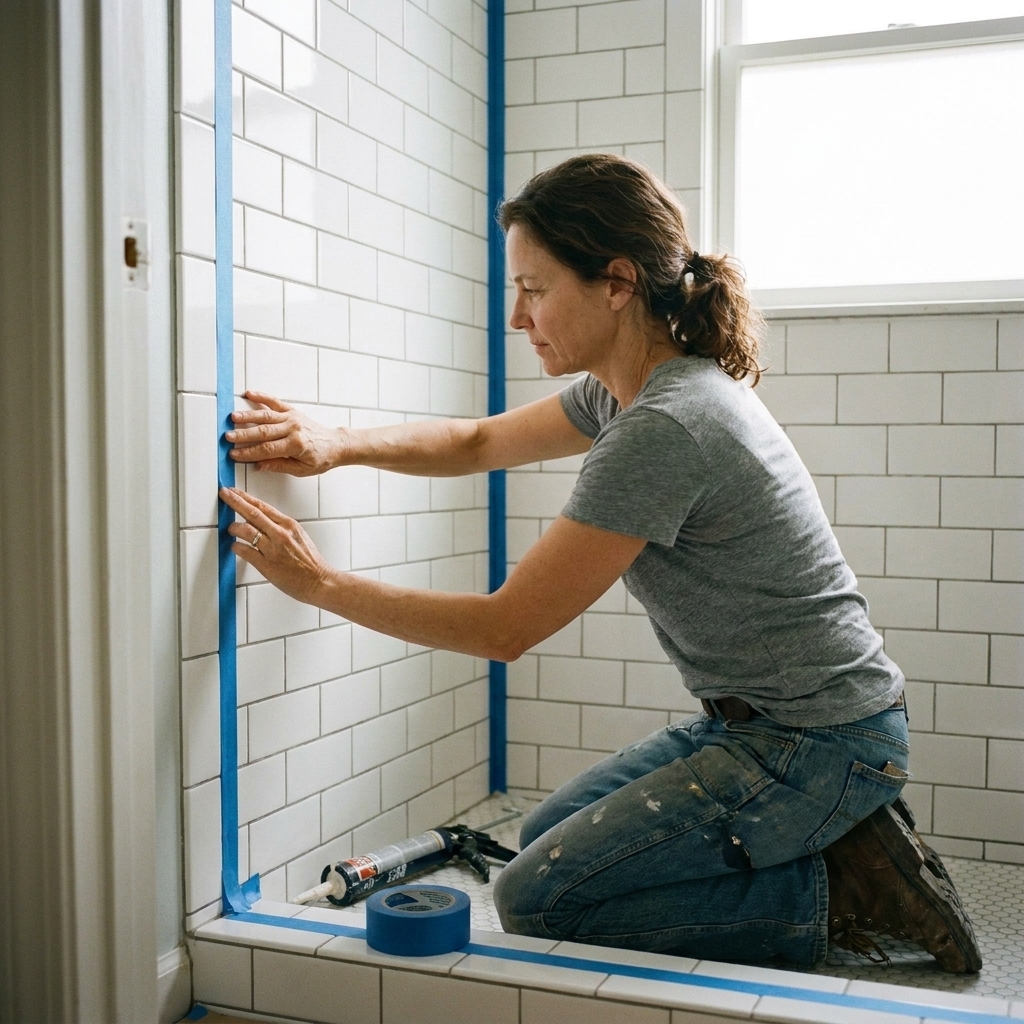
Optional: Tape the edges
Painter’s tape is not mandatory, but it is beginner magic for a clean bead. Apply tape along both sides of the joint, leaving the exact width you want for your caulk line.
Step 5: Cut the tip
The size and angle of your cut controls the bead. Most messy caulk jobs are simply too much caulk coming out too fast.
- Cut at a 45-degree angle.
- Start small: Aim for a hole around 1/8 inch. You can always cut more. You cannot un-cut a tip.
- Puncture the inner seal if your tube has one (many caulk guns have a built-in puncture rod).
Control tip: Practice on cardboard for 20 seconds. You are training your trigger hand to move steadily.
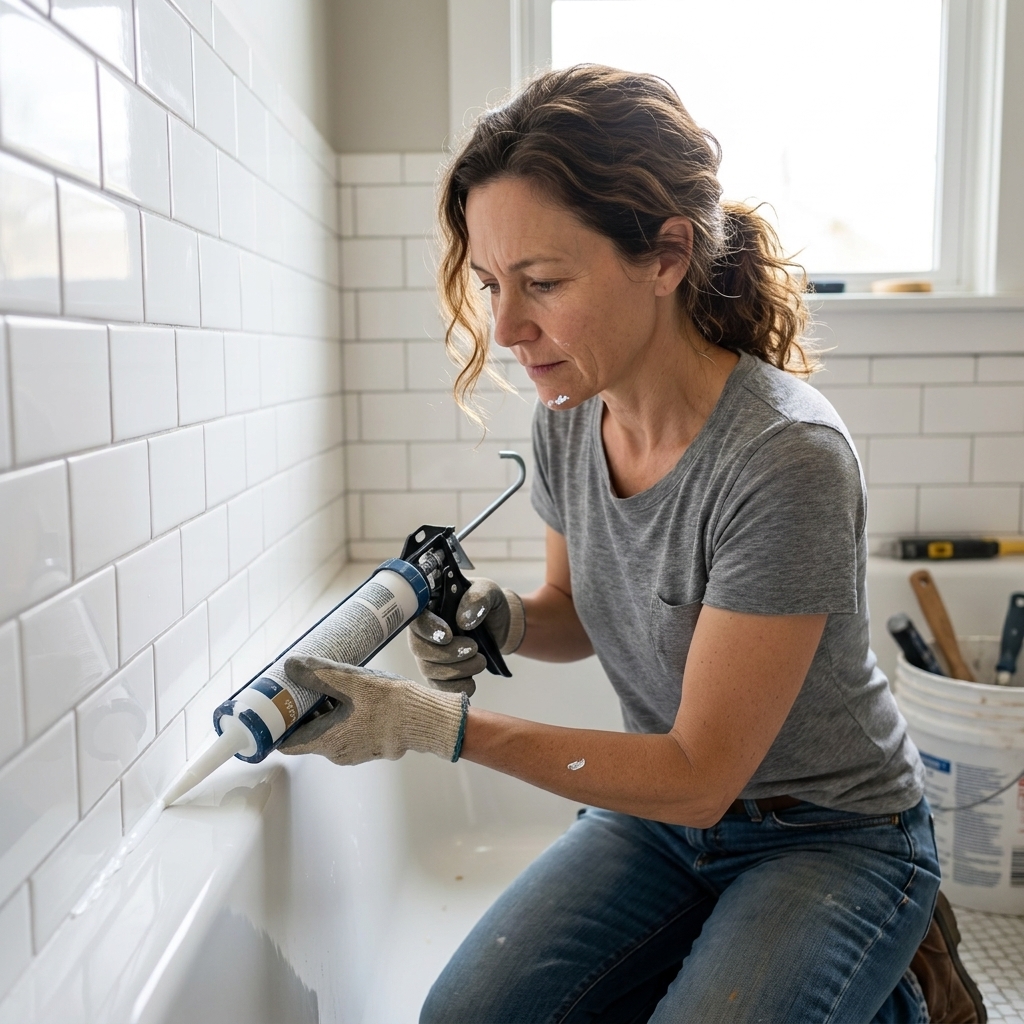
Step 6: Apply a steady bead
Pick a starting point you can reach comfortably and work in one direction. Most people do better pulling the gun toward themselves rather than pushing away.
How to get a clean line
- Hold the tip tight to the joint so it bridges both surfaces.
- Move at a consistent speed while applying gentle, even pressure on the trigger.
- Do not overfill: You want just enough caulk to tool into a smooth concave shape.
If you stop mid-run, it is okay. Just overlap slightly when you restart and tool it well. The tooling step blends small imperfections.
Step 7: Tool the bead
Tooling is where it goes from “DIY” to “who did your bathroom work?” You have a short working time with silicone, so have your tool and paper towels ready.
Two simple tooling options
- Caulk finishing tool: Pick a radius that matches the joint and pull it in one smooth pass.
- Gloved finger: Lightly mist your glove with clean water or use a manufacturer-approved tooling spray, then gently pull your finger along the bead. Wipe your glove often.
Important: Use liquids sparingly and follow the caulk manufacturer’s guidance. You are reducing drag, not washing the caulk away.
If you used painter’s tape
Peel the tape off immediately after tooling, while the silicone is still wet. Pull it back on itself slowly for a crisp edge.
Step 8: Let it cure
Silicone needs time to cure before it gets wet. If you shower too soon, you can trap moisture, weaken adhesion, and invite mold.
- Typical cure before water exposure: 24 hours (check your tube label, some call for 24 to 48 hours)
- Plan for longer in cool or humid bathrooms: Cure times can stretch when temperatures are low or humidity stays high.
- Ventilation helps: Run the fan and keep the bathroom as dry as possible.
If you only remember one thing: dry surfaces in, dry time out. That is how you get a seal that lasts.
Common mistakes
- Leaving old silicone behind: New silicone will peel off residue. Remove completely, then alcohol wipe.
- Caulking over damp corners: Wait longer. Use a fan or dehumidifier.
- Using acrylic caulk in the shower: It is easier to apply, but it is not as waterproof or durable as silicone in wet zones.
- Cutting the tip too big: Start small. Thin beads tool better and look cleaner.
- Skipping tooling: A tooled bead sheds water and resists mold better than a lumpy line.
- Ignoring movement: If a corner seam keeps cracking, do not just re-grout and hope. Changes of plane want flexible sealant, and repeat failures can point to movement or water getting where it should not.
Where to caulk
In most bathrooms, you will caulk:
- Tub to tile (the horizontal seam along the tub deck)
- Shower pan to tile
- Vertical inside corners where two walls meet (tile to tile)
- Around fixtures only if there is a visible gap and the trim plate does not seal well (use restraint here, you do not want to trap water inside some assemblies)
What not to do: Avoid sealing weep paths on certain shower systems, and do not caulk over areas designed to drain. When in doubt, follow the fixture manufacturer’s instructions.
Keep caulk mold-free
Mold is usually a moisture and ventilation problem, not a “bad caulk” problem.
- Run the bath fan during showers and for 20 minutes after.
- Squeegee the walls if you have tile and glass. Thirty seconds makes a big difference.
- Fix drips from the showerhead arm, tub spout, or valve trim. Constant wetting shortens caulk life.
- Clean gently: Skip abrasive pads on caulk lines. Mild cleaner and a soft brush is enough.
- Choose the right color: Bright white can look crisp but also shows grime. Clear can be forgiving with mixed materials, but some clear caulks can yellow over time depending on product and exposure.
FAQ
Can I caulk over old caulk?
In a dry area, sometimes you can get away with it. In a tub or shower, I do not recommend it. Silicone over silicone residue is notorious for peeling. For a watertight seal, remove it all.
Clear or white silicone?
White hides uneven gaps better and looks crisp with white tubs and many showers. Clear is forgiving with mixed materials or colored tile, but it can show trapped grime if prep is not perfect. If your goal is “looks like a pro did it,” white or a color-matched silicone is usually easier.
How long does shower caulk last?
Quality silicone, installed on a clean, dry surface, often lasts 5 to 10 years. Heavy daily use, harsh cleaners, and poor ventilation can shorten that.
Should I fill the tub with water before caulking?
This is one of those old-school debates. The idea is to load the tub so the joint is in its “stretched” position, then caulk. In practice, the biggest factors are still prep and cure time. If your tub noticeably flexes when you step in, you can partially fill it to mimic load, then let the caulk cure fully before draining. Just keep everything dry around the joint while you work.
My caulk keeps turning black. What gives?
Usually it is persistent moisture: a weak bath fan, daily showers with little dry-out time, or water sitting on a flat tub ledge. Improve ventilation, squeegee, and make sure the bead is tooled so water sheds rather than puddles.
Quick checklist
- Use 100% silicone kitchen and bath caulk (or a bath-rated hybrid approved for wet areas)
- Remove old silicone completely
- Keep the joint dry for 24 hours before and 24 hours after (longer if cool or humid)
- Cut the tip small
- Tool the bead for a smooth, water-shedding finish
Do those five things and your recaulk job will look clean, stay stuck, and stop the water from sneaking behind your walls.