A clear, contractor-smart breakdown of when permits are commonly required for kitchens and baths, what they cost, how to apply, and how to pass inspections w...
If you have ever watched a shower pan get dropped onto a questionable subfloor with a “good enough” drain connection, you already know why shower bases get a bad reputation. A pre-fab acrylic or fiberglass shower pan can be rock-solid and leak-free for decades, but only if three things happen: the floor is stiff and flat, the pan is fully supported the way the manufacturer requires (often mortar), and the drain assembly is installed exactly as intended.
This guide walks you through the process I used on design-build jobs for years, translated for real-life DIYers. I will point out the common failure points, the tiny details that matter, and the order of operations that saves you from pulling a brand-new pan back out.
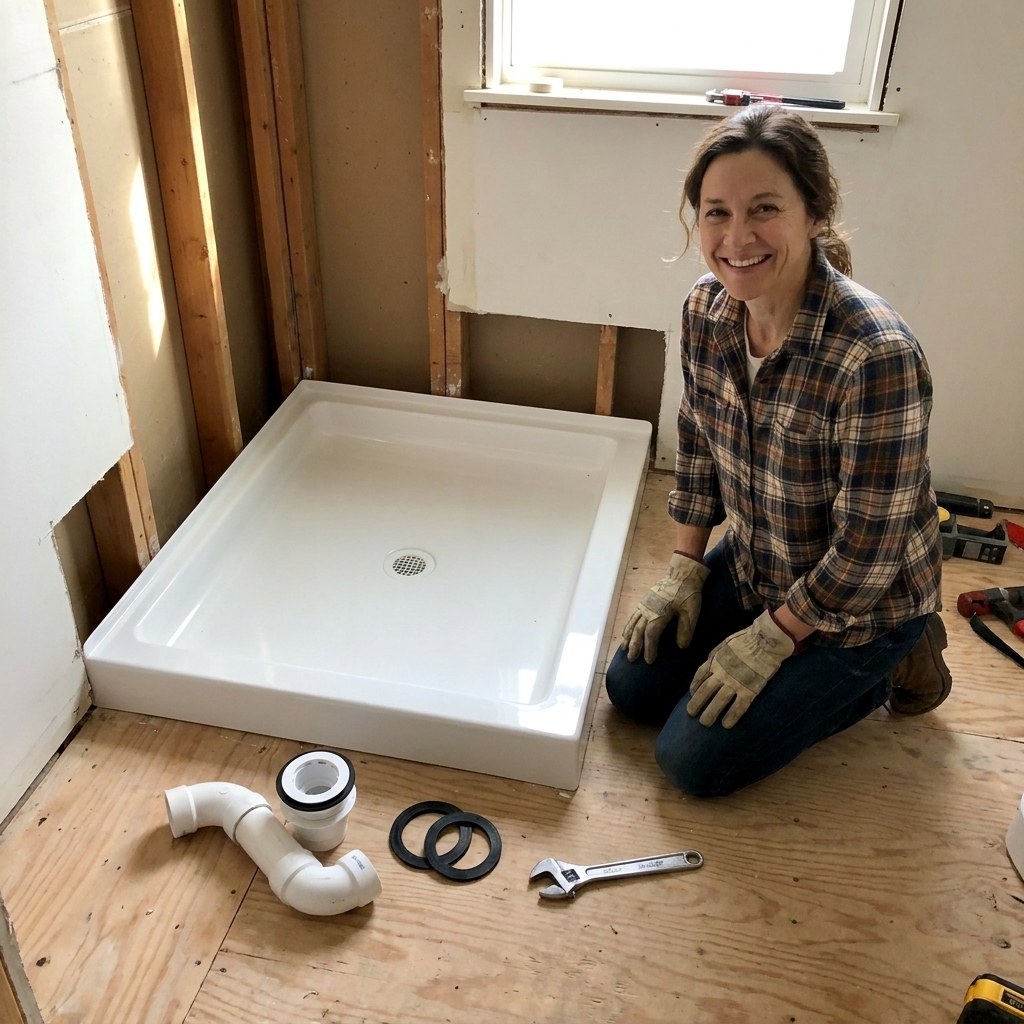
Before you start
Pre-fab shower pans are a great choice when you want a predictable slope and quicker install than a custom mud pan. They are also less forgiving than tile when the framing is out of square.
Quick fit check
- Size: Confirm the base size matches framing and finished wall thickness. For alcoves, you usually want studs, backer board, and tile all planned before you commit.
- Drain location: The drain must align with your plumbing without forcing the trap to do gymnastics.
- Threshold height: Think about curb height versus your finished bathroom floor height.
- Wall system: Many bases are designed for tile walls (backer board overlaps the flange). Some are made to pair with direct-to-stud wall panels.
Tools and materials
You do not need a truck full of specialty tools, but you do need the right drain parts and a level that is not lying to you.
Tools
- 4 ft level (and a short torpedo level)
- Tape measure, pencil, straightedge
- Drill/driver
- Utility knife
- Bucket and mixing paddle (or a hoe for mortar)
- Putty knife or margin trowel
- Oscillating multi-tool or saw (for subfloor patching as needed)
- PVC/ABS cutter and deburring tool (or sandpaper)
- Channel-lock pliers (for some drain styles)
- Test plug for the drain (for leak testing)
Materials
- Pre-fab shower pan (acrylic or fiberglass)
- Matching drain assembly (PVC or ABS to match your existing pipe)
- Mortar bed material: sand/topping mix, mortar mix, or the exact product specified by your pan manufacturer (avoid lightweight or rapid-set products unless approved)
- Roofing felt or 6 mil poly (slip sheet, optional but helpful)
- Construction adhesive and plywood (if patching or flattening subfloor)
- Deck screws (subfloor re-fastening)
- 100% silicone (often required under drain flange or per manufacturer)
- Plumber’s putty (only if the drain instructions allow it)
- PVC or ABS cement and primer (as required by your plumbing code)
My rule: Buy the drain kit recommended by the shower pan manufacturer whenever possible. Mixing brands is where “it almost fit” turns into a slow leak.
Step 1: Check framing and subfloor
A shower pan is only as good as what is underneath it. Flex leads to movement, squeaks, and drain stress. If you are tiling walls, that same movement can also crack grout and tile.
What you are checking
- Subfloor thickness: Many bathrooms have 3/4 inch subfloor, but it varies a lot by era and region. You might find 5/8 inch, 1/2 inch, plank boards, or patchwork. If you have bounce, fix it now.
- Joist stiffness: If the floor deflects when you walk, add blocking, sister joists, or another layer of plywood as needed.
- Flatness: The pan does not need the floor to be perfectly level, but it does need full support. High spots can keep the base from sitting into mortar evenly.
- Square and plumb: Check studs for plumb and corners for square, especially on alcove installations.
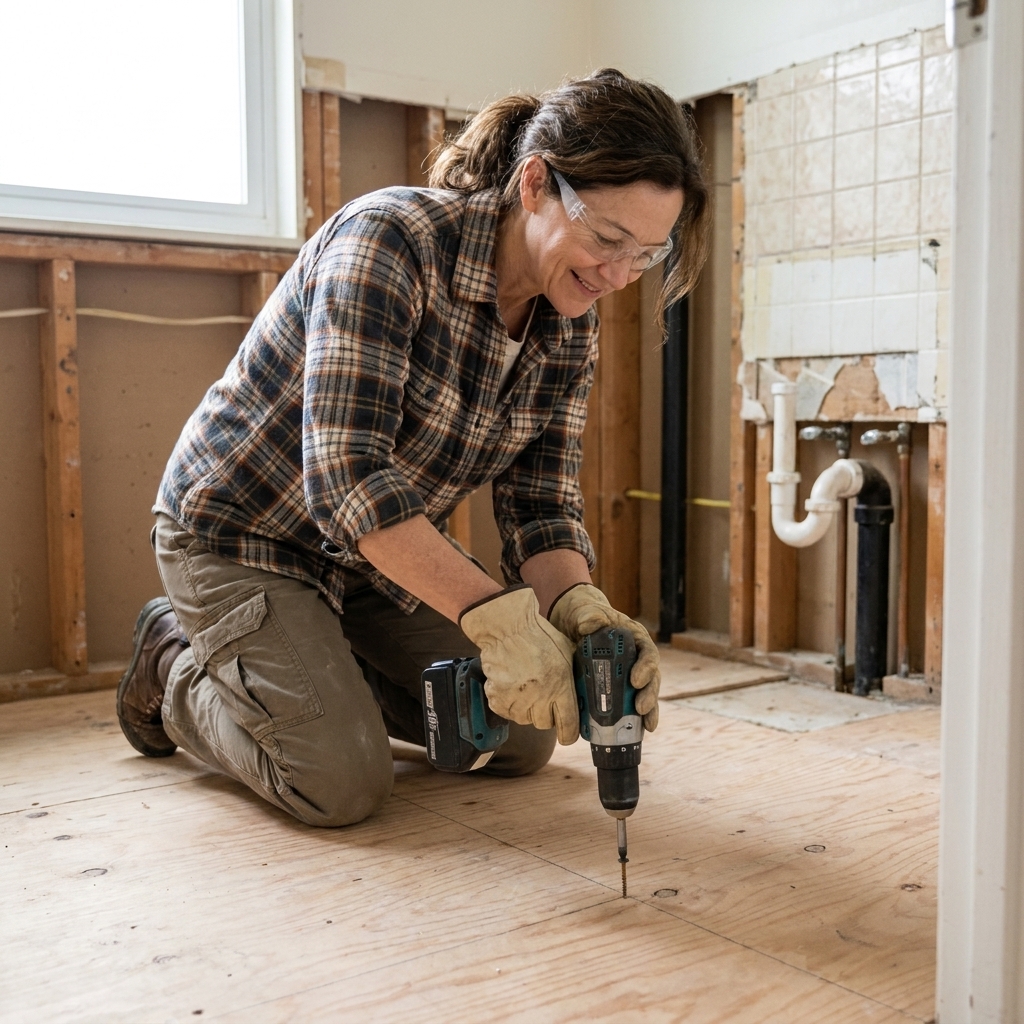
Re-fastening matters
Before anything else, run screws through the subfloor into the joists to eliminate squeaks and tighten the surface. A quiet floor is usually a stiff floor.
Step 2: Dry-fit and mark
This is the step that prevents the “why is the drain off by half an inch?” moment.
Dry-fit checklist
- Set the pan in place with no mortar.
- Confirm the flange sits tight to studs with no bowing.
- Check for rocking. If it rocks, you likely have a high spot on the subfloor or the framing is twisted.
- Locate the drain hole centerline and mark it on the subfloor.
- Mark the outline of the pan footprint on the subfloor. This becomes your mortar target zone.
Pro tip: If the pan rocks during dry-fit, do not assume mortar will “fix it.” Mortar supports. It does not magically correct major high spots. Plane or sand high spots, or patch low areas so the pan can sit calmly.
Step 3: Prep the drain and trap
Most pre-fab shower pans in new work are designed for a 2 inch shower drain and a P-trap directly below, but older installs are sometimes 1-1/2 inch. Local code can vary, so verify what you have and what your jurisdiction requires, and pull a permit if required. A lot of leaks I have seen started as uninspected plumbing shortcuts.
Measurements that bite DIYers
- Trap location: The trap needs to align with the pan’s drain hole without forcing the pipe sideways.
- Riser height: The vertical pipe that meets the drain body must be cut to the right height for your drain style.
- Access: If you have access from below, your life is easier. If not, be extra careful with measurements and solvent welds.
Measure-twice callout: The riser height is the one cut you cannot “un-cut.” Dry-fit the drain parts, mark the pipe, and confirm your measurement again before you commit.
Drain connection styles
Your shower pan drain typically connects one of these ways:
- Compression (rubber donut) drain: Common for acrylic bases. The drain body drops through the pan, and a rubber gasket compresses around the 2 inch pipe. Great when you cannot glue from below.
- Glue-on drain: Solvent-weld connection to the riser pipe. Usually needs access and very accurate pipe height.
- No-caulk drain: A common term for compression-style assemblies, but read the instructions because parts vary.
Match materials: PVC drain with PVC pipe, ABS drain with ABS pipe. Adapters exist, but do not freestyle this part.
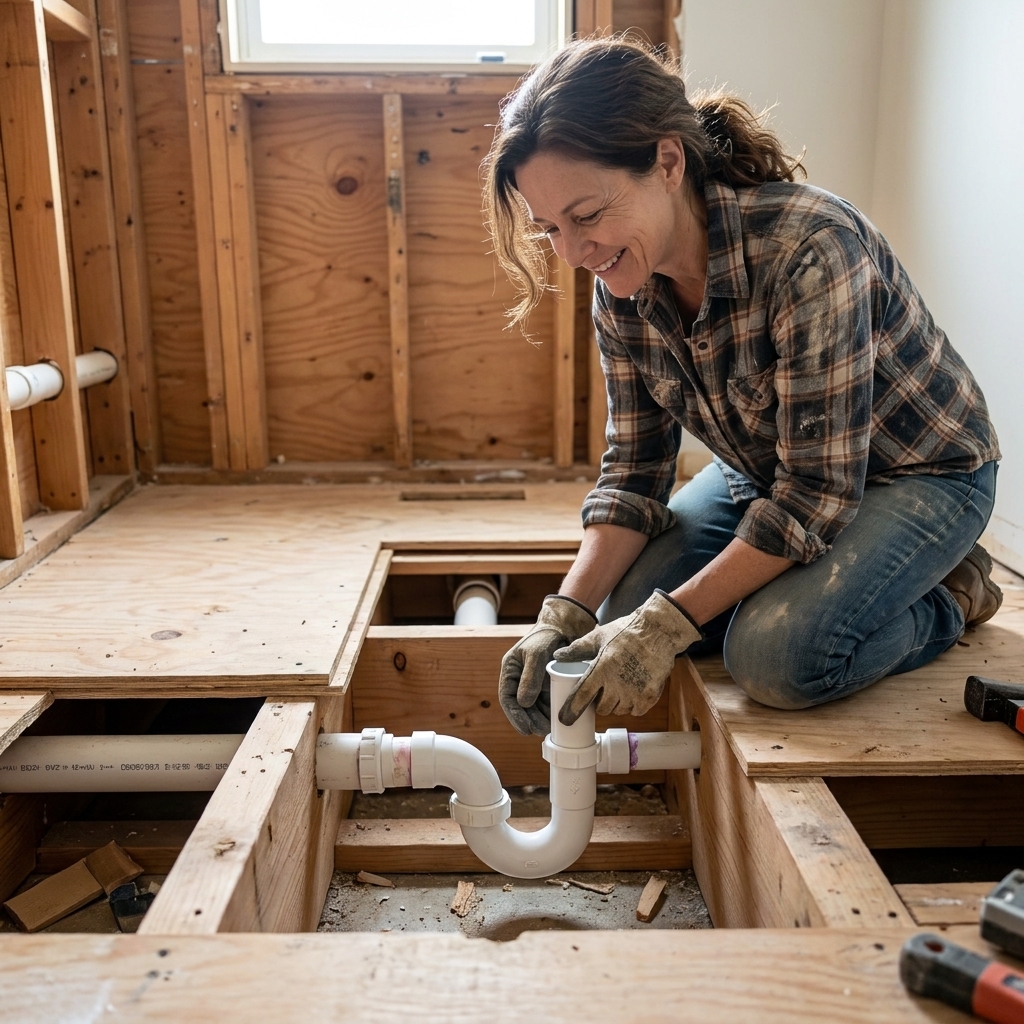
Step 4: Plan the support bed
Many acrylic and fiberglass shower pans are designed to be set in mortar or another support bed so the floor does not flex when someone stands on it. Some manufacturers allow direct-set on a perfectly flat subfloor or specify foam or an adhesive system instead. Your manual is the boss.
Read the instructions first
Some pans call for specific materials or prohibit certain products. Follow their spec even if your uncle has “always done it this way.” If the instructions require mortar and you skip it, you can void the warranty and create squeaks, flex, and drain stress.
Support bed basics
- Consistency: Think thick peanut butter. Wet enough to compress, dry enough to hold shape.
- Coverage: You want support where the pan floor will land, not under the flange unless the manufacturer calls for it.
- Height: Enough so the pan compresses into it and becomes fully supported. Not so much that the pan floats high and your drain no longer lines up.
Slip sheet tip: Laying roofing felt or 6 mil poly over the subfloor before mortar can help prevent the wood from sucking moisture out of the mix too fast and can reduce squeaks. Keep it flat with no big wrinkles.
Step 5: Install the drain body
Many drains are installed to the pan first, then connected to the pipe after the pan is set. Some are connected from below. Your drain kit instructions win, but here are the common principles.
Typical drain assembly sequence
- Clean the drain hole area on the pan so it is dust-free and dry.
- Apply the specified sealant under the drain flange. Many manufacturers call for 100% silicone. Some drains allow plumber’s putty, but silicone is usually safer for acrylic because some putties can stain or react with plastics over time.
- Insert the drain body through the pan opening.
- From below, install the gasket and locknut (or compression parts), tightening evenly.
Do not over-tighten: Cranking down like you are tightening lug nuts can crack acrylic or distort gaskets. Snug plus a bit more is usually the sweet spot. If you see the acrylic deforming, stop.
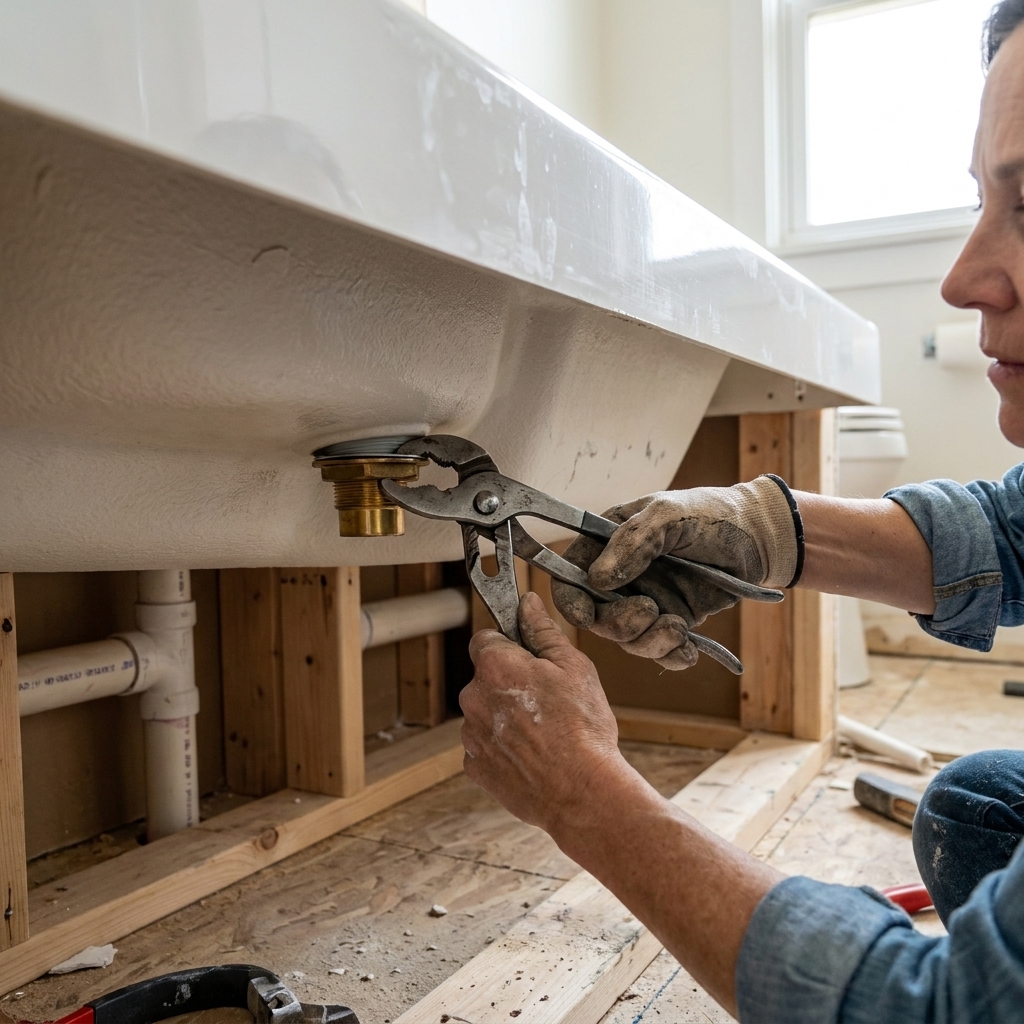
Step 6: Set the pan and level it
This is the moment where everything needs to be ready. Once mortar is down, you are on the clock, and working time varies by product. Do a dry run, stage your tools, and have help lined up if the pan is awkward.
Setting sequence
- Do a final sweep and vacuum of the subfloor.
- Lay your slip sheet if you are using one.
- Place mortar mounds or a continuous bed inside the footprint outline you marked. Avoid the drain opening area unless the manufacturer says otherwise.
- Carefully lower the pan straight down into place. Do not drag it through mortar.
- Step into the pan with clean shoes or socks and gently press around the floor area to seat it evenly. You are compressing mortar, not doing a stomping dance.
- Check level in multiple directions: front to back, left to right, and diagonals.
Leveling rules
- The pan’s flange should sit tight to studs. If there is a gap, your studs may be bowed or the pan is not fully seated.
- Do not shim under the pan floor. Shims create point loads and squeaks. If shimming is needed, it is typically under the flange per manufacturer guidance, or you correct the subfloor.
- Let the mortar do the work. If you are out of level, lift the pan back out immediately and adjust mortar. Do not try to force it into position after it starts setting.
Once level, do not walk in the pan again until the support bed cures per the bag instructions, commonly 24 hours.
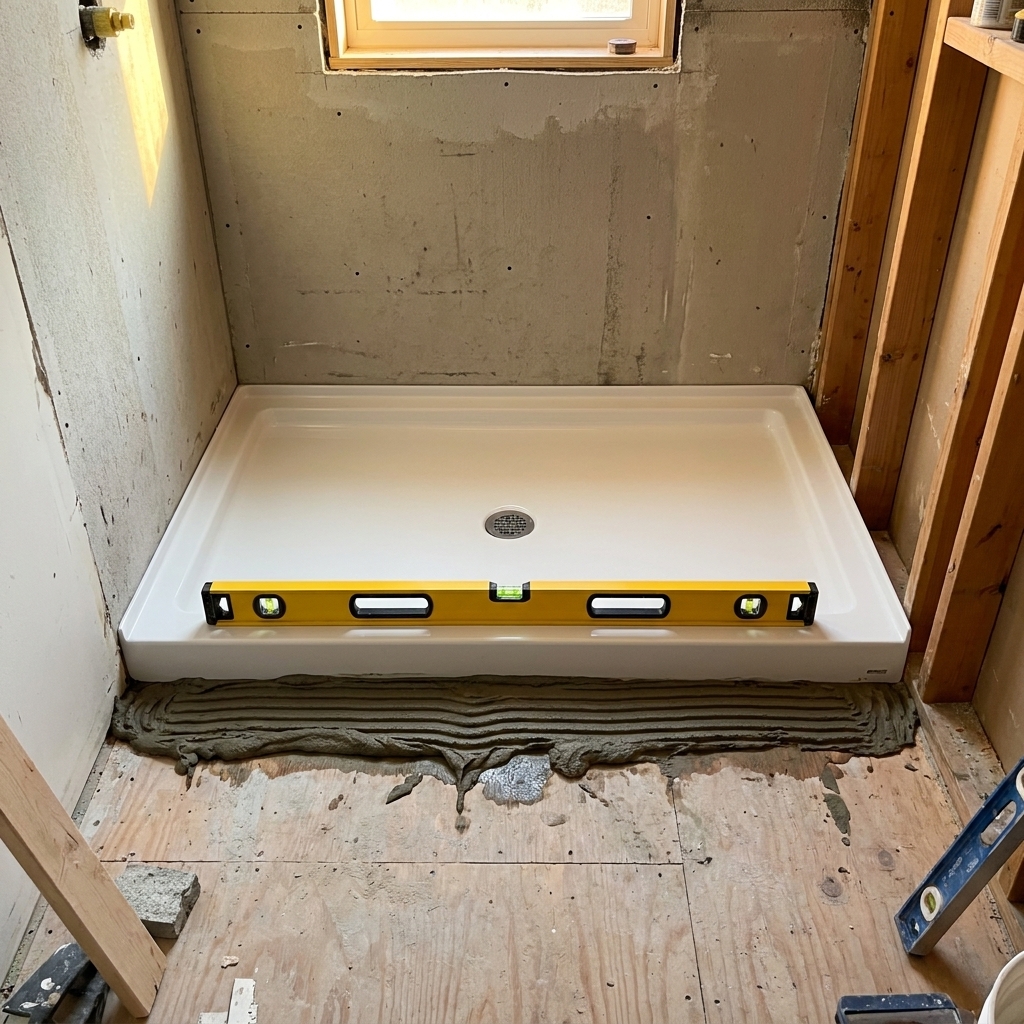
Step 7: Connect the drain
How you connect depends on the drain type and whether you have access from below.
Compression style connection
- Confirm the riser pipe is plumb and cut to the height specified by the drain instructions.
- Lubricate the rubber gasket if the manufacturer allows it (often a small amount of liquid soap). Avoid petroleum lubricants.
- Insert the gasket and tighten the compression nut per instructions until it is fully seated.
Glue-on connection
- Dry-fit everything first. Mark insertion depth on the pipe.
- Prime (if required) and cement the joint quickly, then fully seat the pipe with a twist.
- Hold for the required set time so it does not push back out.
One detail people miss: Support the trap and piping so the weight of the plumbing is not hanging off the drain connection. Add strapping or blocking as needed.
Step 8: Fasten the flange
Your pan’s flange needs to be secured to the studs the way the manufacturer specifies, typically with roofing nails or screws with washers placed just above the flange lip so you are not puncturing it.
- Fasten at the recommended intervals.
- Do not pull the flange so tight that it bows.
- Keep fasteners high enough that your wall backer can overlap the flange without a bulge.
Backer board and flange
In most tile-ready installs, cement board sits just above the horizontal deck of the pan and overlaps the flange, leaving a small gap above the pan’s ledge per the manufacturer recommendation. You are building a shingle effect so water sheds into the pan.
Waterproofing transition
Cement board is not waterproof. If you are using a surface-applied waterproofing system (sheet membrane or liquid-applied), follow that system’s detail for terminating at the shower pan flange. The basic goal is simple: any water that gets behind the tile needs a clear path down into the pan, not into the wall cavity.
Step 9: Leak test
This is where disciplined DIYers win. If you can access the plumbing from below, you can see leaks immediately. If you cannot, you still need to test.
Drain leak test
- Install a test plug in the drain down in the pipe, not just the strainer area. An in-pipe test plug helps isolate the connection and trap from the rest of the system.
- Fill the pan with a few inches of water.
- Let it sit at least 30 minutes for a quick check.
- When practical, give it a longer observation window (1 to 24 hours). Some jurisdictions, inspectors, or manufacturers expect longer tests.
- Inspect below if possible and check around the drain from above for any weeping.
If anything looks damp, stop and fix it now. Water damage is patient and expensive.
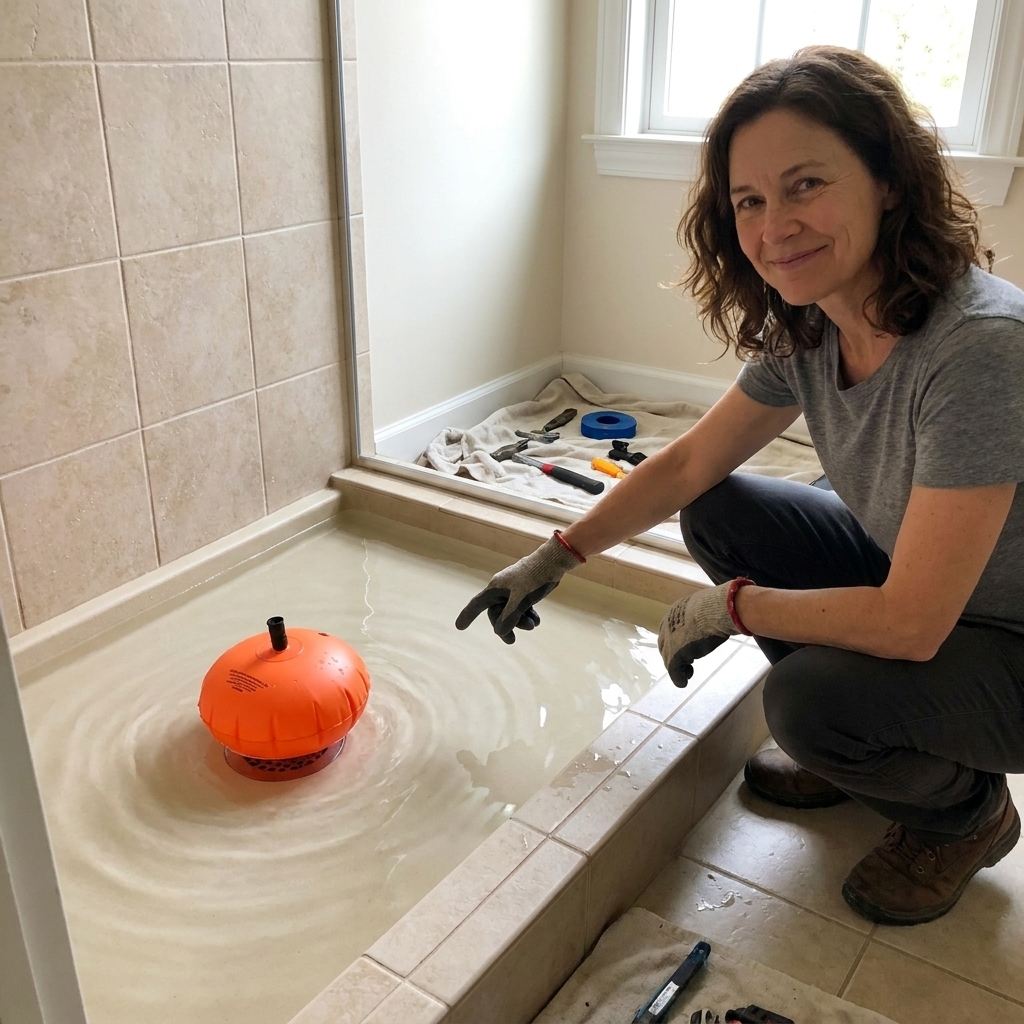
Troubleshooting
The pan squeaks when I step in it
- Most common cause: no support bed, or spotty contact under the pan floor.
- Fix: If it is newly installed and you can remove it without damage, pull it and reset correctly. Squeaks rarely get better on their own.
The pan is level, but it feels spongy
- Cause: support bed too wet, not enough material, or the pan bridged over a low spot.
- Fix: Reset with properly mixed material and correct subfloor flatness.
The drain leaks only when someone stands in the shower
- Cause: pan flexing (no support bed), loose locknut, mis-seated gasket, or unsupported piping pulling on the joint.
- Fix: Address support first, then re-seat and tighten per the drain instructions. If pan flex is the culprit, the real fix is proper bedding.
The drain does not line up with the pipe
- Cause: rough-in location is off, or the pan is not seated in the same place as dry-fit.
- Fix: Do not force it. Adjust the plumbing properly (trap location, offset, or reframing if needed).
Safety and code notes
- Permits: Many areas require a permit for shower plumbing changes. It is not just paperwork. It is a second set of eyes on leak-risk work.
- Vent and trap requirements: A shower needs proper venting and trap sizing. If you are moving the drain, consult a plumber if you are not 100% sure.
- Waterproofing continuity: The pan is only one part. Your wall waterproofing system and flange detailing matter just as much.
FAQ
Do I really need mortar under an acrylic shower pan?
If the manufacturer calls for it, yes. In my experience, proper support is the difference between a solid shower and one that squeaks, flexes, and eventually stresses the drain connection.
Can I use spray foam instead of mortar?
Only if your pan manufacturer explicitly approves it. Some foams expand unpredictably and can lift or distort a base. Mortar and sand mix products are heavy, stable, and time-tested when allowed.
Should the shower pan be perfectly level?
You want the rim and threshold level so doors and wall layouts behave. The pan’s floor is molded to slope to the drain, so do not judge slope by placing a level on the pan floor.
Silicone or plumber’s putty for the drain?
Follow the drain manufacturer instructions. If both are allowed, I lean silicone for acrylic pans because it stays flexible and avoids potential staining issues.
How long before I can tile the walls?
Wait for the support bed to cure, often 24 hours. Then you can proceed with backer board and waterproofing. I also like to keep the pan protected with a drop cloth or a piece of cardboard while you work.
Final checklist
- Subfloor is stiff, re-fastened, and flat
- Pan is dry-fit and drain center is confirmed
- Drain kit matches pipe material (PVC to PVC, ABS to ABS)
- Support bed is mixed correctly and supports the full pan floor
- Pan is level at the rim and not rocking
- Drain connection is made per instructions, with supported plumbing
- Flange is fastened correctly to studs
- Wall waterproofing is detailed to shed into the pan at the flange
- Leak test is done before walls are closed
If you want the “sleep at night” version of this project, it is the checklist above. None of it is glamorous, but it is exactly how you get a shower that performs like a pro install.