A practical comparison of undermount and drop-in sinks: mounting method, compatible countertop materials, reveal styles, install order, rim cleanup, laminate...
Nothing tests your post-remodel glow like a brand-new kitchen sink that drains like it’s thinking about it first.
I grew up holding the flashlight for my dad under sinks, and after 12 years managing kitchen and bath remodels, I can tell you this: when a slow drain shows up right after a sink, trap, or disposal install, it’s usually not a "mystery clog." It’s usually one small missed detail.
Below are six checks I’d run in a brand-new kitchen before I’d pay for a service call. I’ll also flag the moments that point to a rough-in or vent problem, which can mean the cabinet needs to come back off.
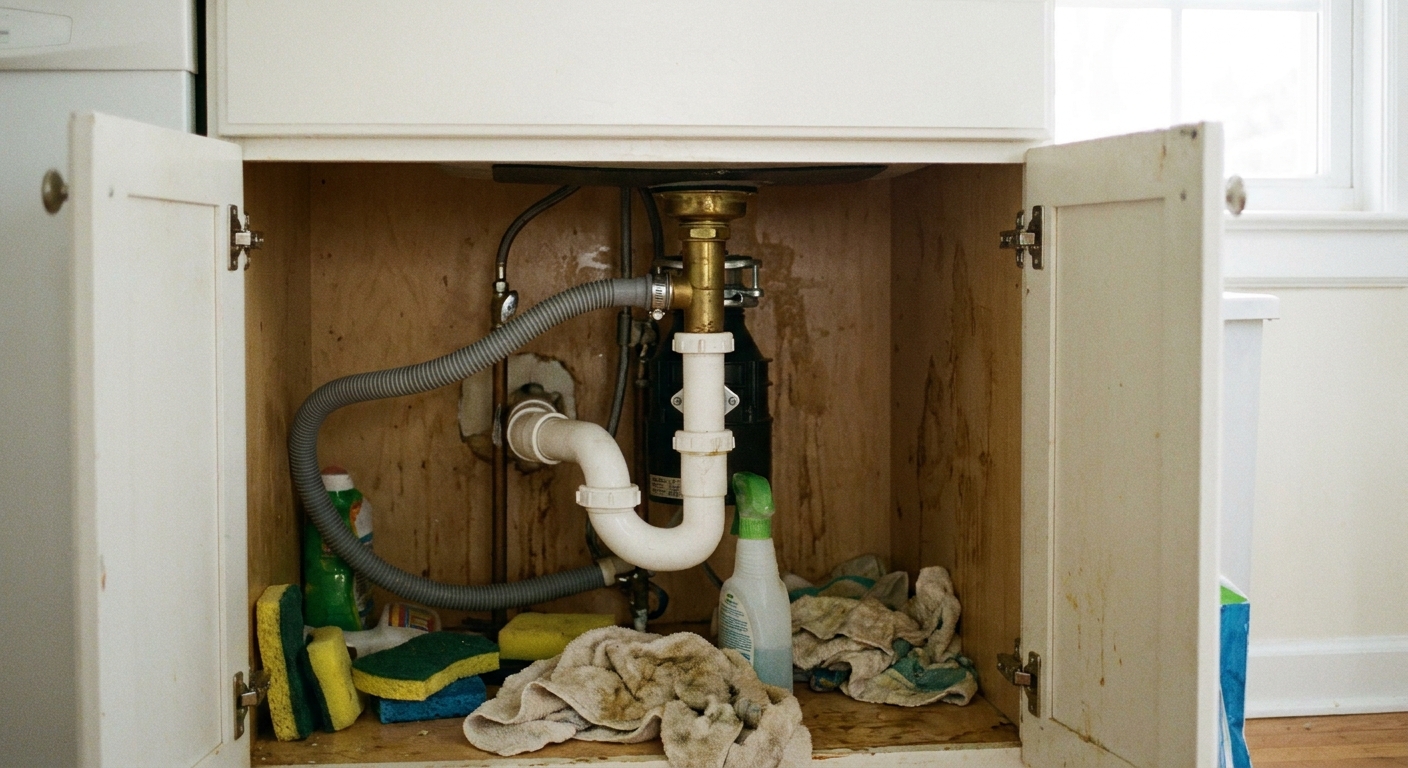
Before you start: safety and quick checks
- Confirm it is really a drain problem. If the faucet flow is weak, the issue is supply, not drainage.
- Test both bowls (if you have them). If one bowl drains fine and the other is slow, it’s more likely local to that strainer, baffle, tee, or disposal connection.
- Listen for gurgle or chug. Gurgling or a “glug-glug” while draining often points to venting, trap arm pitch, or an air-admittance valve issue.
- Skip chemical drain openers. On a new install, they can damage finishes and can stress some seals and plastics. Plus, if you end up calling a plumber, it makes the job more hazardous.
Quick tools: flashlight, towel, small bucket or pan, and (optional) channel-lock pliers. Put the bucket under the trap before you loosen anything.
If the sink backs up immediately and stays full, that can be a main line clog. But if it drains slowly from day one after a remodel, start with the checks below.
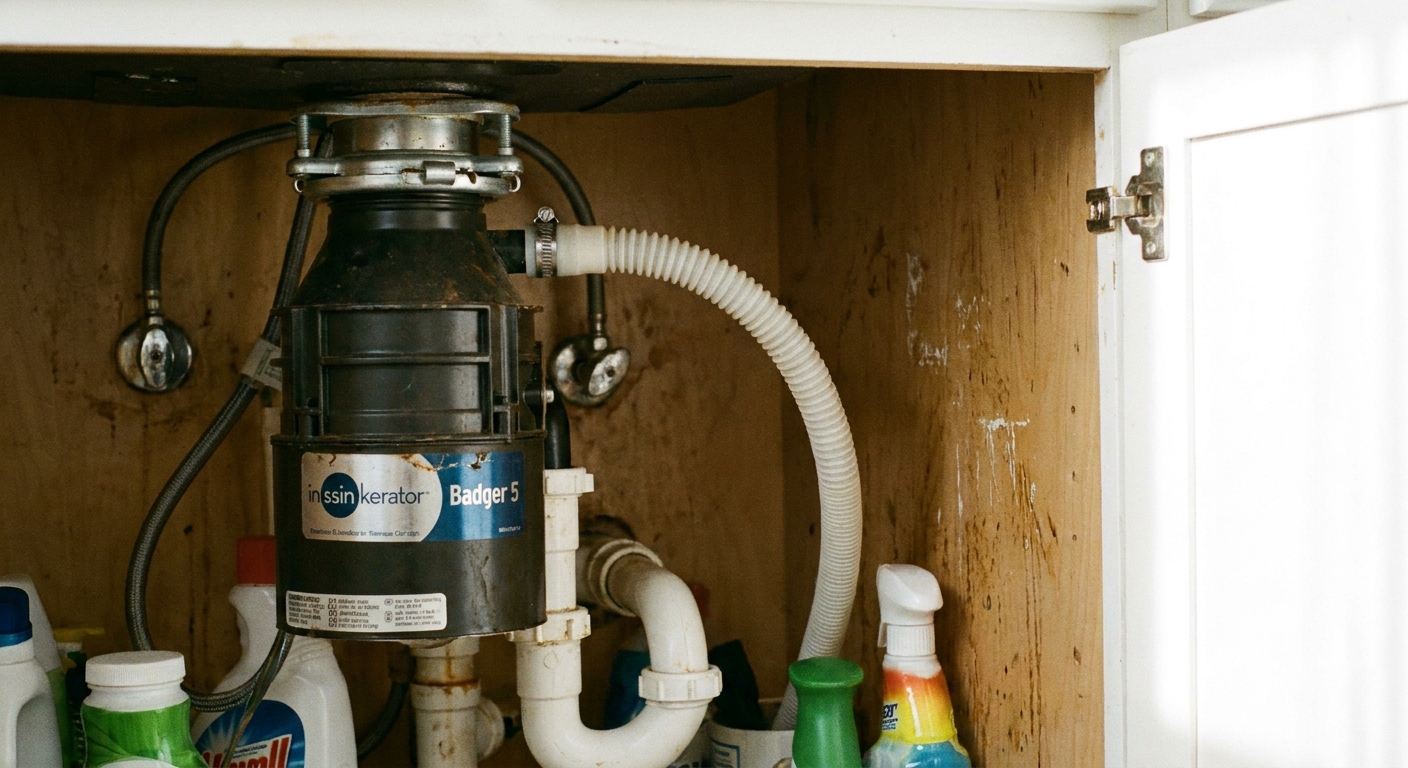
1) Disposal knockout plug still in place
When it happens: This is the classic “everything is new but nothing drains” issue after a disposal install, especially when a dishwasher ties into the disposal.
What to look for
- Dishwasher not draining and water ends up in the sink, or the sink drains slowly only when the dishwasher runs.
- You have a disposal and you can see the dishwasher hose connected to the disposal’s side inlet.
Simple check: With power OFF to the disposal, remove the dishwasher hose from the disposal inlet (have a towel and small bowl ready). Shine a flashlight into the inlet. If you see a solid plastic disc blocking the opening, the knockout plug is still there.
Fix to try
- Turn off power at the switch and breaker.
- Place a towel under the disposal inlet.
- Use a screwdriver and hammer to tap the plug inward.
- Reach inside the disposal through the sink opening and fish the plug piece out (do not leave it rattling inside).
- Reconnect the hose and secure the clamp.
When to call a plumber: If the inlet is clear but the dishwasher still backs up, the issue may be a missing high loop, an air gap setup problem, or an internal dishwasher drain problem.
2) Trap arm too long or pitched wrong
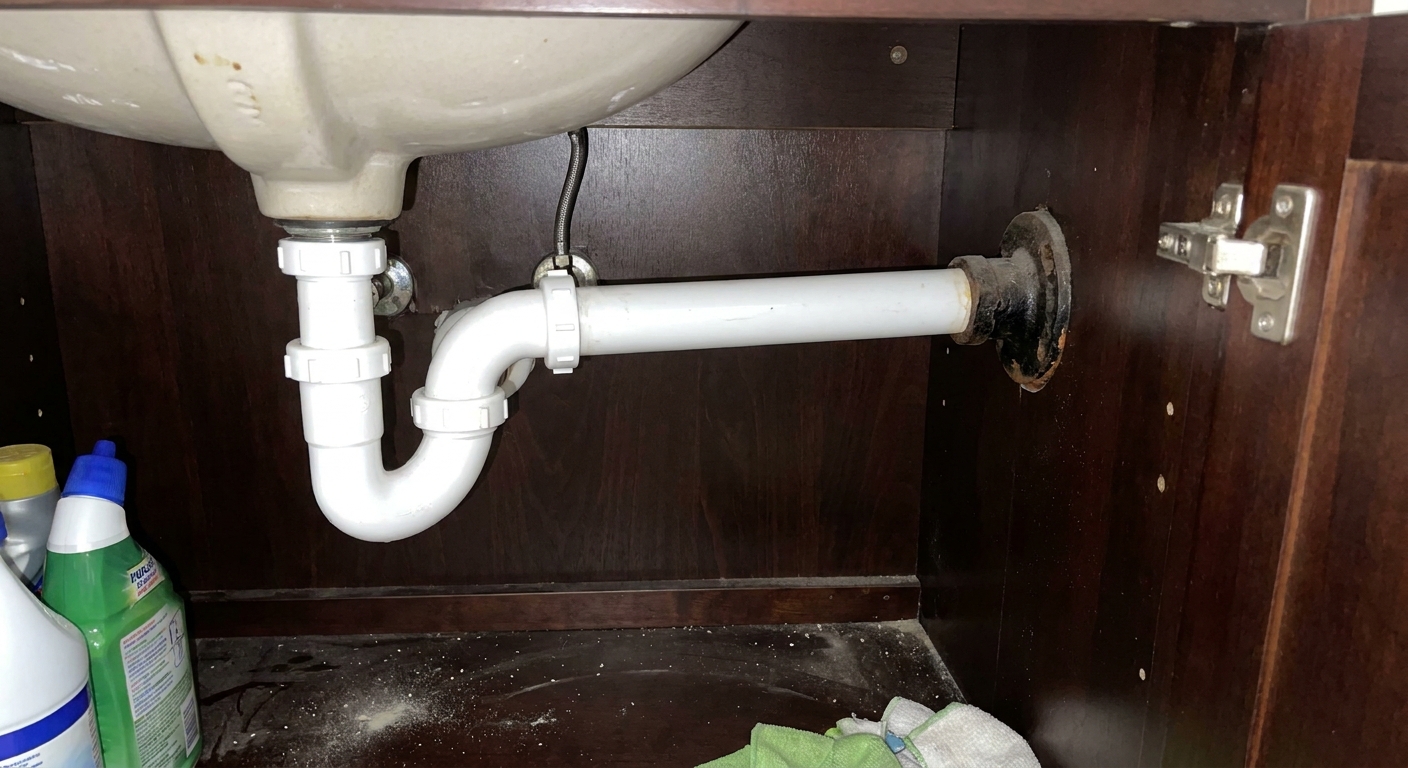
When it happens: After a cabinet swap, sink shift, or deeper basin upgrade, the drain pieces sometimes get creative. A trap arm that is too long, angled upward, or snaked awkwardly can slow drainage and trigger that gurgle or chug.
What to look for
- Slow drain with occasional gurgle.
- Trap arm (the straight pipe from the P-trap to the wall) looks slightly uphill, wavy, or has extra bends.
- The P-trap sits far from the wall, forcing a long horizontal run.
Simple check: Look at the trap arm from the side. It should have a slight, consistent fall toward the wall (toward the drain), not uphill, and not dead flat for a long stretch. Also check whether the trap arm is shoved so deep into the wall adapter that it bottoms out. It should not be jammed all the way in; follow the insertion depth for the adapter/fitting so you do not restrict flow.
Fix to try
- Shorten the trap arm so the P-trap sits closer to the wall connection and the run is tidy and straight.
- Correct the pitch so it is level-to-slightly-down toward the wall, with a consistent fall.
- Remove unnecessary elbows. Every extra turn steals flow.
In many sink cabinets, you can do this with new tubular drain parts from the hardware store and a careful reassembly. Hand-tight plus a small additional snug is usually enough on slip-joints. Over-tightening can distort washers and cause leaks.
Signs the rough-in may be wrong
- The wall stub-out is too high relative to the sink outlet, forcing the trap to sit unnaturally high.
- You cannot create any downhill fall to the wall without the trap hitting the cabinet floor or the disposal.
- You are forced into an S-trap shape (a drop straight down and then straight into the wall without a proper trap arm).
If any of those are true, you may be looking at a drain rough-in elevation problem. Fixing that properly can involve opening the back of the cabinet or the wall, and sometimes the cabinet has to be pulled to access the sanitary tee and vent connection.
3) Vent capped or blocked during work
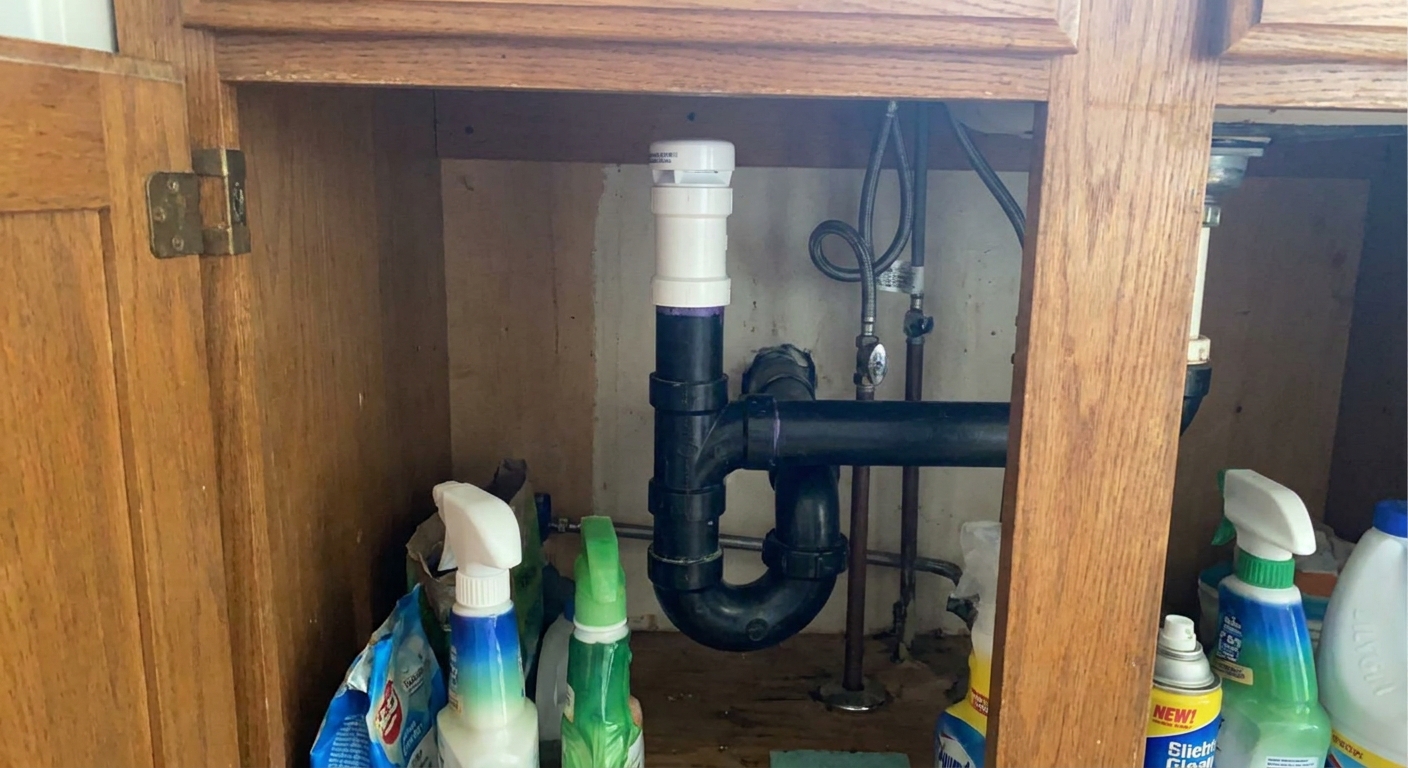
When it happens: During a remodel, a vent can get accidentally capped, disconnected, or covered when walls are patched, cabinets are installed, or an air-admittance valve is buried or removed. Drains need air to flow. Without it, the drain cannot pull air, so it chugs and slows down.
What to look for
- Slow drain in both bowls.
- Gurgling sounds while draining.
- Water level in the bowl bobs up and down before it finally drains.
- Sewer smell that comes and goes, especially after running a lot of water.
Simple check: Fill the sink partway, then open the drain and watch. If it chugs and you hear gurgling, suspect venting. Another clue is whether another nearby fixture (like a bathroom sink) gurgles when you drain the kitchen.
Fix to try (low risk)
- If you have an air-admittance valve (AAV): Look for it under the sink, often mounted on a vertical section of pipe. Make sure it is upright, not buried behind a drawer, and has air around it. If it is stuck or old, replacing it can help, but it must be installed per local code and remain accessible.
- Do not cap vents “just to test.” If you suspect a vent is capped inside the wall, that is not a DIY-friendly guessing game.
Signs the rough-in is wrong
- The sink drains better only if you loosen a slip nut (letting air in). Note: this can also happen with a partial blockage downstream, so treat it as a venting clue, not a verdict.
- Persistent gurgling even after confirming the trap and disposal connections are correct.
- A vent line or AAV was moved or removed during the remodel and never reinstalled correctly.
If venting is the culprit, the fix is often behind the cabinet or in the wall. That can mean removing the cabinet back panel or, in some cases, pulling the sink base to open drywall and correct the vent connection.
4) Dishwasher hose too low
When it happens: The dishwasher drain hose should rise up high under the counter before it heads to the disposal or sink tailpiece. If it droops low across the cabinet base, it can hold dirty water and make it easier for sink/disposal water to backflow toward the dishwasher. For homeowners, think of this as keeping the hose above the top edge of the sink or counter as much as the setup allows.
What to look for
- Musty odor in the sink base cabinet.
- Dishwasher intermittently leaves water in the bottom or drains inconsistently.
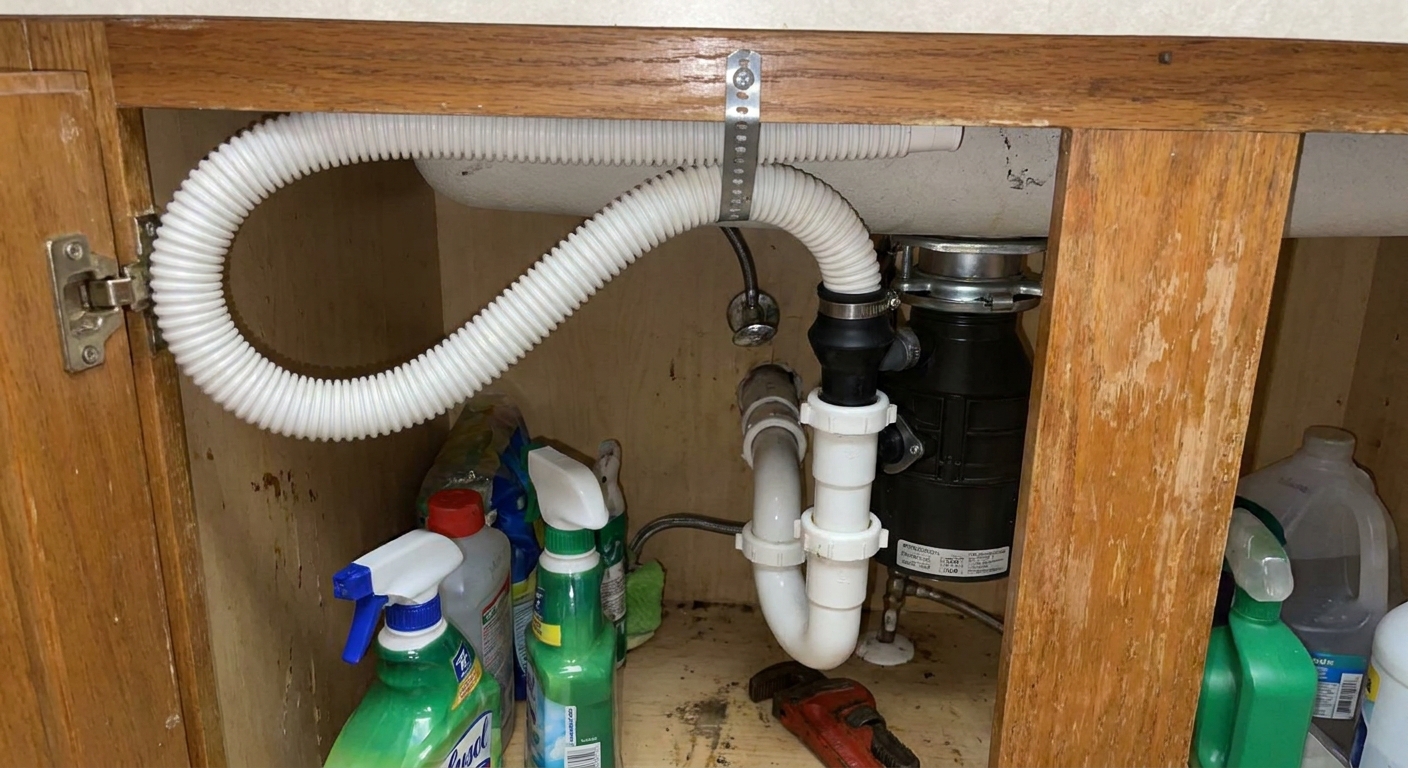
- You see a long sagging loop of dishwasher hose lying low in the cabinet.
Simple check: Open the sink base and trace the dishwasher hose. It should be strapped as high as possible under the countertop before connecting to the disposal inlet or tailpiece. Some dishwashers have built-in check valves, but the high loop still matters in real-world installs.
Fix to try
- Create a high loop: pull the hose up and fasten it to the underside of the counter with a strap or clamp (or to the side wall of the cabinet as high as you can).
- Make sure the connection at the disposal or tailpiece is tight and uses a proper clamp.
- If your area requires an air gap, install one at the sink deck or countertop and route the hose correctly.
When the cabinet has to come back off: Usually it does not. But if the dishwasher hose is pinched behind a newly installed cabinet, trapped by a panel, or crushed by a drawer unit next to the sink base, you may need to loosen or remove trim panels or even pull a cabinet to re-route it cleanly.
5) Remodel debris caught in the trap
When it happens: Remodels create dust and leftovers. Sawdust, tile grout, bits of drywall mud, sink cutout debris, even little sticker scraps can wash down on day one and park themselves in the tailpiece or P-trap. It feels like an install mistake, but it is just junk in a new pipe.
What to look for
- The sink drains, just slowly, and it varies depending on how much water you run.
- No obvious vent symptoms, no immediate full-on backup, just sluggish flow.
- You recently did countertop cutting, tile work, sanding, or drywall near the kitchen.
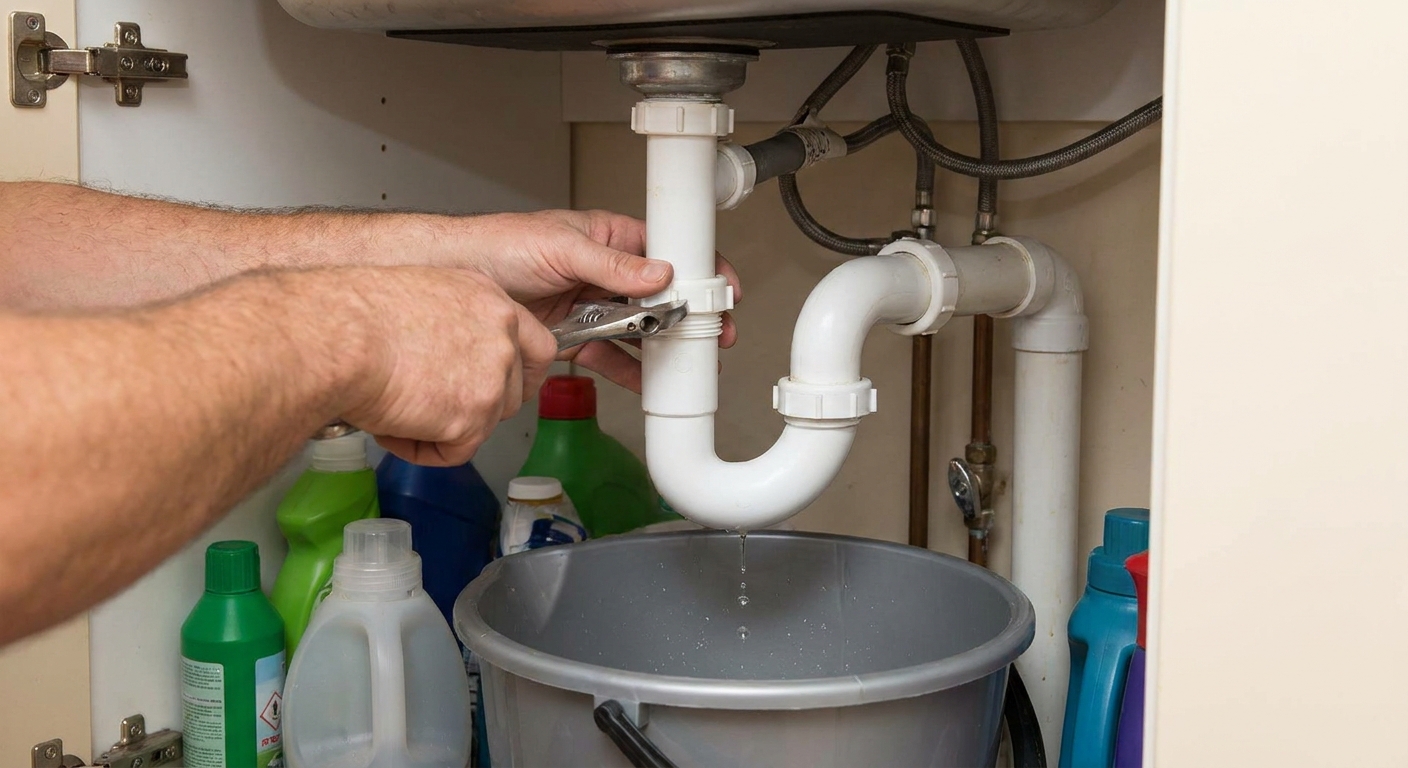
Simple check: Put a bucket under the P-trap. Loosen the slip nuts and remove the trap. Look for debris inside the bend and in the tailpiece above it.
Fix to try
- Clean the trap and rinse it out in a utility sink or outside.
- Wipe out the tailpiece connection and check the washers as you reassemble.
- Reinstall and run water hard for a minute to confirm a clean, steady drain.
When to call a plumber: If the trap is clean but the wall line still drains slowly, the blockage may be downstream in the branch line.
6) Putty or gasket blocking the strainer
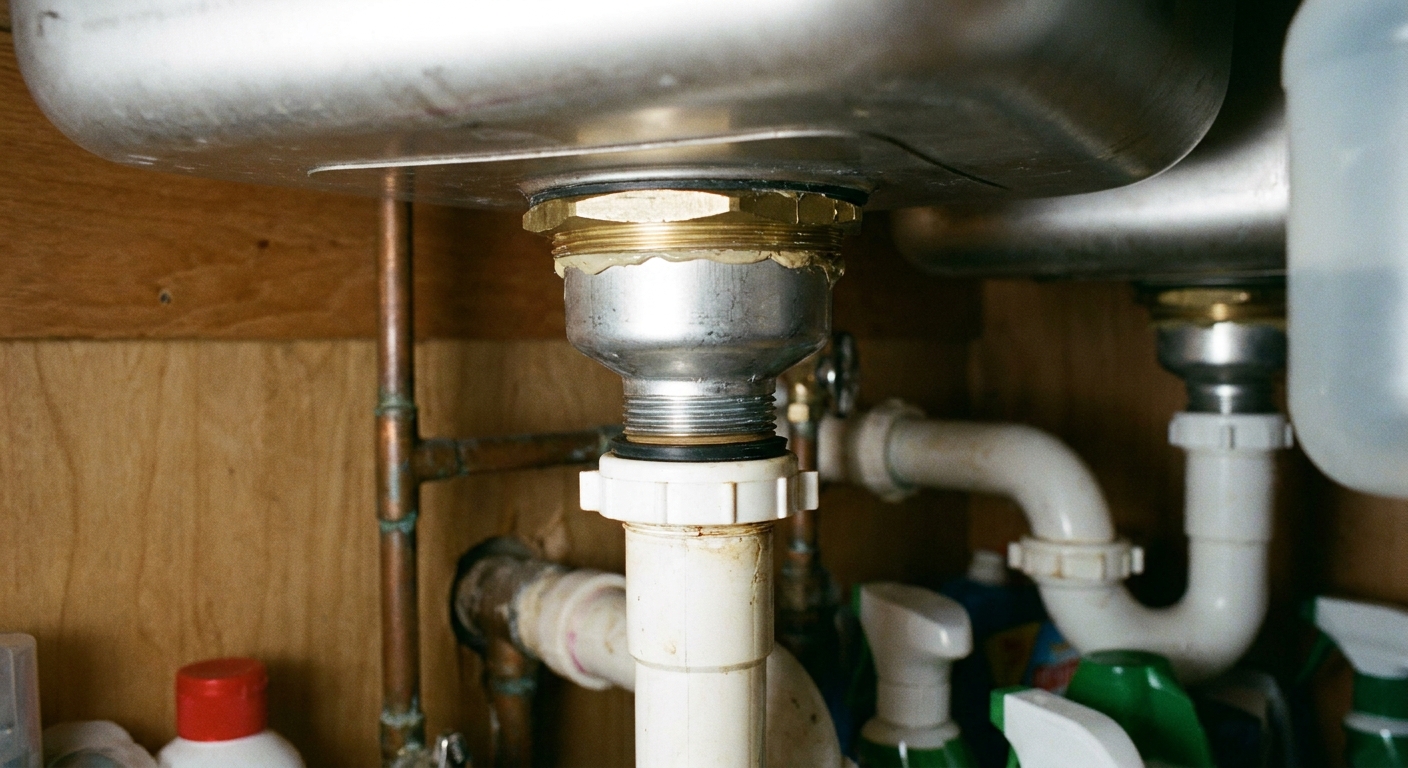
When it happens: On a new sink strainer install, too much plumber’s putty can squeeze inward when the locknut is tightened. It is not the most common cause, but it does happen. More often, it is a slightly misaligned gasket or small construction debris caught right at the strainer or tailpiece.
What to look for
- Slow drain starts immediately after install.
- No gurgling, no odor, just sluggish flow.
- When you look down the strainer, you see a thin lip of putty, gasket material, or debris near the opening.
Simple check: With a flashlight, look straight down into the drain. If you can see material protruding past the strainer edge, that is a clue. You can also feel around the inner edge with a plastic utensil.
Fix to try
- Minor squeeze-out: Carefully remove the visible putty or debris from the opening using a plastic tool (not a metal pick that can scratch stainless or composite sinks).
- If it is clearly restricting the opening: Disassemble and reinstall the strainer correctly. That means removing the tailpiece, loosening the locknut, lifting the strainer, cleaning off all old putty, and reapplying a modest, even bead before tightening.
When to call a plumber: If you have a stone countertop, specialty sink, or a complex basket strainer setup you are not comfortable re-seating, it is a reasonable service call. A slightly mis-set strainer can leak slowly and ruin a new sink base cabinet bottom.
Fast troubleshooting order
- If there’s a disposal and dishwasher: check the knockout plug.
- Check for remodel debris: if you are comfortable, pull and clean the P-trap.
- Look at the trap and trap arm: confirm no uphill pitch, no extra bends, and it is not bottomed out in the wall adapter.
- Listen for gurgle or chug: if yes, suspect venting or an AAV problem.
- Check the dishwasher hose routing: fix the high loop or air gap routing.
- Inspect the strainer opening: look for putty intrusion, gasket issues, or install debris.
Red flags that mean stop DIY
I’m all for confident homeowners, but I’m also very pro not-flooding-your-new-cabinets. These are the signs you should pause and get a licensed plumber involved.
- Water backs up into the other sink bowl rapidly, or into another fixture nearby.
- Sewer gas smell persists even after confirming the trap is holding water.
- The trap setup looks like an S-trap or you cannot create a proper trap arm.
- You suspect a vent was capped inside the wall during cabinet or drywall work.
- Any leak that you cannot stop with a gentle re-seat of a slip-joint washer.
If a rough-in is wrong, it is not a “tighten it harder” situation. It is a “get access and correct the piping geometry” situation, and that can mean removing the sink base or opening the wall behind it.
FAQ
Why would a brand-new sink drain slower than the old one?
New sinks are often deeper and paired with disposals, pull-out trash systems, or tighter sink bases. That means less room for proper drain geometry, and small install mistakes like poor trap arm pitch or a forgotten knockout plug show up immediately.
Is a slow drain after a remodel usually a clog?
Sometimes, but right after a remodel it is often an installation detail or construction debris caught at the strainer, baffle, tailpiece, or trap. Start with the visual checks before you assume the pipe in the wall is clogged.
Can an AAV cause a slow drain?
Yes. If an air-admittance valve is stuck closed, installed sideways, or buried so it cannot pull air, the sink can gurgle and drain slowly. It must be accessible and installed upright.