A designer-builder breakdown of fireclay and stainless farmhouse sinks, including durability, care, cabinet support, scratch and chip risk, bowl options, and...
Farmhouse sinks are gorgeous, hard-working, and famously heavy. Retrofitting one into an existing sink base is absolutely doable for a confident DIYer, but it is not a “drop it in and caulk it” situation. Your cabinet needs a real support structure, your clearances have to be exact, and your plumbing and countertop decisions need to be made before you cut anything.
I used to tell clients this: you are not installing a sink, you are installing a sink system. The cabinet, the support, the plumbing rough-in, and the countertop cutout all have to play nicely together. Let’s walk through it like a project manager would.
Before you buy: confirm the sink type
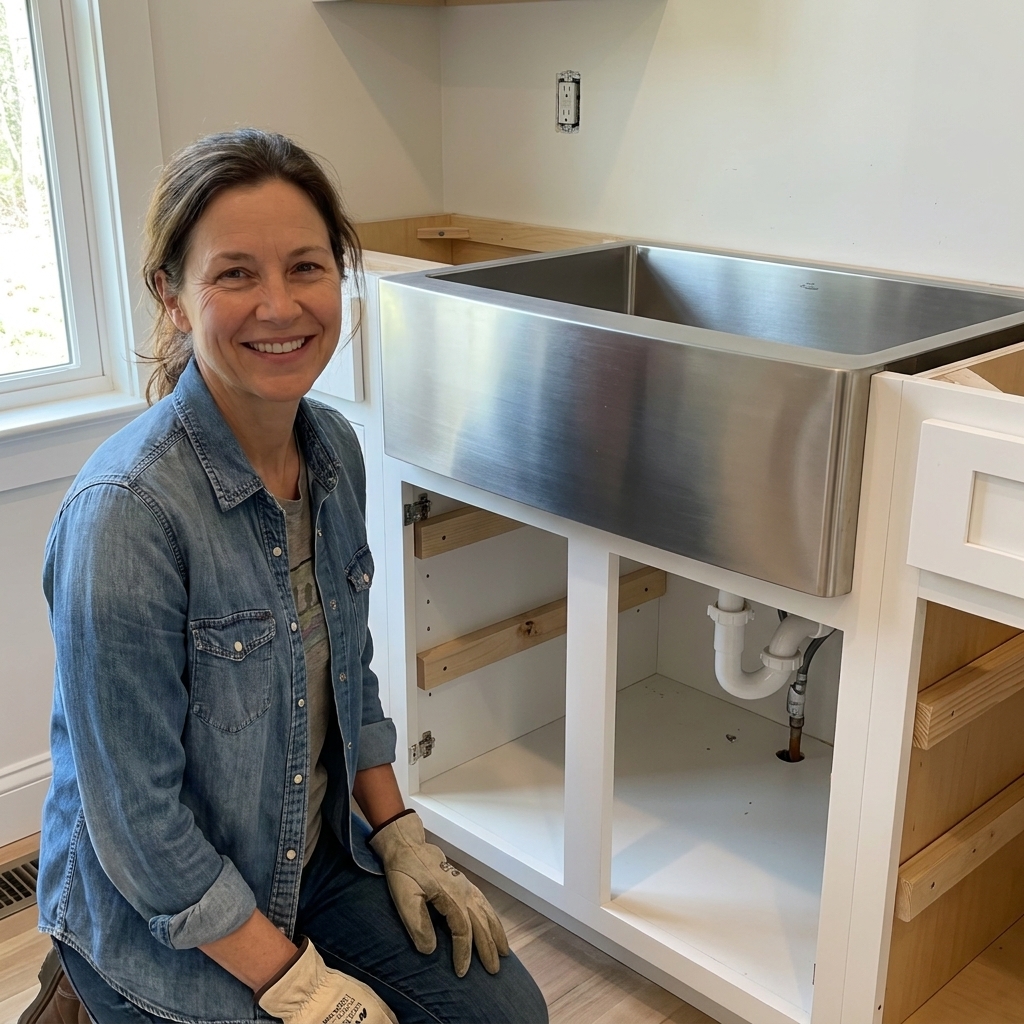
“Farmhouse sink” can mean a few different mounting styles, and the cabinet modifications change depending on which one you have.
Common mount types
- Undermount farmhouse: The rim sits under the countertop. The sink is supported by the cabinet structure or a support frame, not by the stone.
- Top-mount farmhouse: A flange sits on top of the countertop. Still heavy, still needs cabinet support, but the countertop opening is different.
- Flush mount: Specialty install where the sink lip is flush with the counter surface. This is less DIY-friendly and often best left to a pro fabricator and installer.
Weight reality check: Fireclay and cast iron farmhouse sinks can be over 100 pounds before you add water, a disposal, and someone leaning on the front edge while washing sheet pans. Assume your cabinet must support 200 to 300 pounds without flexing.
Cabinet fit checklist
Take these measurements before ordering a sink or cutting your cabinet face frame.
- Cabinet inside width: Measure between the inside faces of the cabinet sides, not the face frame opening. Many farmhouse sinks need a wider cabinet than you expect.
- Cabinet depth: Confirm front-to-back clearance for the bowl and drain location, plus room for supply lines and a trap.
- Countertop thickness: 3 cm stone vs 2 cm stone vs laminate changes your final reveal and install approach.
- Sink height and apron height: You need the apron opening to land exactly where the sink manufacturer specifies.
- Door and drawer conflicts: Many sink bases have false drawer fronts. A tall apron can force you to modify or eliminate that false front.
- Plumbing location: If the sink drain is farther forward or deeper than your old sink, your trap and disposal may conflict with the cabinet back or floor.
If anything here feels “close,” pause. Tight installs are where chipped fireclay, cracked countertops, and cursed language happen.
Tools and materials
Tools
- Tape measure, combination square, and a sharp pencil
- Level (2-foot is fine, 4-foot is better)
- Drill/driver and bits
- Circular saw or track saw (a jigsaw works for small notches, not for long straight cabinet cuts)
- Oscillating multi-tool (for face frame tweaks and clean corners)
- Clamps
- Stud finder (helpful if you are also adding wall cleats behind the cabinet)
Materials
- 3/4-inch plywood (cabinet-grade) for platforms or support panels
- 2x4 or 2x2 lumber for rails and blocking
- Construction screws (not drywall screws), 1-5/8 inch and 2-1/2 inch are common
- Wood glue (optional but helpful for laminating supports)
- Shims
- Silicone sealant (kitchen and bath)
- Sound-deadening pads (optional, great for stainless farmhouse sinks)
Tip from someone who has watched cabinets fail: Pocket screws alone are not a support system. You want supports that transfer load into the cabinet sides and down to the floor.
Step 1: Demo and prep
Turn off water at the shutoffs. Disconnect the faucet lines, trap, and disposal. If you are removing an old sink, shut off power to the disposal at the breaker first.
What to remove
- Doors and any false drawer front
- Existing sink mounting clips and rails
- The countertop cutout area access panel if you have one
- Anything inside the cabinet so you can see the sides, back, and floor clearly
Now inspect the cabinet: if the floor is swollen, the sides are delaminating, or the face frame is loose, reinforce or replace the cabinet. A farmhouse sink is not the moment to “hope it holds.”
Step 2: Choose a support method
Your goal is to create a rigid, level cradle that supports the sink’s weight on structural members, not on thin cabinet parts.
Option A: Side-rail ledgers
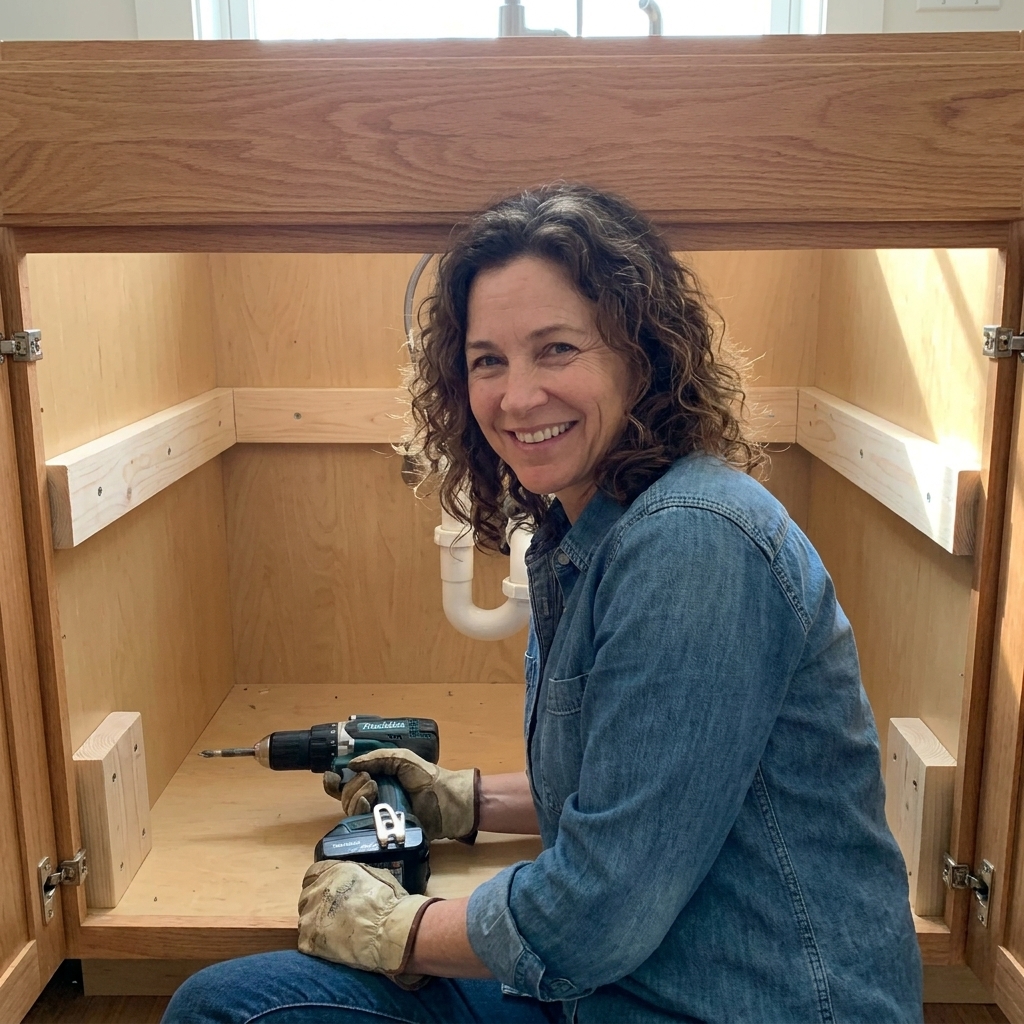
You install thick horizontal rails on both cabinet sides, at the exact height needed, then set the sink on those rails. This method keeps the cabinet floor clear for plumbing and is very strong when done correctly.
- Use straight, dry lumber (2x2 or ripped 2x4).
- Fasten rails into the cabinet sides with construction screws. Pre-drill to avoid splitting.
- Add blocking at the front and back corners for extra bearing surface.
Option B: Plywood platform
A plywood platform spreads the load and can stiffen a cabinet that is a little flimsy. The tradeoff is that it can reduce space for a disposal and trap, especially with deep single-bowl sinks.
- Cut 3/4-inch plywood to fit tightly side-to-side.
- Support the platform with cleats on the cabinet sides and a front-to-back stiffener.
- Cut a generous drain opening after you confirm drain location.
Option C: Independent frame
For big fireclay sinks in a wide cabinet, an internal frame that bears to the cabinet floor, or directly to the subfloor, is the most bombproof. This is also smart if your cabinet is custom or older.
If you are unsure which option fits your situation, pick the method that transfers the load most directly to the cabinet sides and down to the floor. Strength and rigidity beat cleverness every time.
Step 3: Set height and reveal
This is the part that separates a clean farmhouse install from one that looks like it was wrestled into place.
Choose your reveal
- Flush reveal: Countertop edge aligns with the inside of the sink. Sleek, but water can sit on the seam if the slope is not perfect.
- Positive reveal: You see a small ledge of sink rim. Easier to wipe crumbs into the sink but can show grime on the ledge.
- Negative reveal: Countertop slightly overhangs the sink rim. Hides the seam but can be harder to clean around the edge.
Your sink manufacturer may specify a recommended reveal range. For stone countertops, your fabricator may have preferences based on the material and the cutout.
Calculate support height
Dry-fit the sink and work backward:
- Start with your finished countertop height (usually 36 inches, but measure your existing).
- Subtract countertop thickness and any underlayment.
- Subtract the sink rim position based on your chosen reveal.
- The result is the height where the sink must sit, level, supported on both sides.
Pro tip: Leave a tiny adjustment window. Building your rails so you can shim the sink up by 1/16 to 1/8 inch during final fit can save you if the countertop is slightly out of plane.
Step 4: Cut the apron opening
Most retrofit pain comes from cutting the face frame too much, or not enough. You want the apron opening clean, square, and strong.
Mark cut lines
- Measure the apron height and width required by the sink spec.
- Transfer those measurements to the cabinet face frame carefully, centered left-to-right.
- Use painter’s tape over the cut area to reduce splintering and help you see your lines.
Cut the opening
- Use an oscillating tool for controlled plunge cuts and crisp corners.
- If you need long straight cuts, a circular saw can work but requires steady hands and a good guide.
- Do not remove more structure than necessary. Keep as much of the face frame as you can.
Reinforce after cutting
If your cut removes a bottom rail or weakens the front of the cabinet, add reinforcement:
- Sister a new rail behind the face frame, fastened into the cabinet sides.
- Add corner blocks behind the face frame stiles.
The cabinet front takes abuse. People lean on farmhouse sink aprons. Your reinforcement is what keeps that front edge from flexing and cracking caulk lines over time.

Step 5: Dry-fit and lock in
Before any countertop work happens, you want a perfect dry fit.
Dry-fit checklist
- Level: Check side-to-side and front-to-back on the sink rim.
- Centering: Verify the apron is centered in the opening with even reveals.
- Front projection: Confirm how far the apron sits proud of the cabinet face, if at all. Many are designed to be nearly flush.
- Wall clearance: Make sure the sink does not hit the wall, studs, or a protruding supply line.
- Plumbing path: Confirm you have room for the drain assembly, trap, and disposal if you are using one.
Once the dry fit is right, lock in the support structure. Add blocking where needed so the sink has continuous bearing on both sides, and does not teeter on a high spot.
My rule: If you can rock the sink even slightly during dry fit, it will move more once the countertop is on and the cabinet is loaded. Fix the structure now, not after stone is installed.
Plumbing and disposal
Farmhouse sinks often have deeper bowls and different drain placement than a standard drop-in. That affects everything under the cabinet.
Drain height and trap clearance
If your sink is deeper, your drain outlet is lower. That can put your P-trap too close to the cabinet floor, or make the trap arm slope incorrectly. If you have limited height, you may need to lower the trap connection in the wall. That is a bigger job, but it is sometimes the correct job.
Disposal fit
Not every farmhouse sink plays nicely with every disposal, especially with deep single bowls. Check the sink manufacturer’s notes. If clearance is tight, consider:
- A compact disposal model
- Switching to a disposal-compatible basket strainer and skipping the disposal
- Adjusting the drain rough-in height in the wall
Water lines and shutoffs
Make sure your shutoffs are accessible after the sink is installed. Also confirm your faucet supply lines are long enough. Short, strained supply lines are a leak waiting to happen.
Countertop coordination
If you are working with stone or solid surface, your fabricator will want the sink on site and often installed or at least perfectly supported before templating. Ask their process upfront.
Confirm these details
- Who is responsible for verifying the sink is level before install
- Your chosen reveal type
- Whether the cutout will be finished or eased (especially around corners)
- Who will apply silicone at final set
- Whether faucet holes are in the countertop or the sink (some farmhouse sinks allow deck mounting)
If you are using laminate, read the sink’s requirements carefully. Many farmhouse sinks are not recommended with laminate unless you have a specific installation kit or a countertop that can handle the cutout and water exposure.
Final installation
Once your supports are solid and the countertop plan is confirmed, you are ready for final set.
Best practices
- Protect the sink: Use moving blankets or cardboard on the apron and rim during handling.
- Set gently: Fireclay can chip if bumped on a corner of the face frame. Have a helper.
- Use shims intentionally: Shim under support points, not randomly. Keep load transfer continuous.
- Seal smart: Use a clean bead of kitchen and bath silicone where the sink meets the countertop, per manufacturer guidance.
- Check level again: Before plumbing is tightened, confirm level one last time.
Sound and vibration
Stainless farmhouse sinks can sound like a drum. Stick-on sound pads on the outside of the bowl, and a good faucet aerator, go a long way.
Mistakes to avoid
- Relying on the countertop to hold the sink: Even when the countertop helps, the cabinet support should do the heavy lifting.
- Cutting the face frame before confirming sink height: Always set the sink on temporary blocks, confirm position, then cut.
- Ignoring cabinet squareness: Many older cabinets are slightly out of square. Square your opening as much as possible, then dry-fit.
- Not planning for plumbing depth: Deep sinks and disposals eat space fast. Dry-fit the drain, trap, and disposal before you celebrate.
- Underbuilding supports: If you are thinking “this feels pretty sturdy,” add blocking anyway. Heavy sinks reward overbuilding.
Example: side-rail cradle
If you want a straightforward plan that works in a lot of existing cabinets, here is a common approach:
Install two side rails (one on each cabinet side), at your calculated sink support height. Use 2x2 or ripped 2x4, fastened with construction screws every 6 to 8 inches.
Add front and back blocking to create more bearing surface, especially near corners where sinks often carry load.
Add a front stretcher behind the face frame if you removed a structural rail to make room for the apron.
Dry-fit and shim until the sink is perfectly level and centered.
Lock in shims (a dab of construction adhesive can keep them from migrating), then re-check level.
This creates a rigid perimeter support that keeps the sink from sagging over time.
FAQ
Can I put a farmhouse sink in a standard 36-inch sink base?
Sometimes, yes, but it depends on the sink’s actual required cabinet size and the cabinet’s inside width. Many “36-inch sinks” require a 36-inch cabinet, which often means the inside width needs to be around 34-1/2 inches or more. Measure your cabinet interior before you order.
Do I need to replace the entire cabinet?
Not always. If the cabinet is solid and square enough, retrofitting supports is fine. If you have water damage, particleboard swelling, or loose face frames, replacement is often the smarter, safer move.
Should the sink sit on the cabinet floor?
I rarely love that approach unless you build a proper platform. Cabinet floors are not always structural, and you can lose plumbing clearance fast. Side-rail supports are usually cleaner and stronger.
Is this a one-person DIY?
No. Plan on at least one helper for lifting and positioning. Some sinks are awkward even when they are not extremely heavy.
When should I call a pro?
Call a pro if you need to move the drain in the wall, if your countertop is stone and your sink support feels uncertain, or if your cabinet has significant damage. It is cheaper to pay for an hour of expert help than to replace a cracked countertop.
Final thoughts
A farmhouse sink retrofit is one of those projects where patience and planning beat muscle every time. Build the support like you mean it, dry-fit until everything is boringly perfect, and coordinate early with whoever is handling the countertop. Do that, and your sink will feel rock-solid for the long haul, not like a beautiful liability waiting to sag.
If you are on the fence about measurements, support height, or plumbing clearance, a quick consult with a contractor, countertop fabricator, or experienced installer can help sanity-check the plan before you start cutting.