A former kitchen and bath designer breaks down the best bathroom floors for moisture, what they cost to install, and which options hold up best to daily stea...
I have installed a lot of floors in my time, and here’s the truth: “waterproof” LVP is only as waterproof as the way you install it. Kitchens and bathrooms are where shortcuts show up fast. A slightly wavy subfloor becomes click-joint gaps. A forgotten toilet flange detail turns into a spongey ring. A missing expansion gap creates a floor that tents right when you finally invite people over.
This guide walks you through the floating floor technique for waterproof luxury vinyl plank (LVP) in high-moisture rooms, from prep to final trim, with the practical details that keep the floor looking tight for years.
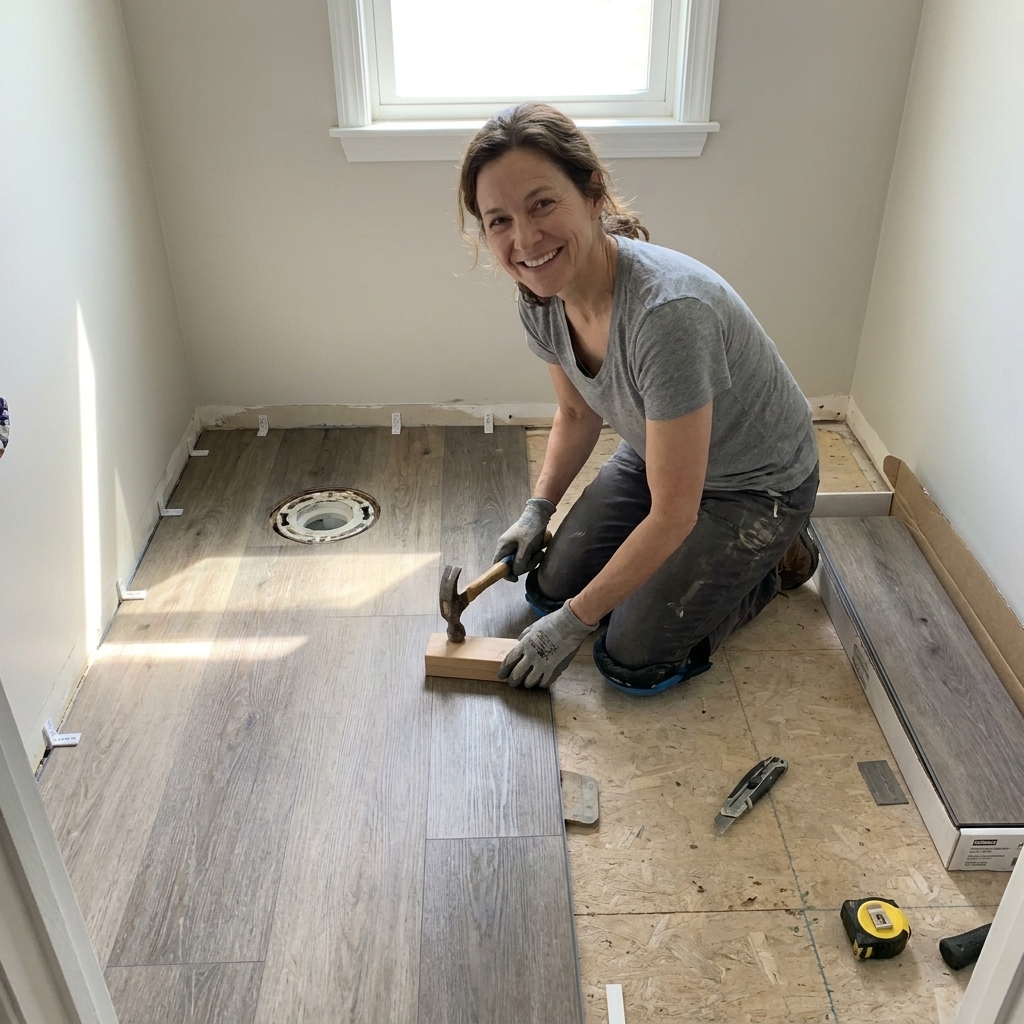
Before you start: Choose the right LVP for wet zones
LVP marketing can get a little loud. Focus on specs that matter in kitchens and baths.
What “waterproof” actually means
Most waterproof LVP refers to the vinyl plank itself and often the attached pad being water resistant. The floor system can still fail if water sits at seams for long periods, if water gets under the floor, or if the perimeter is sealed incorrectly. Think of it like a rain jacket. Great protection, but not magic if you leave the zipper open.
Specs I look for
- Wear layer: 12 mil is fine for many homes, 20 mil is my go-to for busy kitchens, kids, pets, and rolling chairs.
- Core type: SPC (stone plastic composite) is usually stiffer and more dimensionally stable, which can help in older houses. Stiffer does not mean it will bridge dips though, flatness still matters.
- Click-lock system: Choose a brand with a reputation for tight locking. In wet rooms, strong joints are everything.
- Attached pad: Convenient, but confirm your manufacturer allows additional underlayment if you want it. Doubling pads can void warranties and make joints feel bouncy.
- Approved installation locations: Read the box and the install guide. Some products restrict full bathrooms or require perimeter sealing.
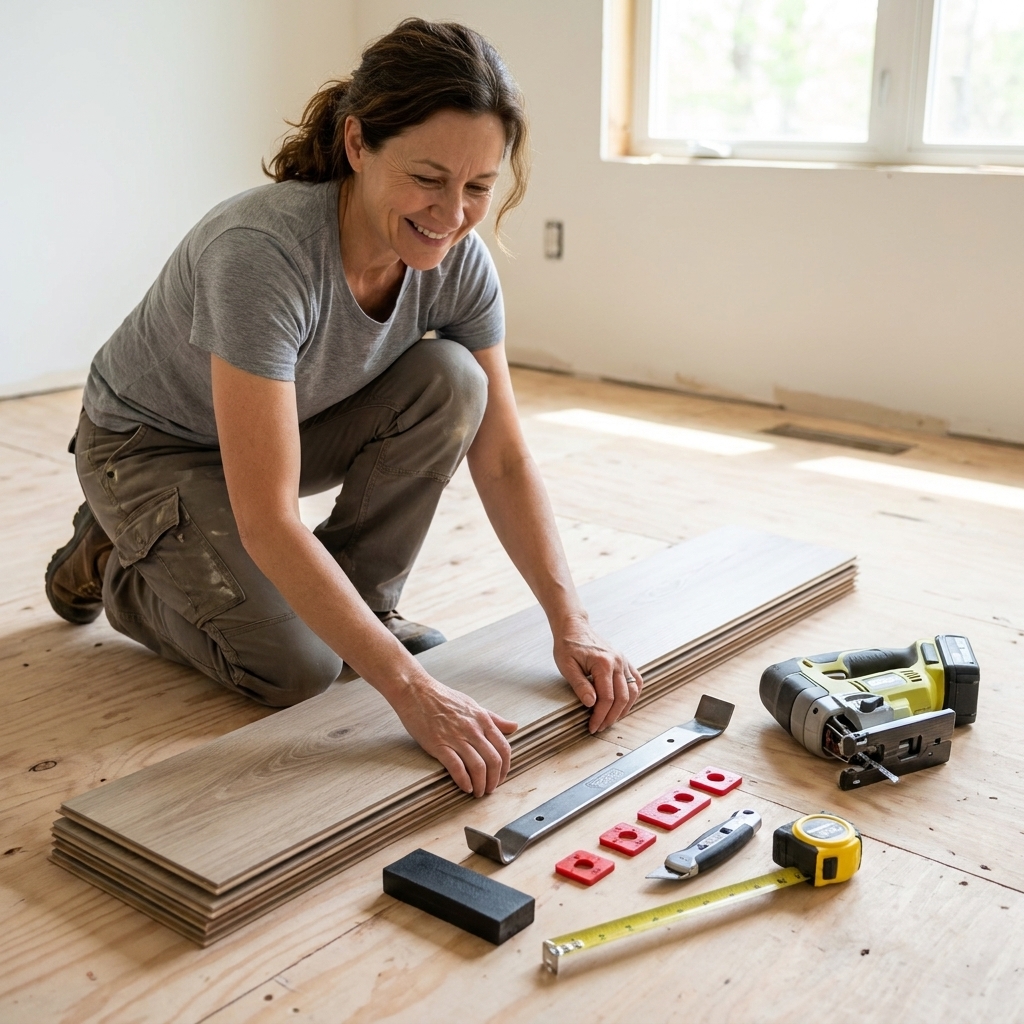
Tools and materials (what you really need)
You do not need a table saw and a prayer. You need accurate measuring and clean cuts.
Tools
- Tape measure, pencil, and a straightedge
- Utility knife with plenty of sharp blades (for score-and-snap planks)
- Jigsaw (for notches, curves, and toilet flange cuts)
- Miter saw or multi-tool (for undercutting door jambs and trimming)
- Rubber mallet and a tapping block (approved for your product)
- Pull bar (for the last row and tight spots)
- Spacers (for expansion gaps)
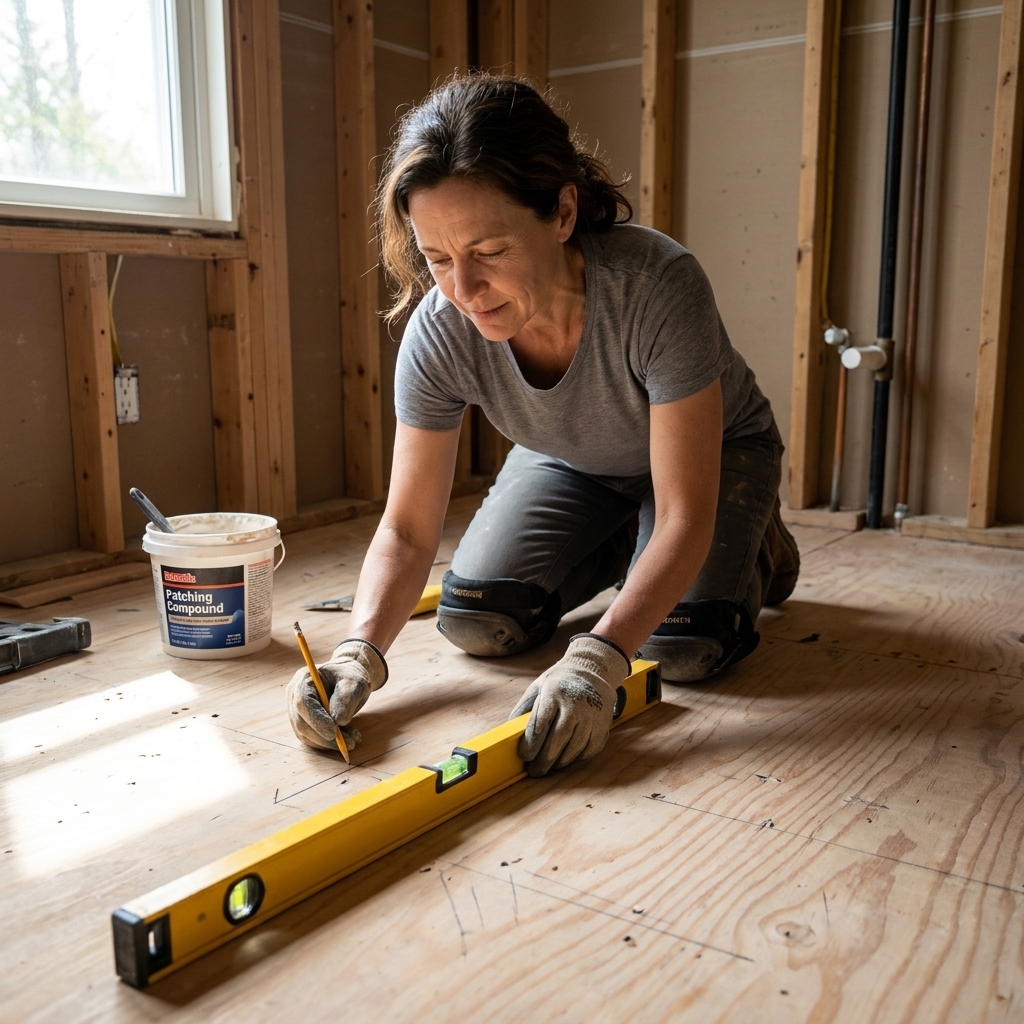
- 4 to 6 foot level or straightedge (to check flatness)
- Shop vacuum and broom
Materials
- LVP planks (buy 10% extra, 15% for complex layouts)
- Underlayment (only if required or allowed by the manufacturer)
- Moisture barrier (if required for concrete slabs or below-grade areas)
- Transitions (T-moldings, reducers, end caps as needed)
- Quarter round or shoe molding if you are not replacing baseboards
- 100% silicone (kitchen and bath rated) if your manufacturer calls for perimeter sealing
- Pipe escutcheons (optional, but a clean way to finish supply line penetrations)
Prep work: The step that makes or breaks your floor
If you remember one thing from this whole article, make it this: LVP hates lumps, and wet rooms punish gaps. Prep is the unglamorous part that keeps seams tight.
Step 1: Confirm the subfloor is allowed
Most floating LVP can go over:
- Plywood or OSB subfloor
- Concrete (often with a vapor barrier)
- Existing vinyl sheet or vinyl tile if it is well bonded and flat
- Tile only if grout lines are not creating valleys, or if you skim coat or level first
Usually not allowed without extra steps:
- Carpet (nope)
- Foam-cushioned vinyl
- Multiple layers of floating floors
- Loose laminate
Step 2: Check flatness, not level
Your floor can be out of level and still work fine. What LVP needs is flat. Many manufacturers call for tolerances commonly around 3/16 inch over 10 feet or 1/8 inch over 6 feet, but this is not universal. Always defer to your product’s install manual.
Fix high spots by sanding or grinding. Fix low spots with the correct floor patch or self-leveling underlayment rated for your substrate.
Step 3: Deal with squeaks and bounce
- On wood subfloors, add screws into joists where you hear squeaks.
- Replace any water-damaged or delaminated panels. Kitchens and baths love to hide rot around dishwashers, toilets, and tub edges.
Step 4: Remove baseboards or plan your trim
My favorite finish is removing and reinstalling baseboards for a clean look. If you do not want to touch baseboards, plan on adding shoe molding or quarter round to cover the expansion gap.
Step 5: Acclimate if required
Many SPC products do not need long acclimation, but some do. Read your manufacturer instructions and keep planks in the room, flat, unopened if required, at normal living temperature.
Layout planning: Make the room look intentional
This is where you avoid the rookie mistake of ending up with a 1-inch sliver along one wall.
Pick your plank direction
- Visually longer: Run planks the long direction of the room or hallway.
- Most natural light: Many people run planks parallel to the main light source to make seams less noticeable.
- Doorway logic: In baths connected to a hall, consider continuing the same direction for flow.
Dry plan your first and last row
Measure the room width (perpendicular to plank direction). Divide by plank width to see what your last row will be. If your last row will be skinny, rip the first row narrower so both sides look balanced.
Stagger joints correctly
Most LVP wants end joints staggered at least 6 to 8 inches, sometimes more. Avoid repeating patterns like a brick layout unless your manufacturer specifically allows it.
Step-by-step: Floating LVP installation in kitchens and bathrooms
1) Clean like you mean it
Vacuum thoroughly. Grit under LVP can telegraph through or keep joints from locking fully.
2) Install vapor barrier or underlayment (if required)
On concrete slabs, many manufacturers require a 6 mil poly vapor barrier or a specific underlayment with a built-in moisture barrier. Tape seams as directed, and run the barrier a little up the wall (it gets trimmed later). If your manufacturer lists a required perm rating or ASTM standard, meet that spec, not just the thickness.
If your LVP has an attached pad, do not automatically add underlayment. The issue is not underlayment itself, it is exceeding the product’s approved thickness and compressibility. Too much cushion can make joints flex and fail, and it can void warranties.
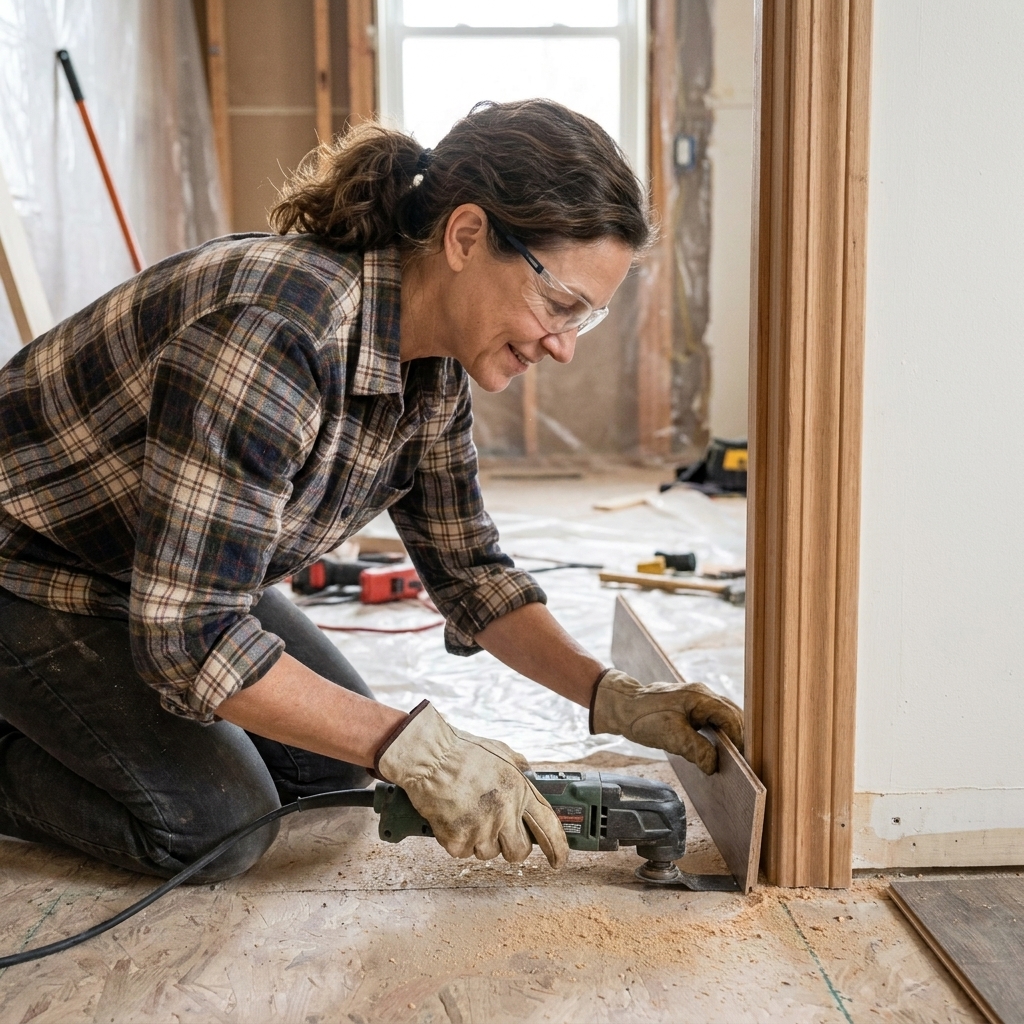
3) Undercut door jambs for a clean slide-in fit
Instead of notching planks around trim, undercut the casing so the plank slides underneath while still maintaining the required expansion gap. A scrap piece of LVP plus underlayment makes a perfect height guide.
4) Start with your straightest wall and set spacers
Place spacers to maintain the manufacturer-required expansion gap, commonly 1/4 inch but verify yours. In kitchens and baths, I treat expansion space as non-negotiable. That includes around tubs, thresholds, and pipes.
5) Install the first row
- Most click systems install tongue into groove at an angle, then press down to lock.
- Keep the first row dead straight. If your first row snakes, the whole floor follows.
- Trim the tongue off the wall side if your manufacturer recommends it for expansion or fit.
6) Cut planks the right way
Many LVP planks are score-and-snap. For tougher cuts:
- Jigsaw: notches, around cabinets, toe kicks, curves
- Miter saw: quick, clean square cuts
- Utility knife: straight rip cuts if your product allows, but go slow and keep blades fresh
7) Keep locking joints fully seated
In wet rooms, I am extra picky: if you see a hairline gap at an end joint, fix it immediately. Debris in the groove is common. Vacuum, re-click, and use the tapping block only as approved by your product.
8) Work around cabinets, vanities, and appliances
For a true floating floor, LVP should not be pinned down by heavy, fixed items unless your manufacturer allows it. Some brands flat-out restrict installing floating floors under built-in cabinetry or islands. Read that section of the install manual before you commit.
In many kitchen remodels, cabinets are installed first and flooring runs up to the toe kicks with a proper expansion gap covered by trim or toe-kick molding.
For dishwashers and ranges, plan your floor height so appliances can slide in and out later. I have seen gorgeous floors become a dishwasher prison because the finished floor came up higher than expected.
9) The toilet flange and bathroom wet-zone details
Bathrooms are where people get nervous, so let’s get specific.
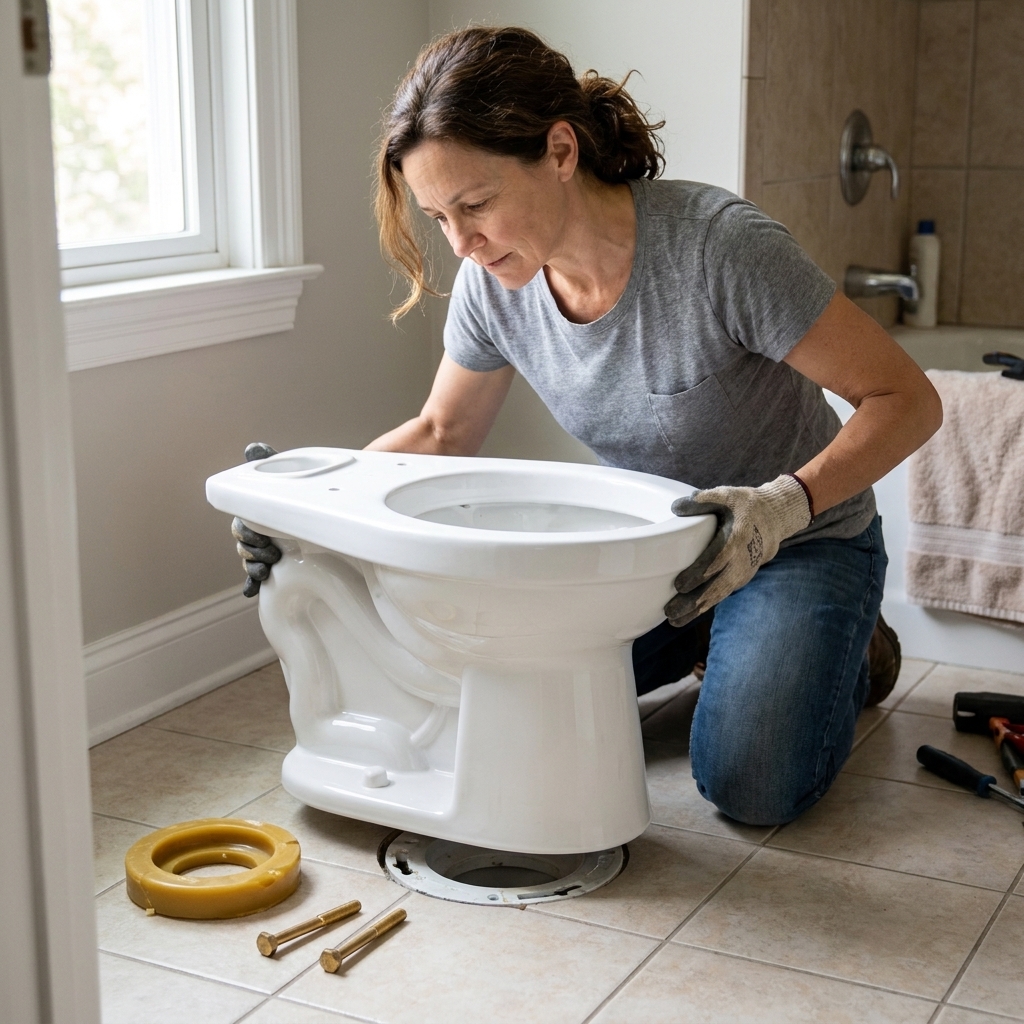
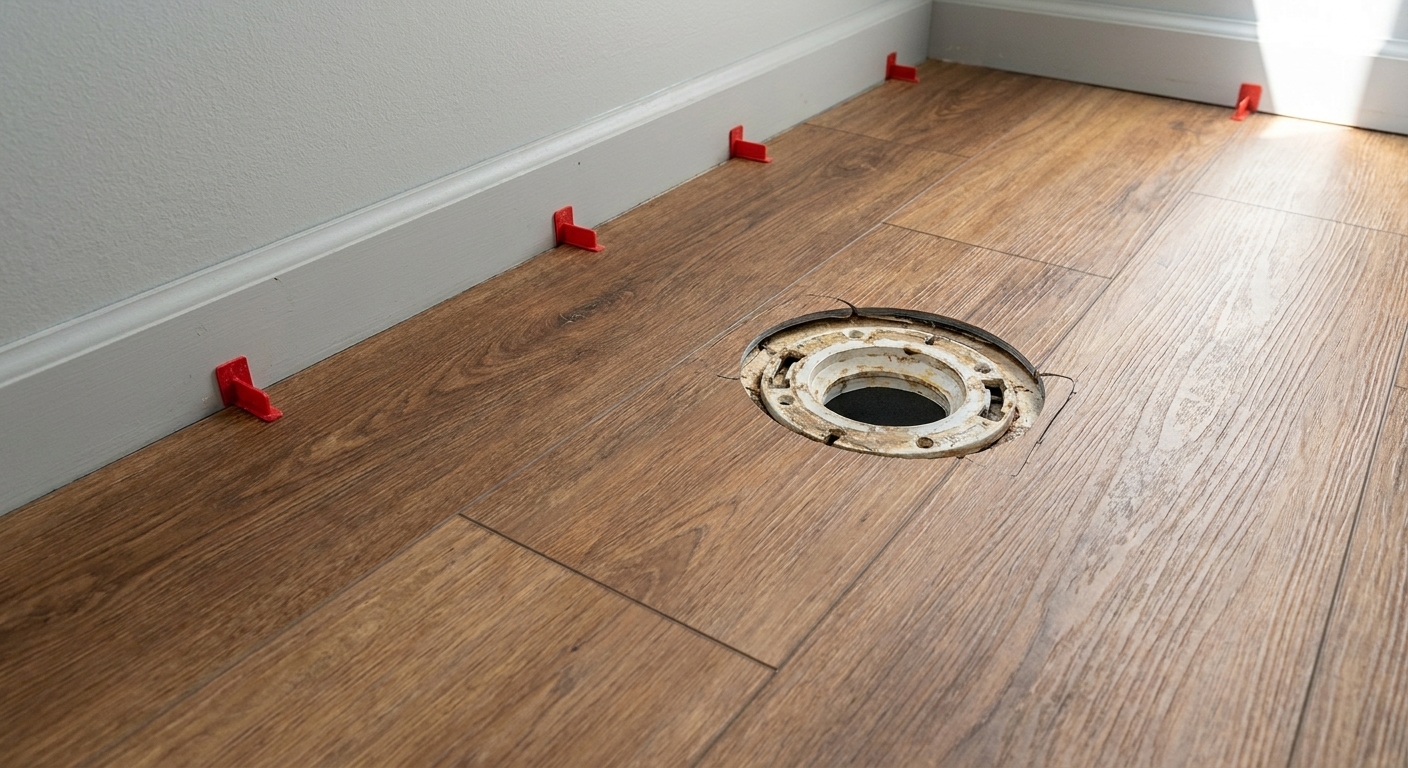
- Remove the toilet. Yes, really. Installing around a toilet base is a leak-friendly shortcut and looks sloppy.
- Give the floor room to move around the flange. You still need expansion space. The toilet base and a clean, correct flange height do the visual hiding here, not a tight cut.
- Get the flange height right. In a perfect world, the toilet flange sits on top of the finished floor. If your flange ends up too low after flooring, use an approved flange extender or repair ring so your seal actually seals. This one detail prevents a shocking number of “my bathroom floor feels soft” stories.
- Handle pipe penetrations correctly. Cut oversized holes for supply lines to allow movement, then finish with escutcheons. Do not hard-pin planks tight to pipes.
- Perimeter sealing is product-specific. Some brands want a silicone bead at the perimeter in full baths, especially at the tub edge and around the toilet area. Others do not. Follow the install guide. Also, silicone is about blocking surface water, not making the whole assembly flood-proof. A toilet or supply line leak can still get under the floor.
- Use a new wax ring or wax-free seal. This is not the place to reuse old parts.
10) Last row: measure every plank
Walls are rarely straight. Measure the gap for each plank, subtract your expansion gap, and rip each piece accordingly. Use a pull bar to lock the last row without crushing the edge.
11) Install transitions at doorways and flooring changes
Use manufacturer-matched transitions whenever possible. At bathroom doors especially, pick a profile that allows the floor to float, not one that clamps it down. Many transitions install with a track that lets the planks move underneath.
If you are meeting tile or carpet, do not guess. Dry-fit the transition early so you are not improvising at the finish line.
12) Reinstall baseboards or add shoe molding
Baseboards should cover the expansion gap without pressing down on the floor. If you add shoe molding, nail it into the baseboard, not into the floor.
13) Reinstall the toilet and seal smart
After the toilet is set and tested for leaks, caulk the toilet base if you choose to caulk. Some pros leave a small gap at the back uncaulked so a leak shows itself instead of hiding. Some plumbers and some local codes prefer a fully caulked base for sanitation. If you are unsure, follow local practice and code, but do not skip the leak test.
Where DIY installs go wrong (and how to avoid it)
- Skipping flatness checks: LVP clicks together, but it does not bridge dips well. Fix the subfloor first.
- No expansion gap: The floor needs room to move with temperature and humidity changes. Pin it, and it can buckle.
- Overpadding: Unapproved underlayment or too much cushion can make a floor feel soft and cause joint failure. It can also void warranties.
- Gaps left “for later”: In wet rooms, tiny gaps become dirt catchers and water entry points.
- Installing under a fixed vanity or kitchen island incorrectly: Follow manufacturer guidance so the floor can float.
- Not planning for appliances: Confirm finished height and clearances before you lock in the first row.
- Assuming silicone equals waterproof forever: Perimeter sealing helps with surface splashes, but it will not save you from a supply line leak. A $10 leak alarm under the sink or behind the toilet is cheap insurance.
Can you install LVP over existing tile or vinyl in a bathroom?
Often, yes. But you need the surface to be flat and stable.
Over tile
- If grout lines are deep, you may need to skim coat or use a suitable leveling product so the pattern does not telegraph through.
- Check for hollow or loose tiles. Anything moving underneath will eventually cause issues.
Over sheet vinyl
- It must be well bonded, not cushioned, and not peeling at seams.
- Clean thoroughly and remove any waxy residues that could affect friction and fit.
When in doubt, pull the old layer. Demo is dusty, but mystery layers are where remodel budgets go to die later.
Maintenance tips for kitchen and bath LVP
- Wipe spills quickly. Waterproof does not mean waterproof forever at seams.
- Use bath mats and runner rugs. Choose rugs without rubber backings that can discolor some vinyl floors.
- Felt pads under chairs. Especially at kitchen tables and islands.
- Skip steam mops unless the manufacturer explicitly allows them. Heat plus moisture can stress joints.
- Watch dishwasher and fridge lines. A slow leak is the sneakiest floor wrecker.
- Avoid standing-water areas. If you have a floor drain, a curbless shower, or an area that regularly sees pooled water, a floating LVP floor is usually not the right system.
FAQ
Do I need underlayment under waterproof LVP?
Only if your manufacturer requires it or allows it for sound and feel. Many waterproof LVP products have an attached pad, and adding unapproved underlayment can void warranties and weaken joints.
Should I caulk the edges of LVP in a bathroom?
Follow your product’s installation guide. Some brands call for a perimeter silicone bead in wet rooms, others do not. Caulking can help block surface water from running under the floor, but it does not make the floor leak-proof, and it can trap water under the floor if a plumbing leak happens.
Can I run LVP into a tub alcove or shower area?
No for showers. For tubs, you typically stop at the tub edge with proper trim or a clean termination, then follow your manufacturer guidance on whether that tub edge gets a silicone bead. LVP is a great bathroom floor, not a shower pan.
How long should I wait before putting the toilet back?
With a floating LVP install, you can usually reset the toilet the same day once the floor is complete and trim is done. If you used any adhesive components for transitions or trim, follow cure times on those products.
What if my bathroom is tiny. Do I still need expansion gaps?
Yes. Small rooms still experience temperature and humidity changes. The trim exists to hide the gap, not eliminate it.
My final pro tip: Treat water like it will win
Kitchens and bathrooms are high-moisture by nature. If you prep the subfloor properly, keep your click joints tight, respect expansion space, and finish edges thoughtfully, waterproof LVP can be one of the most forgiving, good-looking DIY floors you can install. And unlike tile, it is friendlier on feet during those long mornings when you are making coffee and negotiating with a toddler.
If you want a second set of eyes before you start cutting planks, drop your subfloor type and bathroom or kitchen details in the comments and I will help you sanity-check the plan.